!
Safety Precautions
Do not reposition the pedestal while driving. Arkon Resources, Inc.
does not promote the adjustment of hand-held devices except when
the vehicle is safely parked or stopped.
Arkon is not responsible for any damages caused to your car, your
device, or yourself due to the installation or use of the pedestal mount.
The Mobile Mounting Specialists™
www.arkon.com
Arcadia, CA 91006 USA
Made in Taiwan
© Copyright 2007 Arkon Resources, Inc.
Consumer Hotline:
(USA) (800) 841-0884
(INT’L) (626) 254-9005
Mon-Fri. 9am-5pm, PST
CM160
|
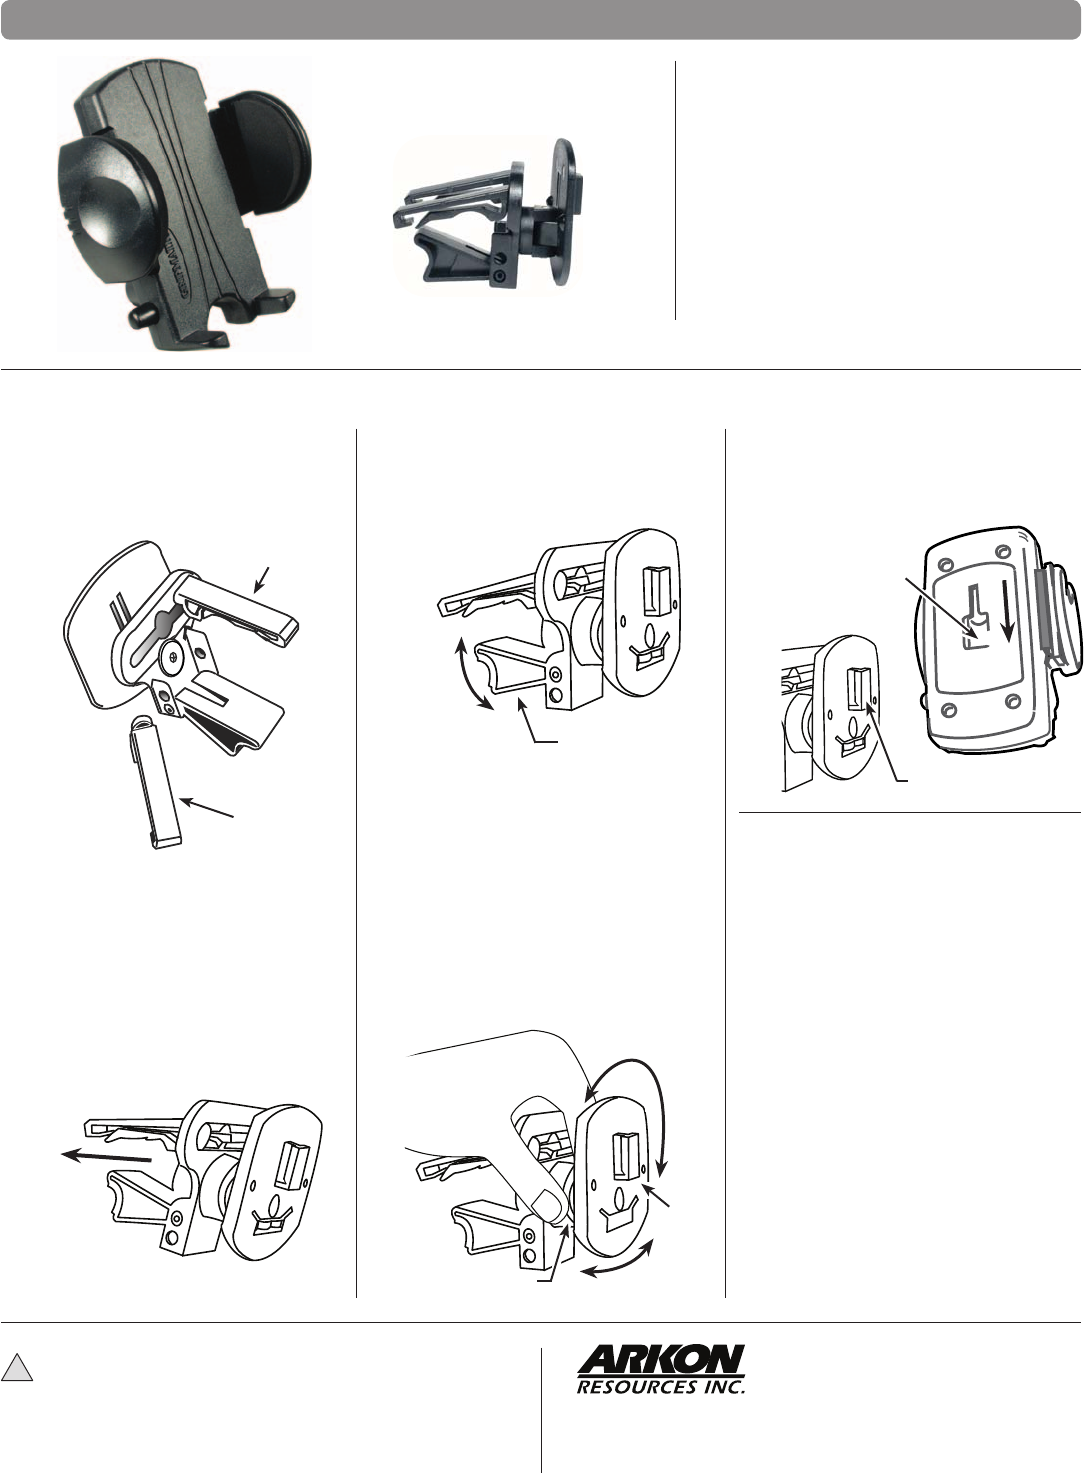
Universal Mobile Phone Vent Mount
Package Contents:
(1) CM030 Universal Mobile Phone Cradle
(1) CM047-S Vent Mount Assembly
NOTES:
1. This vent mount kit is designed for
permanent and semi-permanent use
only. This assembly can be di cult
to remove from your vent louvres. Be
careful if removing the vent assembly.
2. This vent mount kit is not compatible
with circular air vents.
Choose a suitable vent location for
installation. Attach the vent mounting
clips to the back of the pedestal with
the vent clips correctly positioned with
the at sides facing up.
Gently insert vent pedestal into vent
louvres until the mounting clips are
attached to the n/blade of the vent.
Adjust the spacing between the
mounting clips if necessary.
Warning: Arkon is not responsible if
the vent louvres become damaged
as a result of the installation or use of
this mount.
Step 1.
Step 2.
CM047-S Vent Mount Pedestal
(fully assembled)
CM030 Universal
PDA/MP3 Cradle
Adjust the support leg vertically until
it rests rmly along the bottom of the
vent or dash surface below the vent. It
will need to support the weight of the
cradle and device.
If necessary, move the support leg to
the alternate bracket holes.
If necessary, you can rotate the lateral
head by holding the swivel mechanism
and gently pulling and rotating the
head to the desired angle .
Warning: Do not attempt to pull out
the lateral head to rotate without rst
holding the pedestal for support.
Pulling on the head and assembly can
damage your louvres.
Step 3.
Step 4.
While holding the pedestal’s swivel
mechanism, align the T-tab on the
pedestal face to the T-slot on the back
of the cradle and slide down.
Warning: The vent mount assembly can
be di cult to remove from your vent
louvres.
Remember to use the utmost care when
trying to remove the vent assembly so as
not to damage your vehicle.
Remove the cradle from the vent mount
assembly.
Carefully slide the mounting clips inward
as close together as possible to help
remove the pedestal from the clips at the
center hole.
Carefully pinch the clip and angle the
clip o of the vent n/blade.
If are unable to remove the vent mount
clips, please call our technical service
department at (626) 254-9005.
Step 5.
Step 1.
Step 2.
Step 3.
Step 4.
Step 5.
Mounting clip
Mounting clip
Spring-loaded
swivel mechanism
Lateral
head
Rotate
Swivel
T-slot
Cradle back
Support leg
Removal of Vent Mount Clips
Installation Instructions
T-Tab


