!
SM03 2
|
Bicycle / Motorcycle Handlebar Mount & Water-Resistant Mobile Phone Holder
The Mobile Mounting Specialists™
®
Consumer Hotline:
USA (800) 841-0884
INT’L (626) 254-9005
Monday - Friday 9 am - 5 pm, PST
www.arkon.com
Arcadia, CA 91006 USA
Designed in USA | Made in China
© Copyright 2010 Arkon Resources, Inc.
Package Contents:
(1) GN032-SBH - Bicycle or motorcycle handlebar mount with
swivel tightening ring
(1) SM-WPCS-WS - Water-resistant mobile phone holder with
set screw.
Safety Precautions
Do not reposition the pedestal while cycling or driving. Arkon
Resources, Inc. does not promote the adjustment of mobile devices
except when the bicycle or vehicle is safely parked or stopped.
Arkon is not responsible for any damages caused to your bicycle, your
device, or yourself due to the installation or use of this product.
SM-WPCS
Water-resistant
Mobile Phone Holder
GN032-SBH
Bicycle or Motorcycle
Handlebar Mount
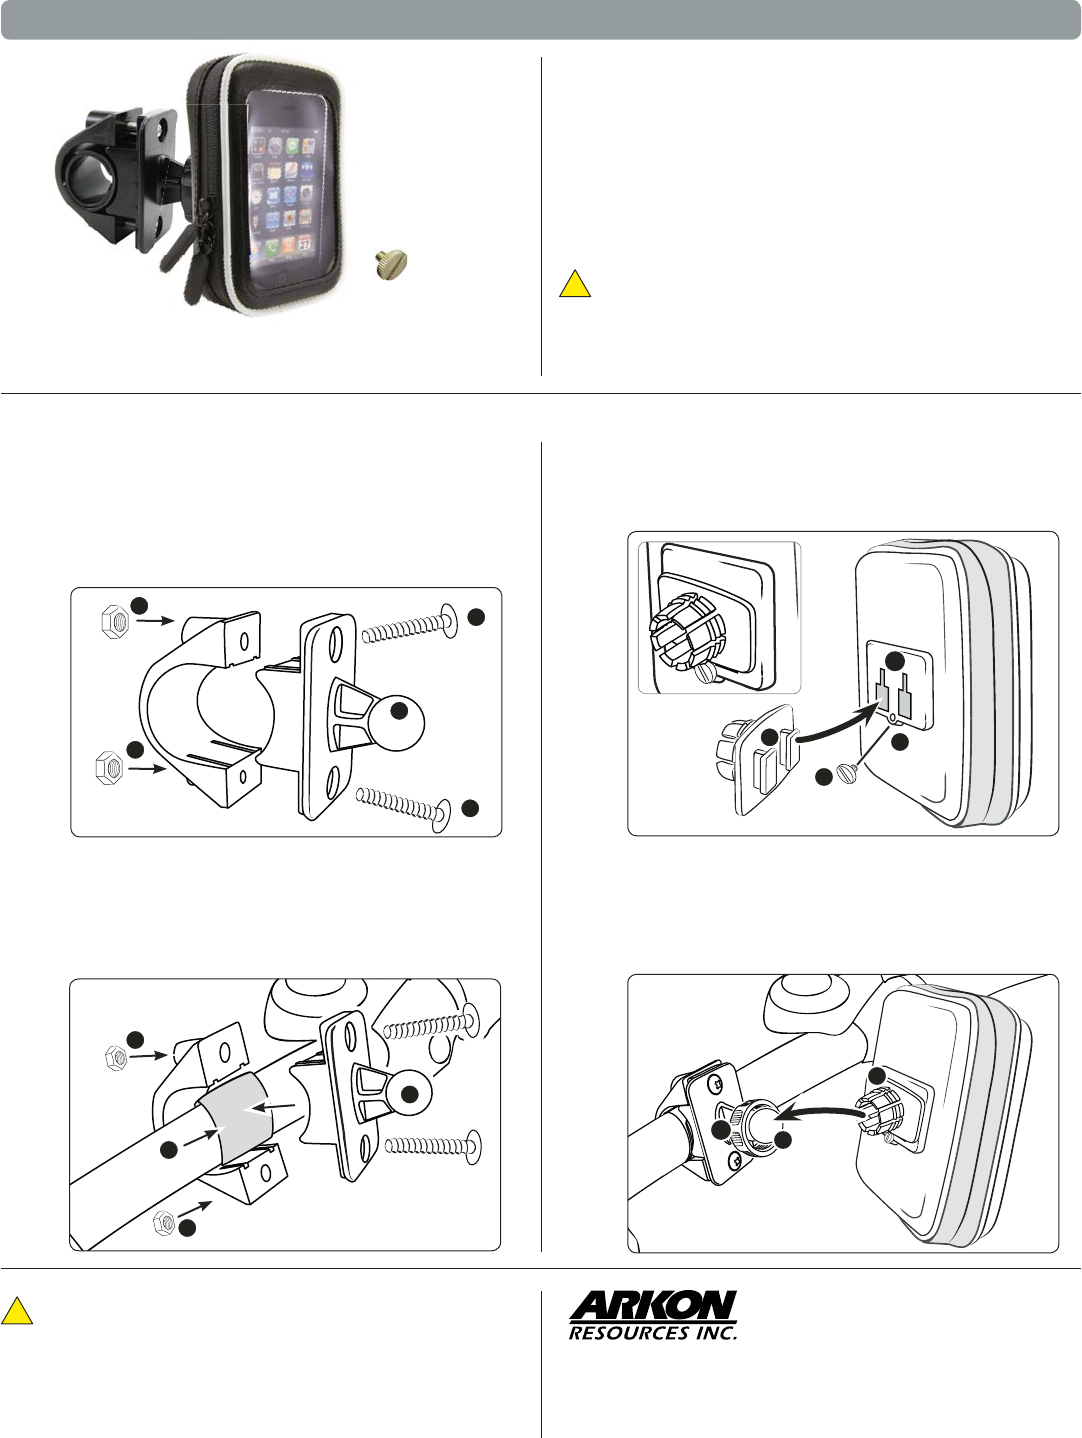
Step 5.
Step 4.
Snap the dual-T head adapter plate (K) onto the handlebar
mount ball (L). Adjust the angle as needed and screw the
threaded tightening (M) ring onto the adapter plate until
the plate is securely held in place.
Connect the dual T-tabs (G) on dual T-tab adapter head to the
dual T-slots (H) on the water-resistant mobile phone holder.
Insert the set screw (I) into the set screw hole (J) and screw in
tightly to prevent the pedestal head from slipping o .
Connect Water-resistant Mobile Phone Holder to Pedestal
M
K
L
Set Screw
G
H
J
I
!
Precaution: A set screw has been provided to be installed into
the back side of the water resistant holder to secure it to the
handlebar pedestal. Ensure that the screw is properly installed
to prevent the holder from falling from the pedestal.
Fits handlebars up to 33mm diameter. Compatible with most straight, drop, trekking,
touring, and standard (25.4mm and 26mm) size handlebars. Also for use with golf carts,
ATVs, snowmobiles, hang gliders or other apparatus having cylinder-shaped frames or posts.
Step 1.
Step 2.
Choose a safe location on the handlebars of your bicycle
in which to mount the pedestal.
Using a screwdriver, remove the two mounting screws (A)
in order to release the ball plate and swivel head (B) so the
mount can be placed around the handlebars. Ensure the
screw nuts (C) are not lost when loosening the screws.
Bicycle Handlebar Mounting
Wrap the rubber rings (D) around the handlebar and reas-
semble the ball plate and swivel head (E) around the rubber
rings. Secure the mount assembly by using the screwdriver
to retighten the two mounting screws into the screw nuts
(F) through the screw holes.
Step 3.
B
A
C
C
A
D
E
F
F


