www.U-LineService.com 6 02/2005
BI-95 Ice Maker
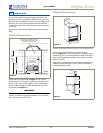
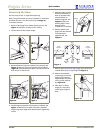
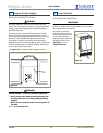
10. Fasten upper hinge to
unit (three screws).
Partially tighten screws.
See
Figure 11
.
11. Adjust door to assure
proper seal. Tighten
upper and lower hinge
screws securely.
12. Replace three plastic
plugs removed in Step 8
into holes on top of
unit. Replace screws in
holes in bottom of unit
on opposite side.
Other Site Requirements
Power Supply
The unit requires a grounded and polarized 115 VAC,
60 Hz, 15A circuit (normal household current). See
Electrical Specifications on Page 9.
Water Supply
The unit requires a 1/4-inch OD water supply line and a
shut-off valve. For more information see Page 8.
Environmental Requirements
The surrounding air temperature must be at least 50°F
(10°C) but must not exceed 110°F (40°C). Units may be
installed outdoors in a covered area. The unit must not be
located near heat-generating equipment or in direct
sunlight.
Units will accept a Custom 1/4" Thick Insert to harmonize
with or accent the surrounding decor.
If this treatment is not included in this installation, go on
to 5 Adjust Door.
Custom 1/4" Thick Door Panel Insert
Door Panel Preparation
A custom door panel can be inserted into the doorframe.
Custom door panels can be flat or raised, as long as the
maximum panel thickness where inserted into the door
reveal (channel) is 1/4"-thick. For raised panels, the depth
of the reveal is 1/4" on all four sides.
IMPORTANT
Raised panels will reduce the door’s 90° swing/zero
clearance if the unit is installed next to a wall or similar
type of structure (see Page 4).
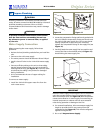
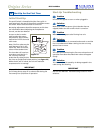
Cut the panel insert to the following dimensions.
Custom 1/4" Dimensions:
Width: 12-15/16"
Height: 13-15/32"
The door panel must not weigh more than 20 lbs.
Door Panel Installation
Install the insert as follows:
CAUTION
Use care when handling the insert. Insert edges may be
sharp.
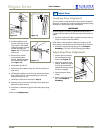
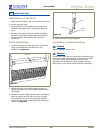
1.
Remove top hinge screw pin with a Phillips head
screwdriver (see
Figure 12
). Remove door by tilting
forward and lifting off bottom hinge pin.
Figure 11
4 Prepare and Install Door Panel


