13
G Wireless Router
SECTIONSTable of Contents 1 2 3 5 6 7 8 9 104
CONNECTING AND CONFIGURING YOUR ROUTER
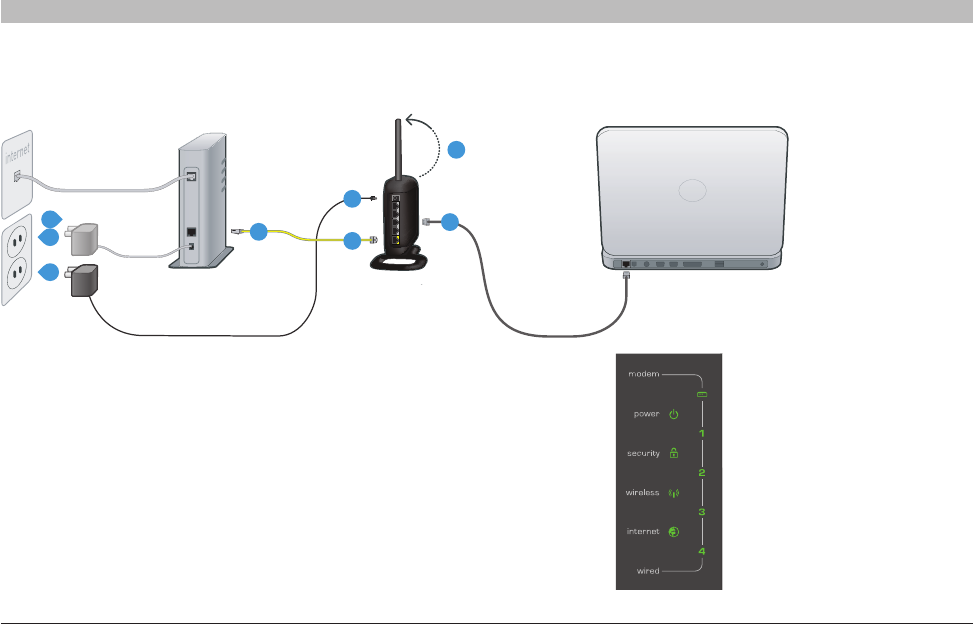
Step 1: Hardware Connections
A. Unplug your modem’s power cord. Put the Router next to the
modem. Raise the Router’s antenna.
B. Locate the networking cable that connects your modem and
computer. Unplug that cable from your modem, and plug it into any
gray port on the back of the Router.
C. Find your new networking cable (included in the box with your
Router) and connect it to the yellow port on the back of the Router.
Connect the other end to your modem, in the port that’s now free.
D. Plug in your modem’s power cord. Wait 60 seconds for the modem
to start up. Plug the Router’s power supply into the black port on the
back. Plug the other end into the wall outlet.
E Wait 20 seconds for the
Router to start up. Look at
the display on the front of
the Router. Make sure at
least one of the “Wired”
and “Power” icons are lit
up in green. If they are not,
recheck your connections.


