26
Installation Without Base
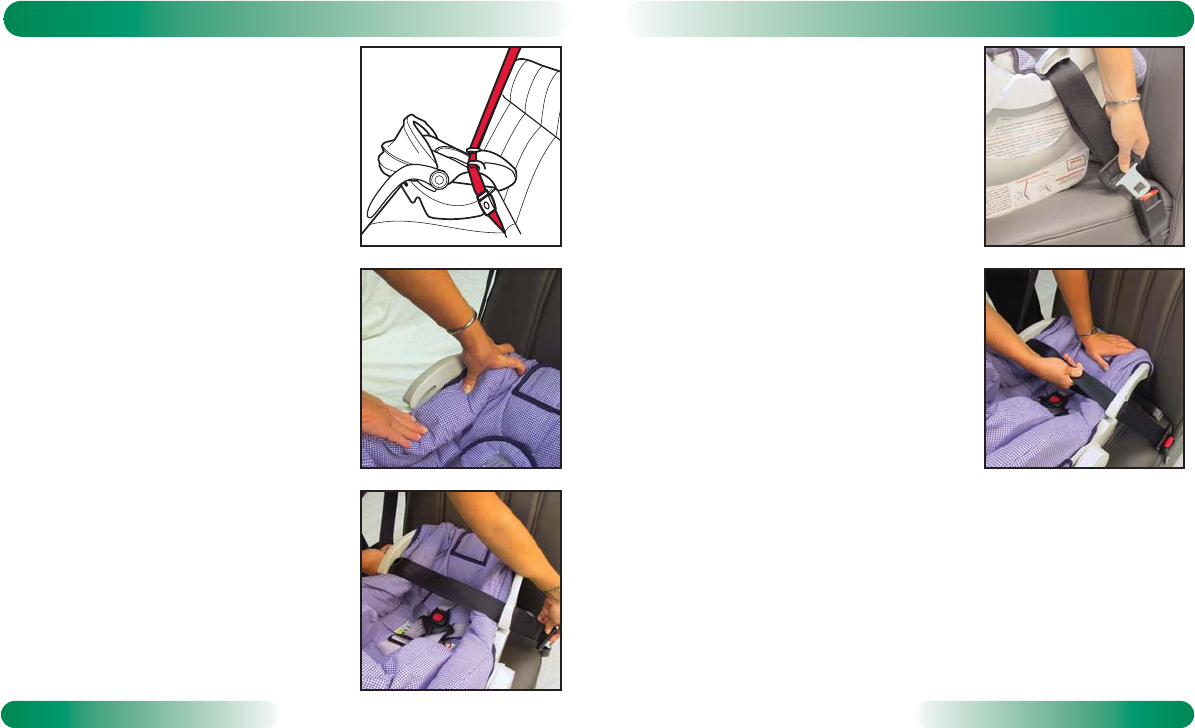
Lap-Shoulder Belt Installation
• Figure A illustrates a typical rear facing lap-
shoulder belt installation of restraint only.
WARNING: Do not install this restraint using
a non-locking ELR vehicle belt, unless a
locking clip is used. Refer to the vehicle
owner's manual for instructions on
correct use of vehicle belts with child
restraints.
1 Place the restraint rear facing on the
vehicle seat.
2 Push cover back to expose belt guides
(Fig. B).
3 Pull to fully extend vehicle belt.
4 With shoulder and lap portion of vehicle
seat belt together, route under both belt
guides (Fig. C).
B
A
C
Installation Without Base
27
5 Verify that the vehicle belt is not twisted,
then buckle (Fig. D).
• When correctly reclined, the red line on
restraint will be level with the ground.
• If there is a problem stabilizing the restraint,
place a rolled towel in the crease of the
vehicle seat to help level the restraint.
WARNING: Only raise restraint as described
above. Do not raise the restraint off of
the front edge of vehicle seat; doing so
will reduce the protection for your child.
6 Push the restraint firmly into the vehicle
seat while removing slack from the lap
portion of the vehicle belt, then the
shoulder portion (Fig. E).
7 Adjust handle to In-Vehicle position.
8 Verify that vehicle belt is tight and that
the restraint is stable.
E
D
P2314_R02.qxd 6/4/2004 11:14 AM Page 28


