8-12 Dell PowerEdge 6450 Systems Installation and Troubleshooting Guide
+!'!((
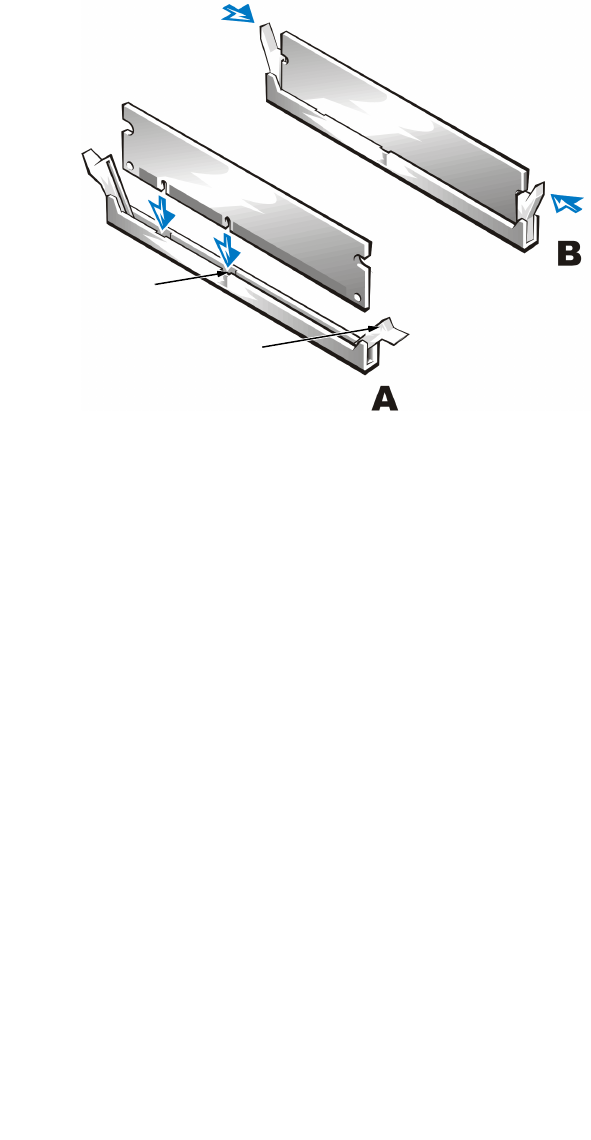
2. Align the DIMM's edge connector with the slot in the center of the DIMM
socket, and insert the DIMM in the socket (see step A in Figure 8-6).
The DIMM socket has two alignment keys that allow the DIMM to be installed in
the socket in only one way.
3. Press down on the DIMM with your thumbs while pulling up on the ejectors with
your index fingers to lock the DIMM into the socket (see step B in Figure 8-6).
When the DIMM is properly seated in the socket, the ejectors on the DIMM
socket should align with the ejectors on the other sockets with DIMMs installed.
4. Repeat steps 1 through 3 to install the remaining DIMMs.
5. Continue with step 7 of "Performing a Memory Upgrade," found earlier in this
chapter.
To remove a DIMM, press down and outward on the ejectors on each end of the
socket until the DIMM pops out of the socket (see Figure 8-7).
DIMM socket ejectors (2)
alignment keys (2)


