Working Inside Your Computer 5-3
5HPRYHWKHIORRUVWDQGLIRQ HLVDWWDFKHG
See “Using the Optional Floor Stand” in Chapter 1 for instructions.
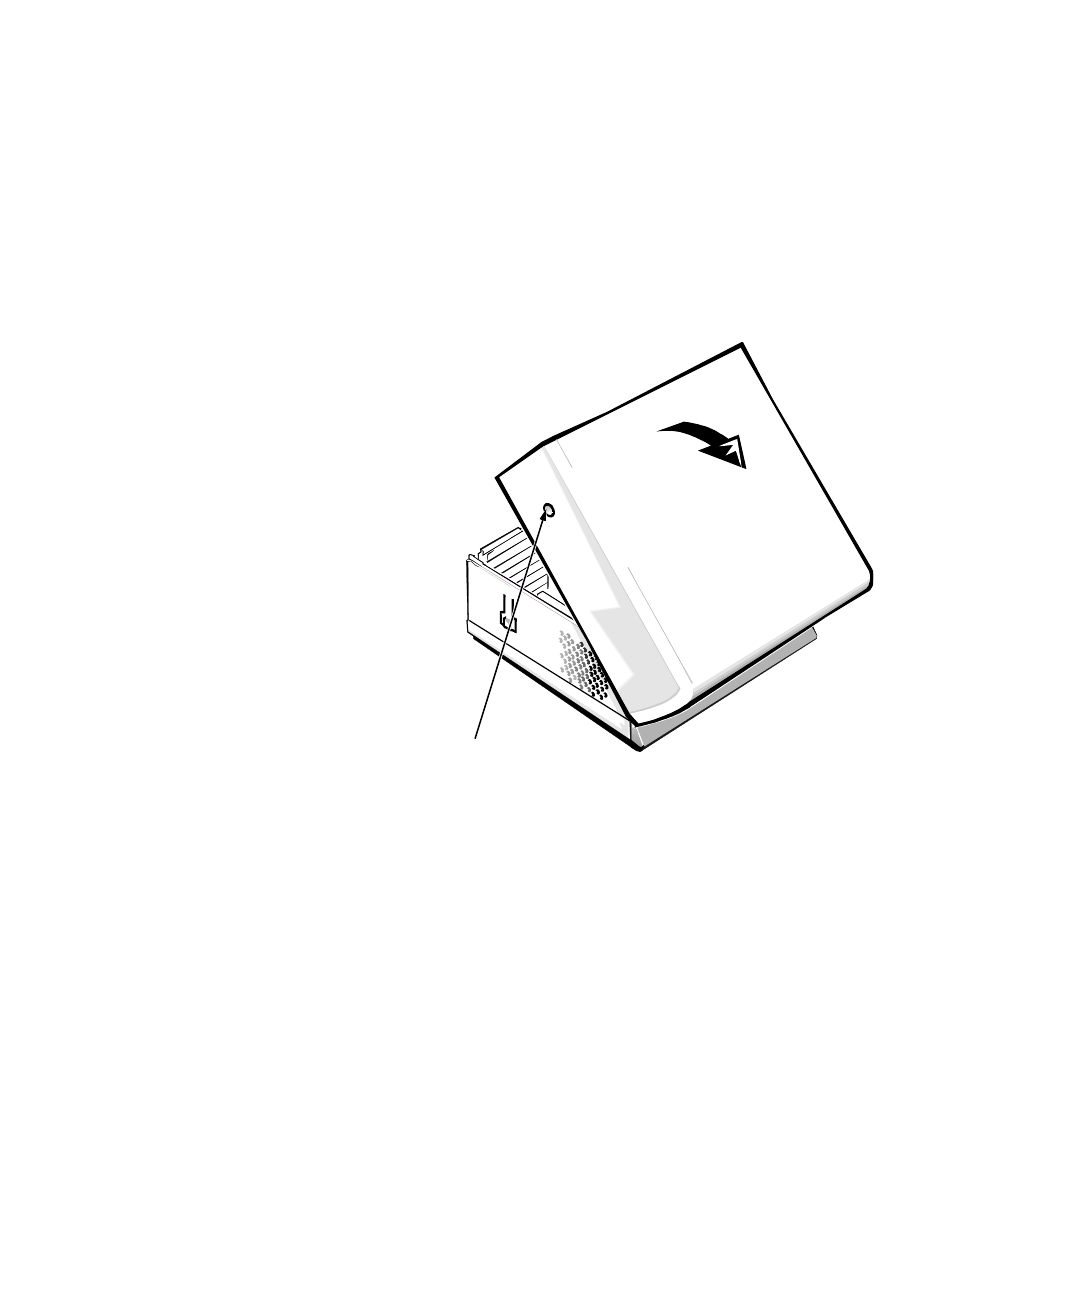
5HPRYHWKHFRYHU
From the front of the computer, press in the two release buttons (located on the
sides of the cover toward the back). With the buttons depressed, lift the cover at
the back, allowing it to pivot up toward you (see Figure 5-2).
Disengage the plastic hooks that secure the cover to the front of the chassis, and
lift the cover away.
)LJXUH5HPRYLQJWKH&RPSXWHU&RYHU
5HSODFLQJWKH&RPSXWHU&RYHU
To replace the computer cover, follow these steps:
&KHFNDOOFDEOHFRQQHFWLRQVHVSHFLDOO\WKRVHWKDWPLJKWKDYHFRPH
ORRVHGXULQJ\RXUZRUN)ROGFDEOHVRXWRIWKHZD\VRWKDWWKH\GRQRW
FDWFKRQWKHFRPSXWHUFRYHU0DNHVXUHFDEOHVDUHQRWURXWHGRYHUWKH
GULYHFDJH³WKH\ZLOOSUHYHQWWKHFRYHUIURPFORVLQJSURSHUO\
&KHFNWRVHHWKDWQRWRROVRUH[WUDSDUWVLQFOXGLQJVFUHZVDUHOHIW
LQVLGHWKHFRPSXWHU·VFKDVVLV
5HSODFHWKHFRYHU
From the front of the computer, hold the cover at about a 45-degree angle as
shown in Figure 5-3. Fit the three cover hooks into the rectangular slots on the
release buttons (2)
front of computer


