Getting Photos Into Your Computer
10-12
3
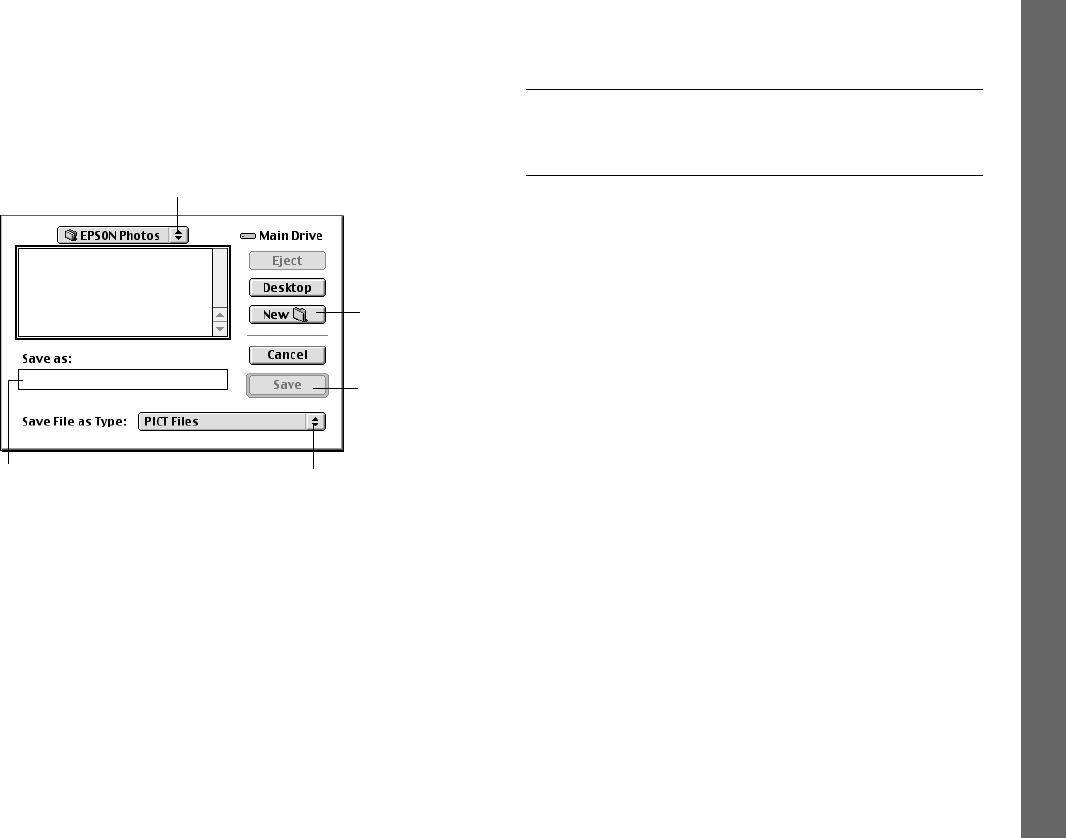
Click the
Export Photos
button. The Save As dialog
box appears (this box looks slightly different in
Windows, but has the same options):
4
Type a file name. If you’re exporting more than one
image, the software will add numbers to identify each.
5
Select the file type from the drop-down menu. You can
choose any of these formats: PICT (Macintosh only),
JPEG, Bitmap (BMP), PCX.
6
Click
Save
. Your pictures are transferred one by one.
NOTE
You cannot open exported photos in EPSON Photo!3. Use
Image Expert to view and edit the exported images.
7
Click
Erase Photos
if you want to delete the pictures in
your camera’s memory card.
Here are some additional things you can do with
EPSON Photo!3:
◗ Select the
Controls
tab to change camera settings
or view a live preview and take pictures from your
computer. See Chapter 13 for more information.
◗ Set the camera’s date and time from the
Setup
tab,
or change your computer connection settings. See
Chapter 13 for more information.
◗ Select the
Folder
tab and click
Browse
to locate
and display pictures you have downloaded. You can
then select a picture and click
Upload
to transfer a
picture from your computer to the camera or an
optional memory card. See Chapter 14 for more
information.
type a name for your
photo(s)
click to
transfer
and
“export”
photos
click to choose
the file type
click if you
want to
create a
new folder
click to choose a different folder
Capella.book Page 12 Thursday, April 20, 2000 4:21 PM


