6
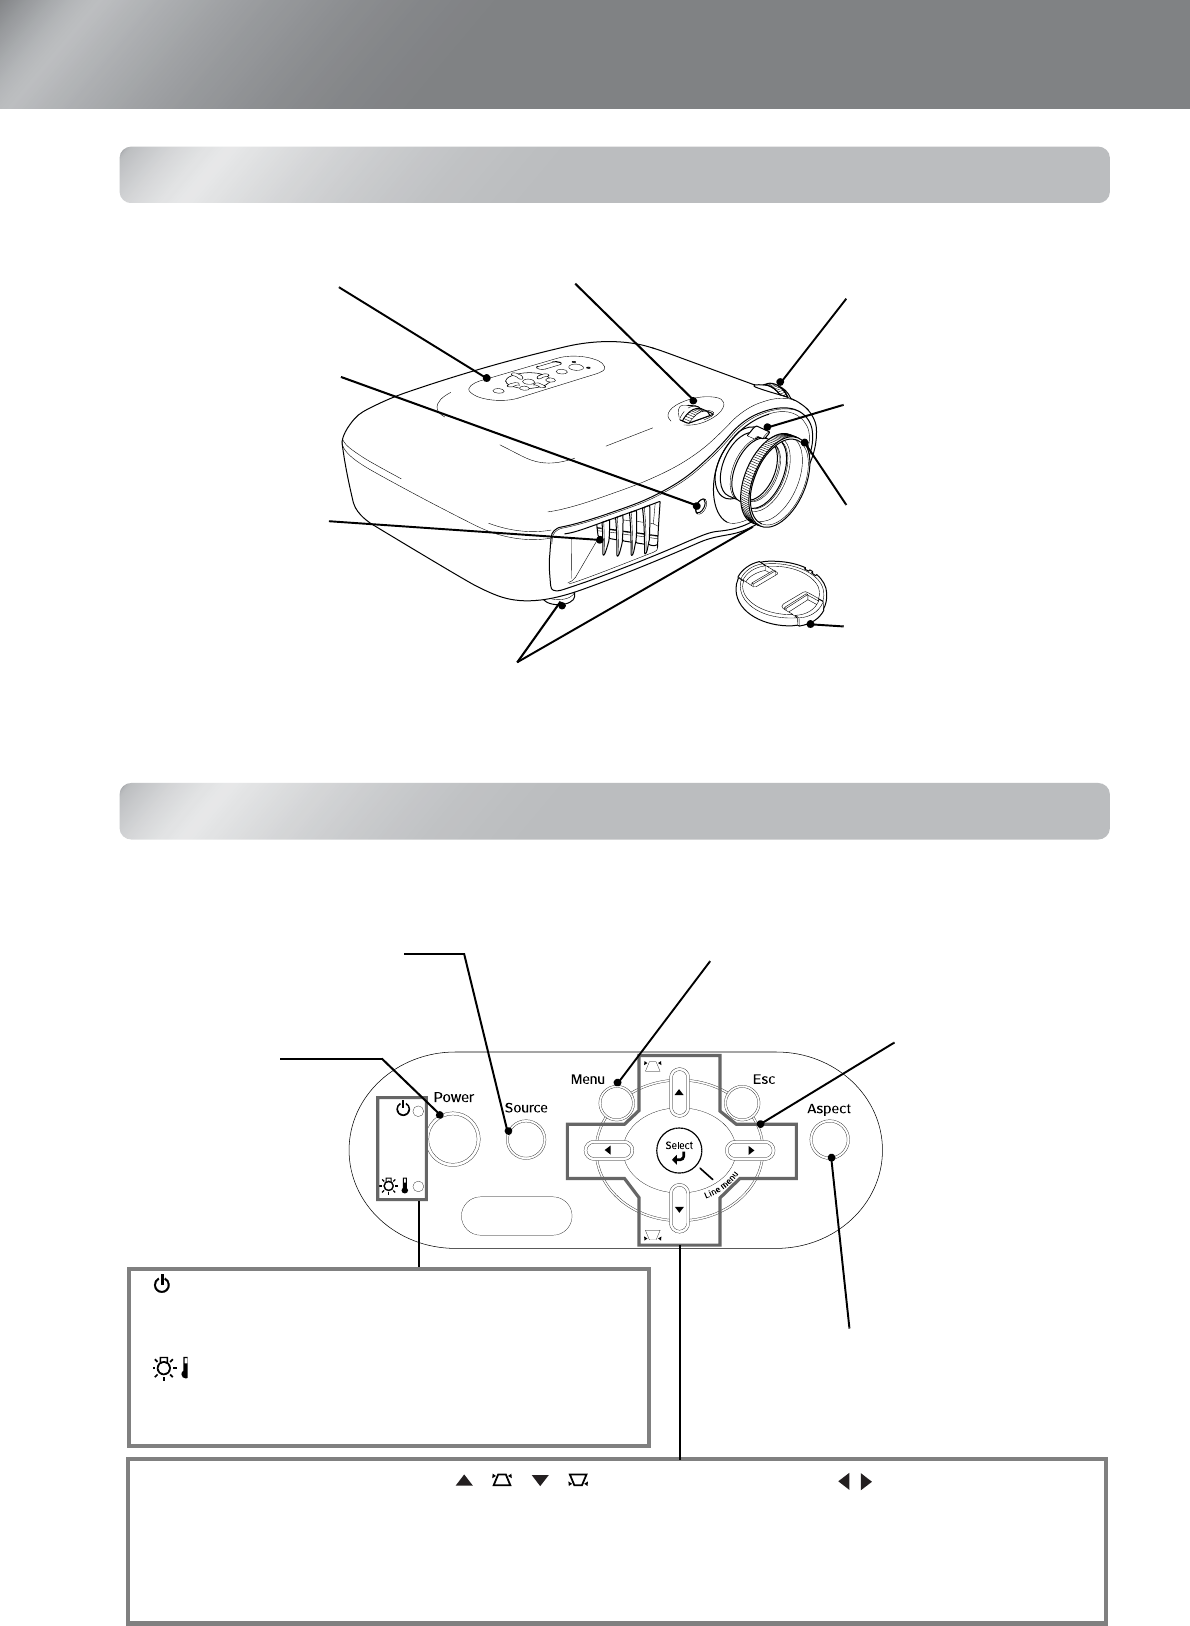
Part Names and Functions
Front / Top
Control panel
Buttons with no explanation function in the same way as the corresponding buttons on the remote
control. Refer to "Remote control" for further details on these buttons.
• Front adjustable feet s page 17
Extend to adjust the projection angle so that the
projector is horizontal when placed on a desk top.
• Control panel
s See below
• Air exhaust vent
• Remote control light-
receiving area
s page 13
Receives signals from the
remote control.
• Vertical lens adjustment
dial
s page 16
Moves the lens vertically.
• Lens cover
Attach when not using the
projector to prevent the lens
from becoming dirty or
damaged.
•
or
zonta
ens a
ustment
a
page
Moves the lens horizontally.
cCaution:
Do not touch the exhaust vent
immediately after projecting,
or while projecting, since it
becomes hot.
• Focus ring s page 16
Adjusts the image focus.
• Zoom ring s page 16
Adjusts the image size.
• (Operation) indicator s page 35
Flashes or lights in different colours to indicate the operating
status of the projector.
• (Warning) indicator s page 35
Flashes or lights in different colours to indicate problems
with the projector.
• Power button
s page 14
Turns the projector power
on or off.
• Select/Line menu button
s page 18
,
24
,
34
• buttons s page 20,
34
Used as right/left buttons to
select adjustment values in
menus.
• / / buttons
s page 17, 18, 21, 24, 34
Used as up/down buttons to select items in
menus and select menus.
If the menus are not displayed, correct the
keystone distortion.
• Menu button s page 34
• Source button s page 15
Selects the image source.
• Esc button
s page 18, 20
,
24
,
34
• Aspect button
s page 18


