Epson Stylus Photo R260
9/06 Epson Stylus Photo R260 - 5
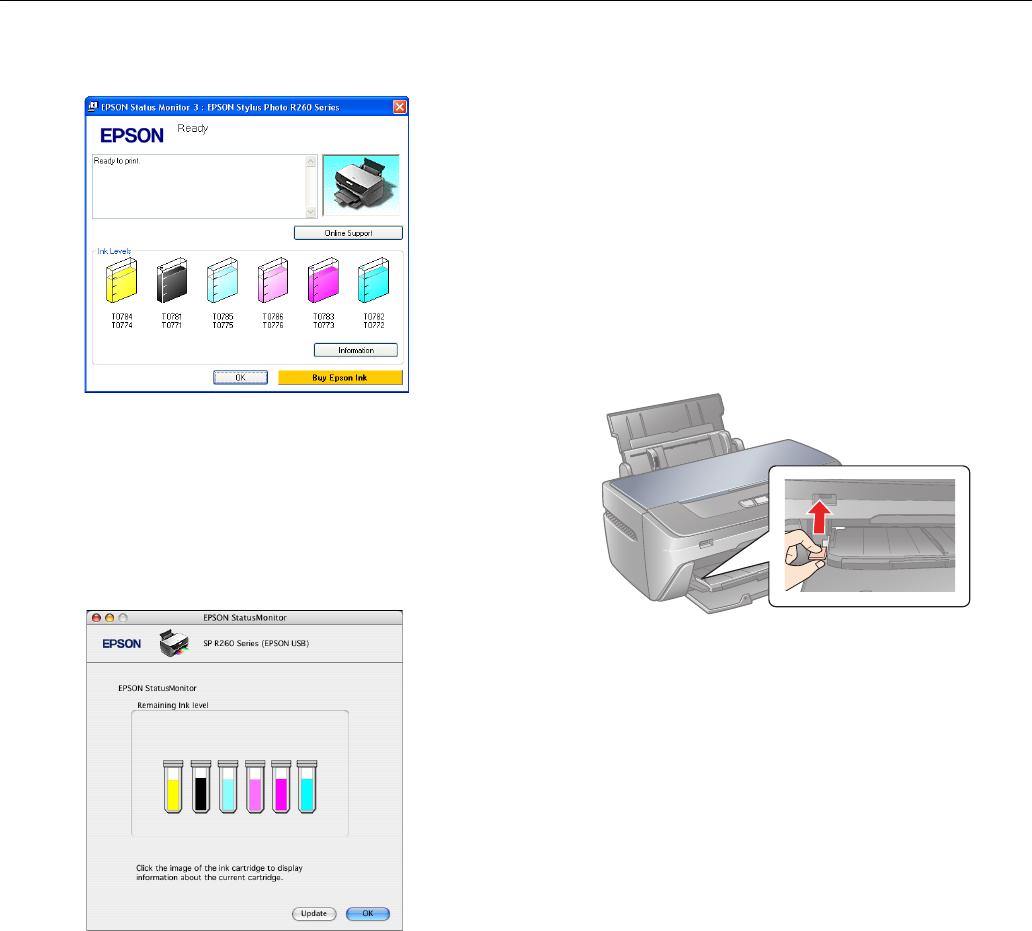
You see a window like this one:
To see the part numbers for the ink cartridges currently
installed in your printer, click
Information.
❏ Macintosh OS X: Open the Applications folder and select
EPSON Printer Utility2. Select SP R260 Series in the
printer list, click
OK, and select EPSON StatusMonitor.
You see a window like this one:
Click a cartridge image to display information about the
cartridge.
Ink Cartridge Precautions
Warning: Keep ink cartridges out of the reach of children.
If ink gets on your hands, wash them thoroughly with soap and
water. If ink gets in your eyes, flush them immediately with water.
If discomfort or vision problems continue after a thorough flushing,
see a doctor immediately.
Caution: To avoid damaging the printer, never move the print head
by hand.
You cannot print if an ink cartridge is expended. Leave the
expended cartridge installed in the printer until you have obtained a
replacement. Otherwise the ink remaining in the print head nozzles
may dry out.
Removing and Installing Ink Cartridges
Note: Do not open ink cartridge packages until you are ready to
install the ink. Cartridges are vacuum packed to maintain reliability.
This printer uses ink cartridges equipped with IC chips that monitor
the amount of ink used by each cartridge. Cartridges are usable
even if they are removed and reinserted. Some ink is consumed
each time cartridges are inserted, however, because the printer
automatically checks their reliability.
If you remove a cartridge that is low (for which you have received
an “Ink low” message), you cannot reuse it.
1. Make sure the CD/DVD tray is not inserted in the printer,
and make sure the front tray is in the paper (lower) position.
If it is not, lift the tray lever up to reposition the front tray.
2. Make sure the printer is turned on. (The green P power
light should be on, but not flashing.) Then open the printer
cover.
3. Press and release the H ink button.
If the red H ink light is off, go to step 5.
If the red H ink light is on or flashing, the print head moves
to the left, and the cartridge that needs to be replaced stops
under the _ mark. The green P power light begins to flash.
Go to step 4.
Note: Don’t hold down the H ink button for more than 3 seconds,
or the printer will start to clean the print head.
4. Press the H ink button again.
If more than one cartridge is low or expended, the next
cartridge moves under the _ mark. Repeat this step.
If all the low or expended cartridges have been identified,
the print head moves to the ink cartridge replacement
position.
Note: You can also use the Status Monitor to check ink cartridge
status. See “Checking the Ink Supply” on page 4 for more
information.


