Printing From a Memory Card, Camera, or Other Device 17
7. To crop the photo, press the
Display/Crop button. See page 13 for
instructions.
8. Press l or r to view other photos, select the number of copies, and crop, if
desired.
9. To print borderless photos on 4 × 6-inch Epson Premium Photo Paper Glossy
or Semi-gloss, press x
Start.
To change your paper type or other print settings, or turn on red eye
reduction or other features, press x
Menu. Select your settings and press OK.
(See page 10 for a list of paper types.)
Note:
For the best quality printing, make sure the Enhance setting is set to
PhotoEnhance
™
(also known as Auto Photo Correction). This automatically
analyzes your photos and, if necessary, adjusts the brightness, contrast, and
saturation. PhotoEnhance uses a sophisticated face recognition technology to
optimize photos that include faces. For this to work, both eyes and the nose must
be visible in the subject’s face. If your photo includes a face with an intentional
color cast, such as a bronze statue, you may want to turn off PhotoEnhance to
retain the special color effects.
10. Press x Start to start printing. If you need to cancel printing, press
y
Stop/Clear Settings.
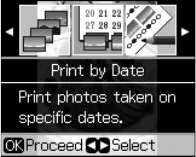
Printing Photos by Date
You can quickly print photos by the date they were taken. You can select several
dates at a time.
1. Load Epson photo paper. See page 7 for a list.
2. Press the
Memory Card button.
3. Press l or r to select
Print by Date.
4. Press OK.
5. Highlight any dates shown and press r to print
photos taken on that date.
6. Press
OK.
7. To print more than 1 copy, press
+ or – to select the number (up to 99).


