Understanding control-panel features
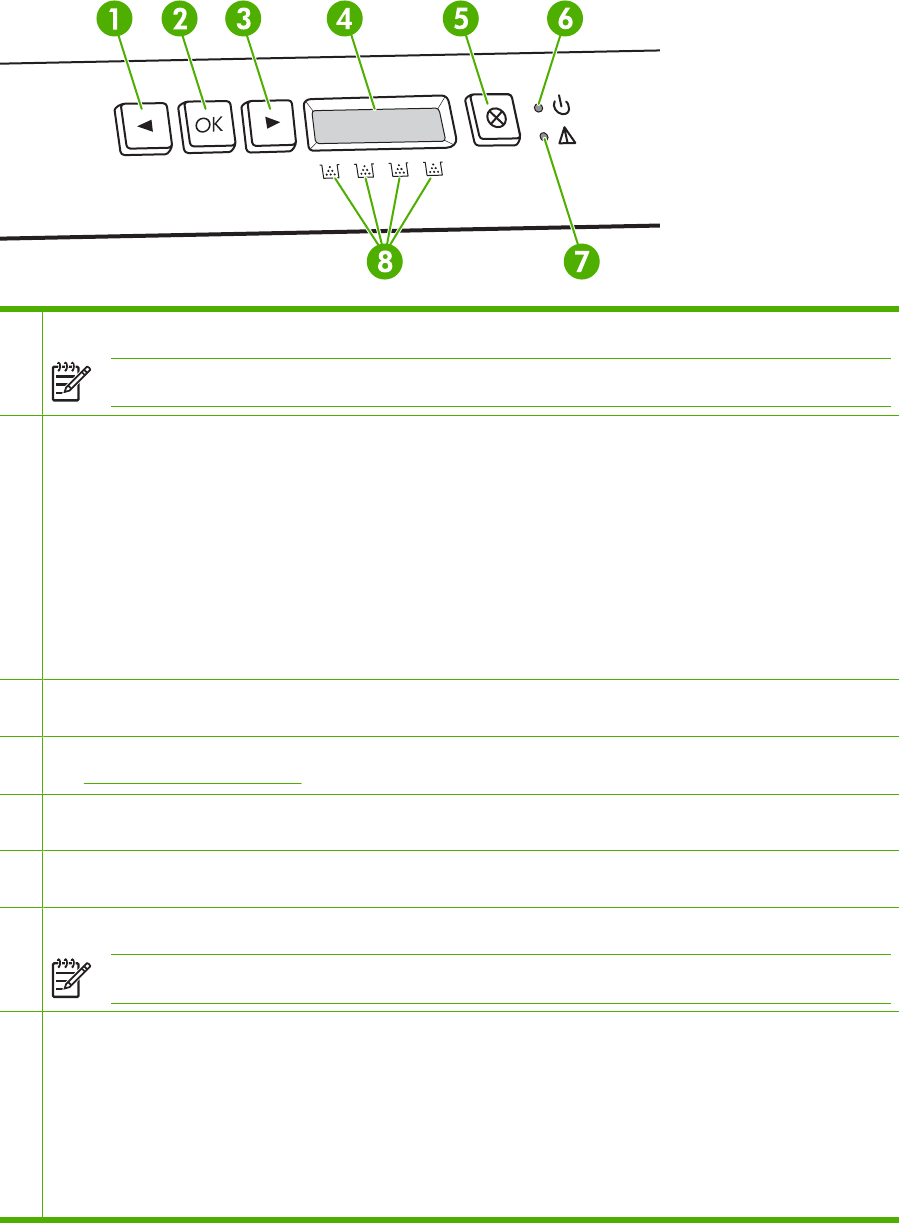
The printer has the following lights and buttons on the control panel:
1 Left arrow button (<): Press this button to navigate through the menus or to decrease a value that appears on the display.
NOTE Press the left and right arrow buttons simultaneously to print a demo page.
2 OK button: Press the OK button for the following actions:
●
Open the control-panel menus.
●
Select a menu item.
●
Clear some printer errors.
●
Continue printing after reloading a tray.
●
Acknowledge that a non-HP supply is in use.
●
Return the printer to the Ready state whenever the ready light is blinking.
3 Right arrow button (>): Press this button to navigate through the menus or to increase a value that appears on the
display.
4 Display: The display provides information about the printer. Use the menus on the display to establish printer settings.
See
Using the control-panel menus.
5 Cancel Job button (X): Press this button to cancel a print job whenever the attention light is blinking. You can also press
this button to exit the control-panel menus.
6 Ready light (green): The ready light is on when the printer is ready to print. It blinks when the printer is receiving print
data.
7 Attention light (amber): The attention light blinks when a print cartridge is empty.
NOTE The attention light does not blink if more than one print cartridge is empty.
8 Print-cartridge-status gauges: These gauges show the consumption level for each print cartridge (black, yellow, cyan,
and magenta).
If the consumption level is unknown, a ? symbol appears. This can occur in the following circumstances:
●
The print cartridge is missing or installed incorrectly.
●
The print cartridge is defective.
●
The print cartridge might not be an HP cartridge.
18 Chapter 2 Control panel ENWW


