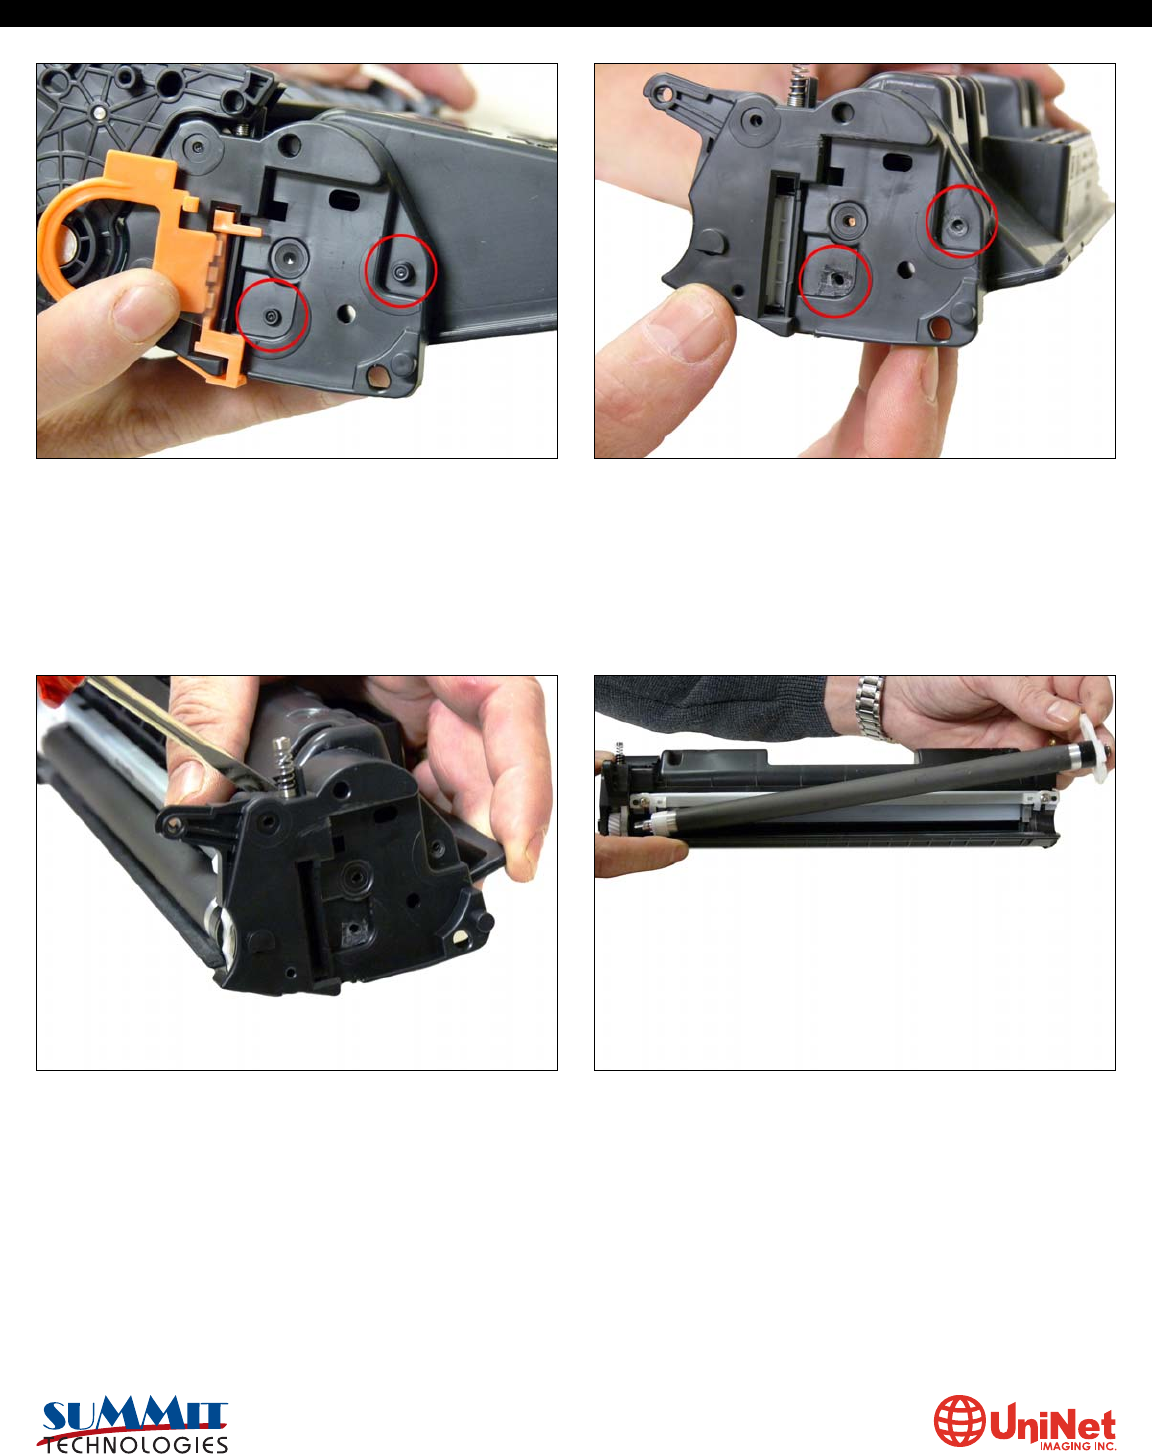
13. Slice the two tabs off each location as shown on the left
(Seal) end cap. Use a square blade X-Acto knife to slice off the
tabs.
NOTE: Both the end caps are plastic welded in place. The only
way to open them up is to cut the welds and carefully drill them
out. We have found the left (Non-Gear) side is the best side to
do this on.
14. Using the 3/32” drill bit, drill out each of the two welds. Be
careful to keep the drill straight as you drill in. Use a slow
speed and only drill in no more than ¼”.
15. With a flat head screwdriver work the edge of the blade
around the edge of the end cap and gently pry up the end cap.
You will hear the remaining parts of the welds break free. The
top weld will also break off now. Take your time with this.
16. Remove the magnetic roller assembly.
HP P2035 • 2055 CARTRIDGE REMANUFACTURING INSTRUCTIONS
3232 West El Segundo Blvd., Hawthorne, California 90250 USA • Ph +1 424 675 3300 • Fx +1 424 675 3400 • techsupport@uninetimaging.com • www.uninetimaging.com
© 2009 UniNet Imaging Inc. All trademark names and artwork are property of their respective owners. Product brand names mentioned are intended to show compatibility only. UniNet Imaging does not warrant downloaded information.