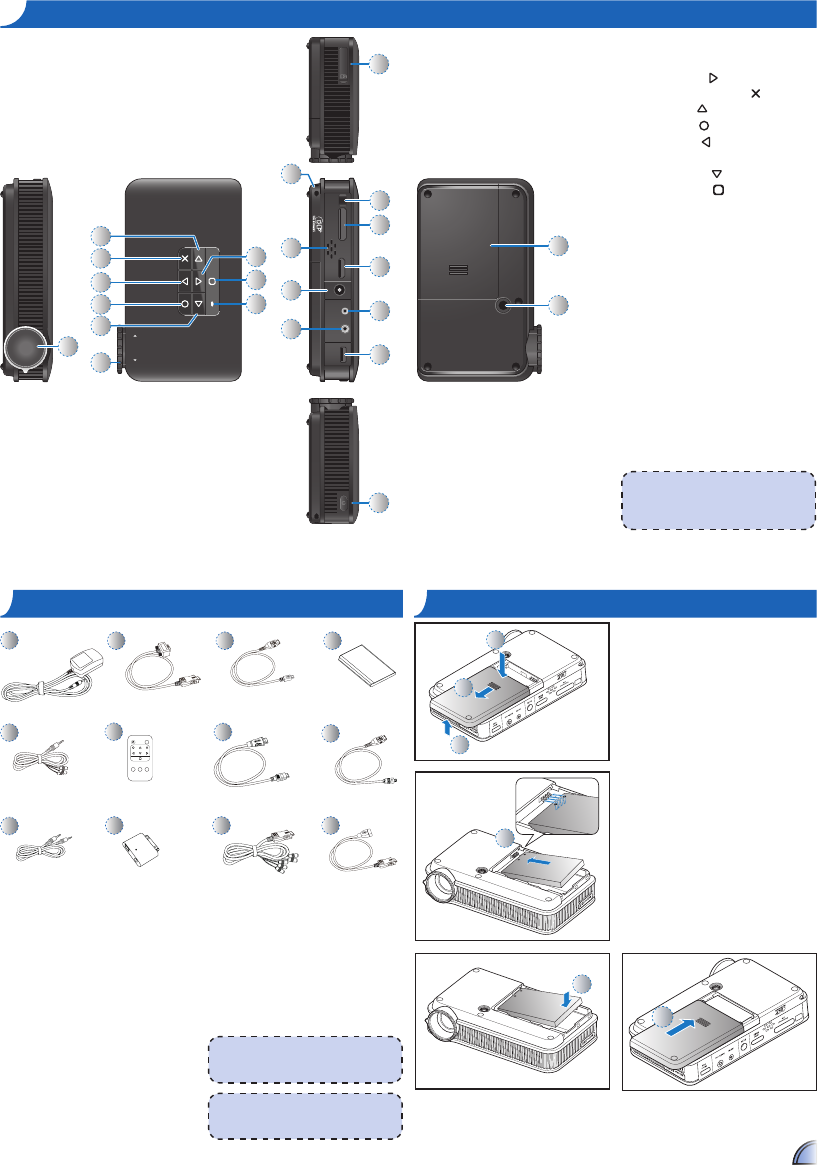
proDuct overvIeW
pacKage overvIeW
1
2
3
InStall the Battery
Standard Accessory
1. Power adaptor with AC plug
2. VGA cable
3. USB to micro USB cable
4. Battery
5. AV cable
6. Remote control
Optional Accessory
7. Mini HDMI cable
8. iPod connection kit
a. USB cable for iPod connector
b. iPod cable
c. iPod connector
9. Component cable
10.USBcable(forashdrive)
4
5
6
33
FOCUS
Universal
I/O
mini
HDMI
AV IN
DC IN
Audio out
Micro
USB
micro SD
7
1
21
15
23
22
10
16
17
18
19
20
9
8
12
13
14
11
3
2
6
4
5
1. Lens
2. Right Button (
)
3. Cancel / ESC Button (
)
4. Up Button (
)
5. OK Button (
)
6. Left Button (
)
7. Focus Dial
8. Down Button (
)
9. Home Button (
)
10. LED Indicator
11. Lanyard
12. Speaker
13. DC Input
14. Audio Out Connector
15. MicroSD Card Slot
16.IRReceiver
17.UniversalI/OConnectort
18. Mini HDMI Connector
19. AV Input Connector
20. Micro USB Port
21. Power Button
22.BatteryCover
23ScrewHoleforTripodConverter
proDuct overvIeW
pacKage overvIeW
1.Removethebatterycover.(
~
)
2. Align the battery contacts with
the contacts in the battery
compartment. (
)
3. Push the battery to secure it in
place. (
)
4.Slidethebatterycoverbackinto
place. (
)
1
5
8b
<Note>
Thestandardaccessoriesmayvaryineach
region due to different applications.
6
8c
2
7
3
8a
9
4
<Note>
Theinclusivepowerplugheadvariesper
region.
<Note>
Items 2~6 and 8 are also function buttons.
Functionsvarydependingonthecurrent
mode.
10
Bright
OFF
VideoVGA HDMI


