■
Photo View
■
Movie View
•
Slide show
R
(p. 31)
■
Photo View
Display one at a time
To display / hide the operation guide
INFO
PTI
N
■
Movie View
Playback will start
To display the operation guide
R
G
Y
B
or
•
To hide the operation guide
RETURN
•
To return to thumbnail screen
RETURN
R
G
•
To return to list screen (stop)
•
To display information banner
INFO
•
To change aspect ratio
(only for the 4:3 movie content)
POWER
INPUT
GUIDE
STTL
MUTE
CH VOL
SURROUNDMULTI PIP
REC
POWER
OPTION
ASPECT
SD CARD
EXIT
RETURN
INFO
GRYB
SD Card
Photo View
Movie View
Pause
Stop
Search
Play
Skip
EXIT
RETURN
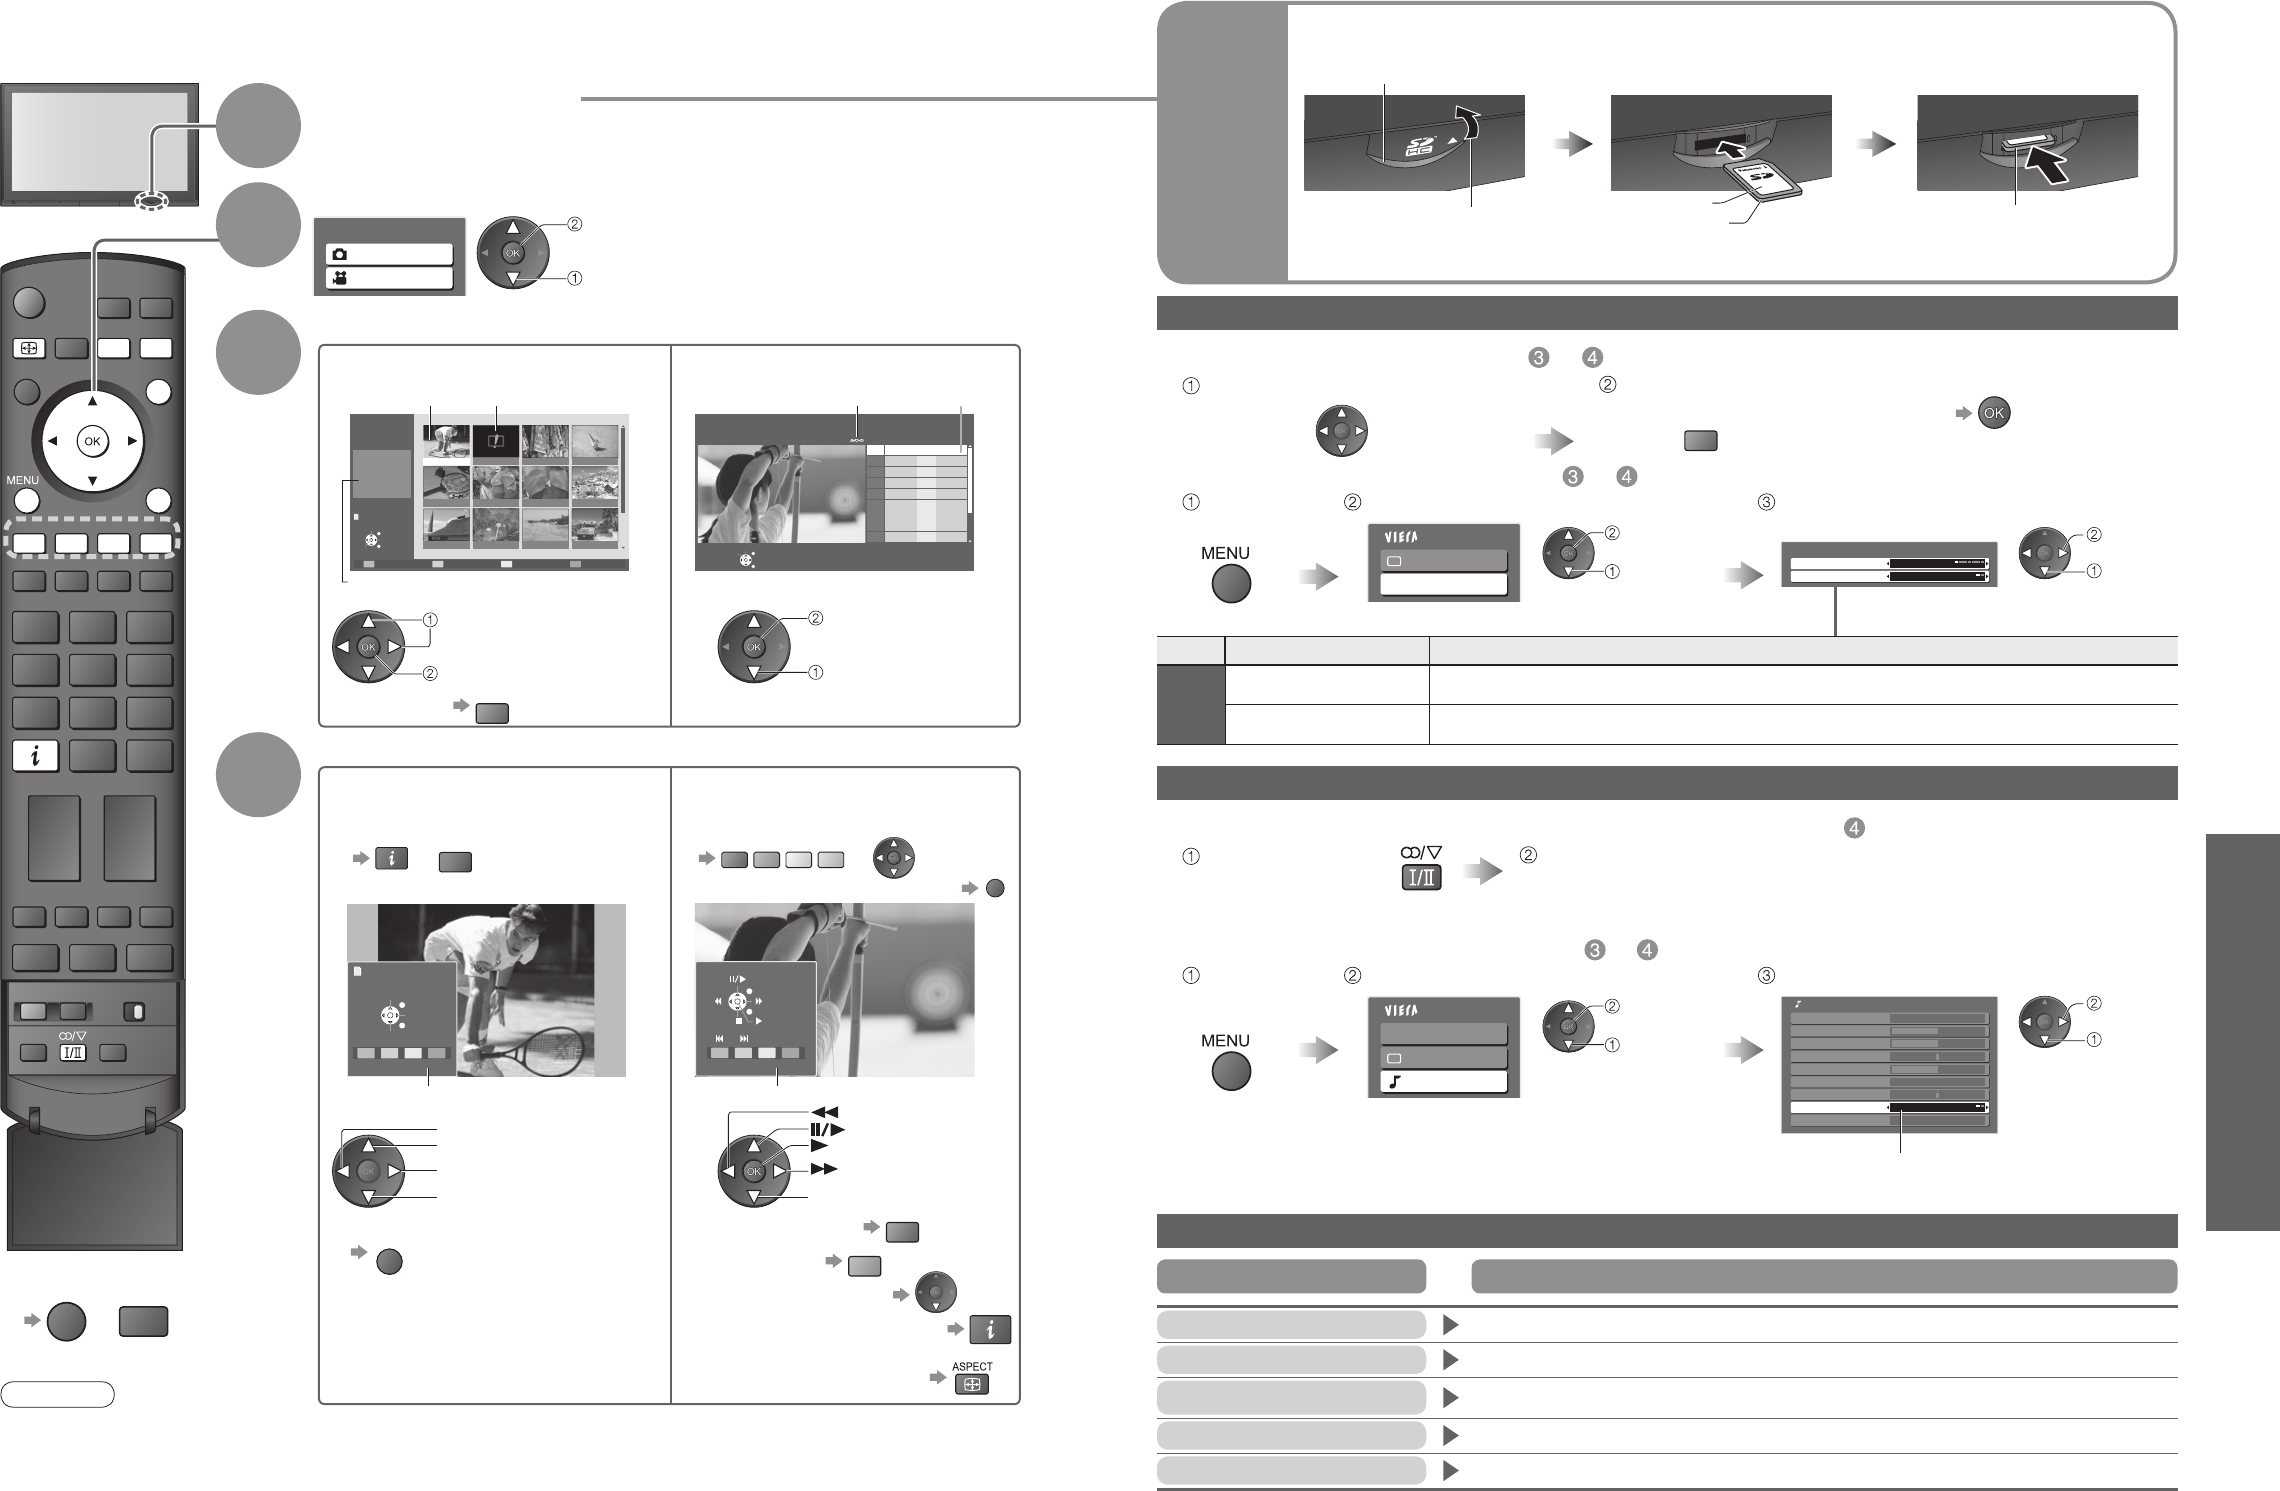
Viewing from SD Card
Photo View: The still images recorded by the digital camera can be displayed.
Movie View: The moving pictures recorded by the digital video camera can be played back.
View
4
Insert the SD Card
Select the fi le to be viewed
3
1
2
Select “Photo View” or “Movie View”
select
view
■
To return to TV
EXIT
SD CARD
SD
Card
(Photos and Movies)
•
Viewing from SD Card (Photos and Movies)
Interval 5 seconds
Repeat Off
Viewing Setup
Main Menu
Picture
Viewing Setup
R
■
Start Slide show (operate in step or )
■
Slide show settings (operate in step or )
Slide show (Photo View)
Select the photo for the fi rst view Start Slide show
Display the
menu
Select “Viewing Setup” Select the functions and set
access
•
“Picture Menu” (p. 20)
Menu Item Adjustments / Confi gurations (alternatives)
Viewing
Setup
Interval Select slide show interval (5 / 10 / 15 / 30 / 60 / 90 / 120 seconds)
Repeat Slide show repeat (Off / On)
set
select
•
To pause
On screen messages
No valid fi le to play
•
The card has no data.
Cannot read fi le
•
The fi le is broken or unreadable.
•
The TV does not support the format. (For the applicable formats and data, see p. 38.)
Is SD Card in?
•
Insert a SD card.
Message Meaning / Action
select
•
For details on SD Cards (p. 38)
Label surface
■
To open
Open the cover
Push until a
click is heard
■
To remove
■
To insert
Press the centre of the card
Blue LED
•
Blue LED lights while SD Card is inserted if set “SD Card LED” to “On” in Setup Menu (p. 21).
select
access
100-0002
Filename
Date
Pixel
100-0001
1/17
23/10/2006
1600 x 1200
100-0004100-0003100-0001
100-0008100-0007100-0006100-0005
100-0012100-0011100-0010100-0009
Photo View Mode
Select
View
EXIT
Select
RETURN
Reading
Slide show
(Thumbnail screen)
Error display
(images that could not be loaded, etc.)Selected photo
Selected photo
information is displayed
view
select
Rewind
Pause / Playback
Playback
Fast forward
■
Stop
To previous photo
Rotate 90˚ (anti-clockwise)
To next photo
Rotate 90˚ (clockwise)
Rotate
Rotate
Select
Slide show
View
EXIT
List
Operation guide
This operation is not possible
•
Your operation is not available.
Confi rm SD card
•
The inserted SD card has a problem.
Title
: Trip
Scene : Japan
MENU
No. Date & Time Duration
Movie View Mode
Select
Play
EXIT
RETURN
1
01/12/2006 22:12 00h01m01s
2
01/12/2006 22:20 00h01m11s
3
01/12/2006 22:25 00h01m31s
4
01/12/2006 22:28 00h01m00s
5
09/02/2007 11:10 00h00m36s
6
09/02/2007 11:12 00h00m44s
7
09/02/2007 11:13 00h00m27s
8
09/02/2007 11:14 00h00m37s
9
09/02/2007 11:16 00h00m14s
Recording format
Selected
movie
(List screen)
Caution
•
Signal output from all AV terminals will be disabled during SD Card operations. But the sound in Movie View can
be output from AUDIO out and DIGITAL AUDIO OUT terminals.
•
“Date” shows the date on which the recording was made by the digital camera or digital video camera. It shows
“**/**/****” when recordings are made without date signal.
Main Menu
VIERA Link
Picture
Sound
■
To confi rm or change the current sound status (operate in step )
■
Audio output settings (operate in step or )
Audio Settings (Movie View)
Display the current
sound status
Press repeatedly until the desired sound is selected
(if the movie has multiple audio signals)
•
It may take several seconds to change the sound.
Display the
menu
Select “Sound” Select “SPDIF Selection” and set
access
•
“VIERA Link Menu” and “Picture Menu” (p. 20)
select
Mode Music
Bass
Treble
Balance
Headphone Volume
Surround Off
Volume Correction
SPDIF Selection Auto
Reset Sound Defaults Set
Sound Menu
set
select
SPDIF : A standard audio transfer fi le format
Selects the initial setting for digital audio output signal from DIGITAL AUDIO OUT terminal (Auto / PCM)
Auto: Dolby Digital is output as Dolby Digital Bitstream. MPEG is output as PCM.
PCM
: Dolby Digital is output as PCM. MPEG is output as PCM.
Operation guide


