Chapter 3: Installation 17
3. Drill out the two 0.2 in (5 mm) fixing stud clearance holes (2).
4. Cut out the clearance hole (3) then remove the template.
5. Peel off the protective sheet from the self-adhesive gasket (4) then stick the
gasket into position on the rear of the instrument.
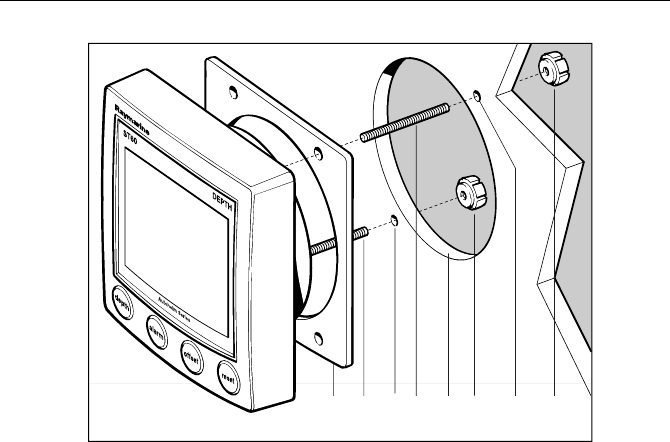
6. Screw the two fixing studs into the threaded sockets on the rear of the instru-
ment.
7. Mount the assembled instrument, studs, bezel and gasket into the panel.
Secure from behind with the thumb nuts (5).
Flush mounting
The Flush Mounting Kit uses a low-profile bezel to reduce the fitted profile of the
instrument, to approximately 0.25 in (6 mm) above the panel fascia.
Fitting the low-profile bezel
In order to flush-mount your ST60 instrument, you must first replace the standard
bezel with the low-profile bezel as follows:
1. Hold the instrument in both hands with the display towards you.
2. Using both thumbs, gently press an upper corner of the instrument from the
bezel, then remove the bezel from the instrument. Retain the rubber keypad
which is released when the bezel is removed.
Surface mounting
D4337-2
11223455
81038_4.book Page 17 Wednesday, March 24, 2004 3:17 PM


