NETWORK CONFIGURATION
It provides networked monitoring of Live screen from a remote place, and supports mail forwarding function with
events. You can configure the network environment which enables such functions.
Interface
You can set the network connection route and protocol.
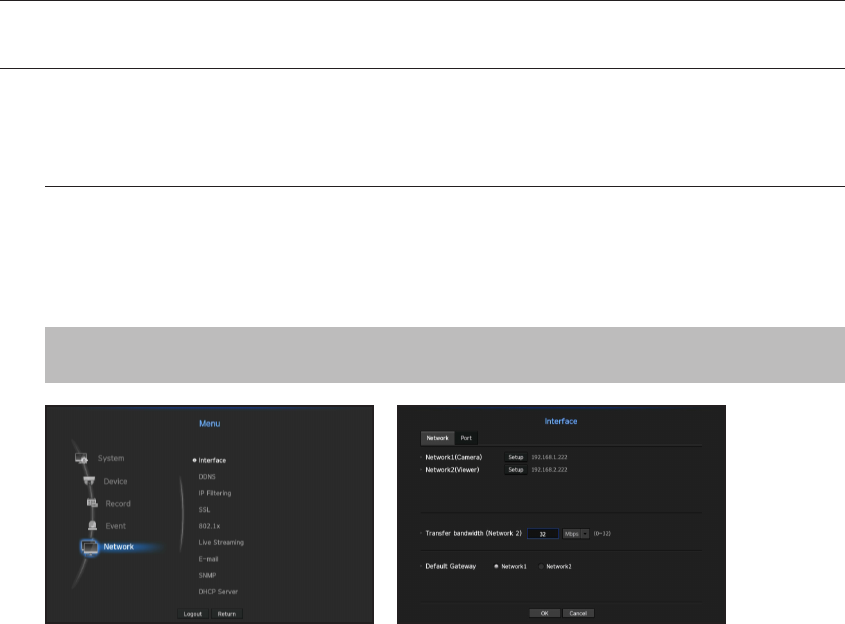
Setting a network connection
Sets the protocol and environment of the network.
[MENU] Ö [ENTER] Ö ▼ Ö <Menu> Ö [ENTER] Ö ▼ Ö <Network> Ö ► Ö <Interface> Ö [ENTER] Ö ▼
Ö <Network> Ö ▲▼◄► Ö [ENTER]
• Network1 (Camera) : Port for camera connections; it receives video from a camera.
• Network
2 (Viewer) : Port used to send video to the web viewer.
• Network1 (Camera) / Network2 (
Viewer) setup
-
IP Type : Select a network connection type.
-
IP Address, Subnet Mask, Gateway, DNS
<Static> : You can manually enter IP address, subnet mask, gateway and DNS.
<DHCP> : IP address, subnet mask and gateway values will be automatically set.
<PPPoE> : IP address, subnet mask and gateway values will be automatically set.
-
User ID, Password : If you set the connection mode to PPPoE, you need to enter "User ID" and
"Password" to register in PPPoE.
• Transfer bandwidth (Network3) : Enter the maximum amount of upload data bandwidth.
Check the assigned setting in Connection Mode before entering your value.
` If the sum of the network TX/RX is less than 32Mbps, there is a max transmission rate of 32Mbps.
• Default Gateway : Set the basic gateway by using Network1 (Camera) / Network2 (
Viewer) setup.
M
` You can manually input DNS of <DHCP> and <PPPoE> when it selected to <Manual>.
76_ menu setup
menu setup


