GAS PRESSURE REGULATOR
Disconnect the
electrical power to the machine and
follow lockout / tagout procedures.
Shut off the gas before servicing the
unit.
All gas joints disturbed during
servicing must be checked for leaks. Check with a
soap and water solution (bubbles). Do not use an open
flame.
Clean pipe threads and apply thread
sealant that is suitable for use with propane gases.
Removal
1. Disconnect gas supply line from gas pressure
regulator inlet.
2. Disconnect gas pressure regulator from back of
griddle.
Installation
1. Thread regulator onto pipe hand tight with arrow
pointing in direction of gas flow to the griddle.
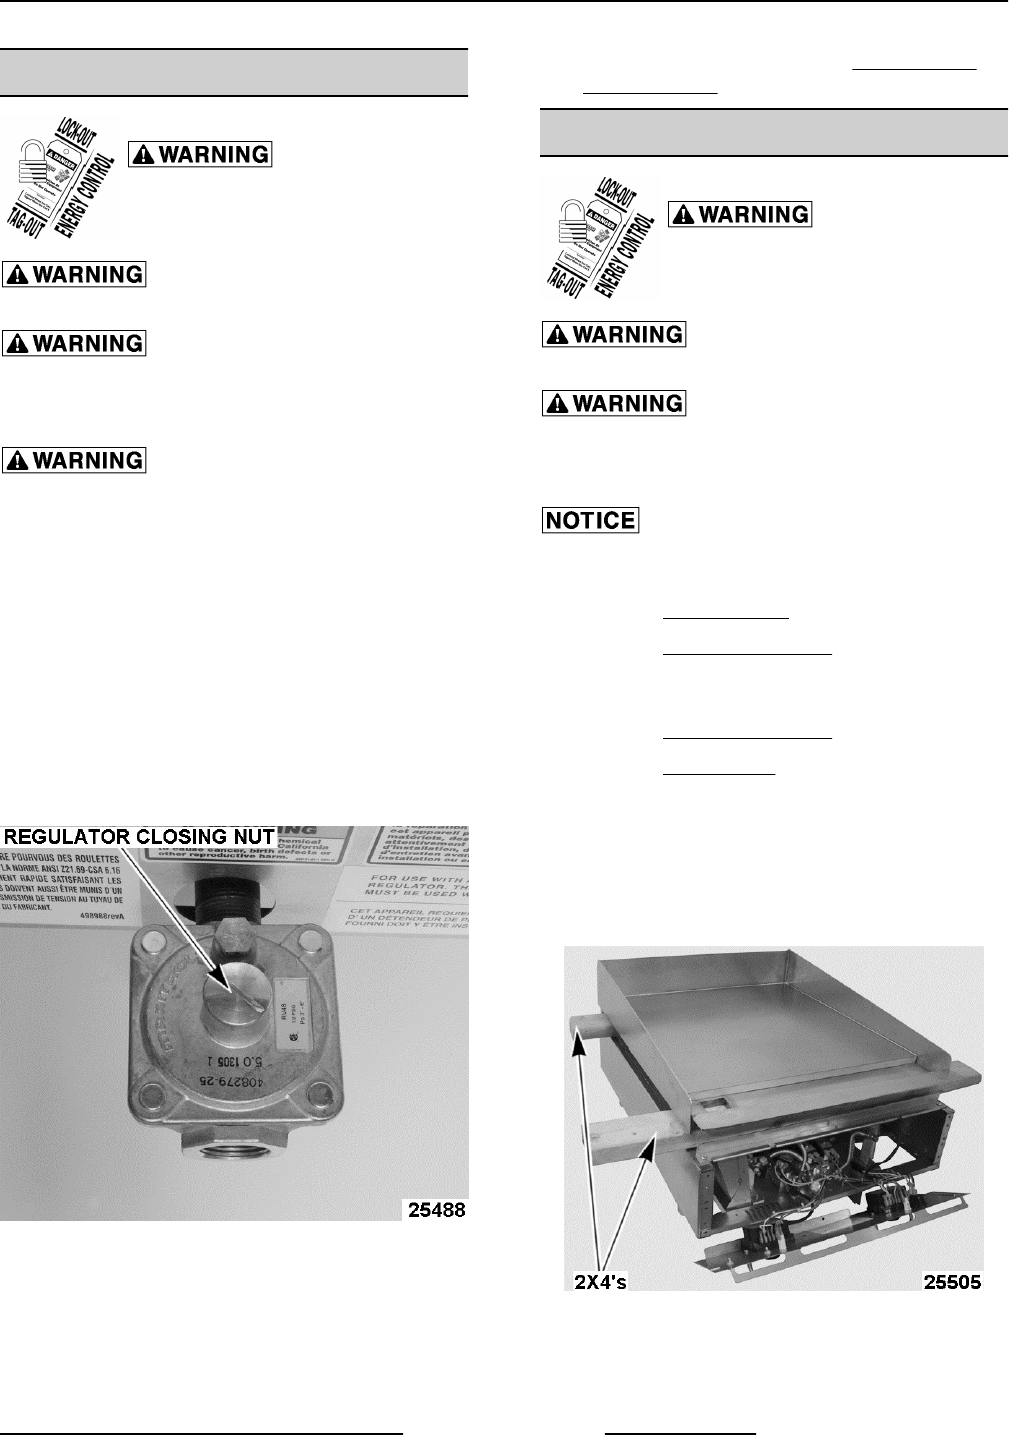
2. Tighten regulator securely in horizontal position
with the regulator closing nut facing upward.
Fig. 18
NOTE: Regulator will not function properly without
adjustment screw pointing upward.
3. Connect supply gas line to gas pressure
regulator inlet.
4. Adjust regulator as outlined in REGULATOR
ADJUSTMENT.
GRIDDLE PLATE ASSEMBLY
Disconnect the
electrical power to the machine and
follow lockout / tagout procedures.
Shut off the gas before servicing the
unit.
All gas joints disturbed during
servicing must be checked for leaks. Check with a
soap and water solution (bubbles). Do not use an open
flame.
For larger units, removal and replacement
of the griddle plate weld assembly should be done by
more than one service technician .
1. Remove BACK PANEL.
2. Remove THERMOCOUPLEfrom griddle plate.
Leave thermocouple wires connected at
temperature controller.
3. Remove CONTROL PANEL.
4. Remove BULL NOSE.
5. Cut a length of 2x4 appropriate for the griddle
plate width, leaving additional length to grasp on
each side of griddle plate.
6. Lift front of griddle plate and support with 2x4.
7. Lift back of griddle plate and support with 2x4.
Fig. 19
8. Lift Griddle plate and remove from base of
equipment.
9. Reverse procedure for installation.
RRG SERIES HEAVY DUTY GAS GRIDDLE - REMOVAL AND REPLACEMENT OF PARTS
Page 11 of 24 F45514 (0214)


