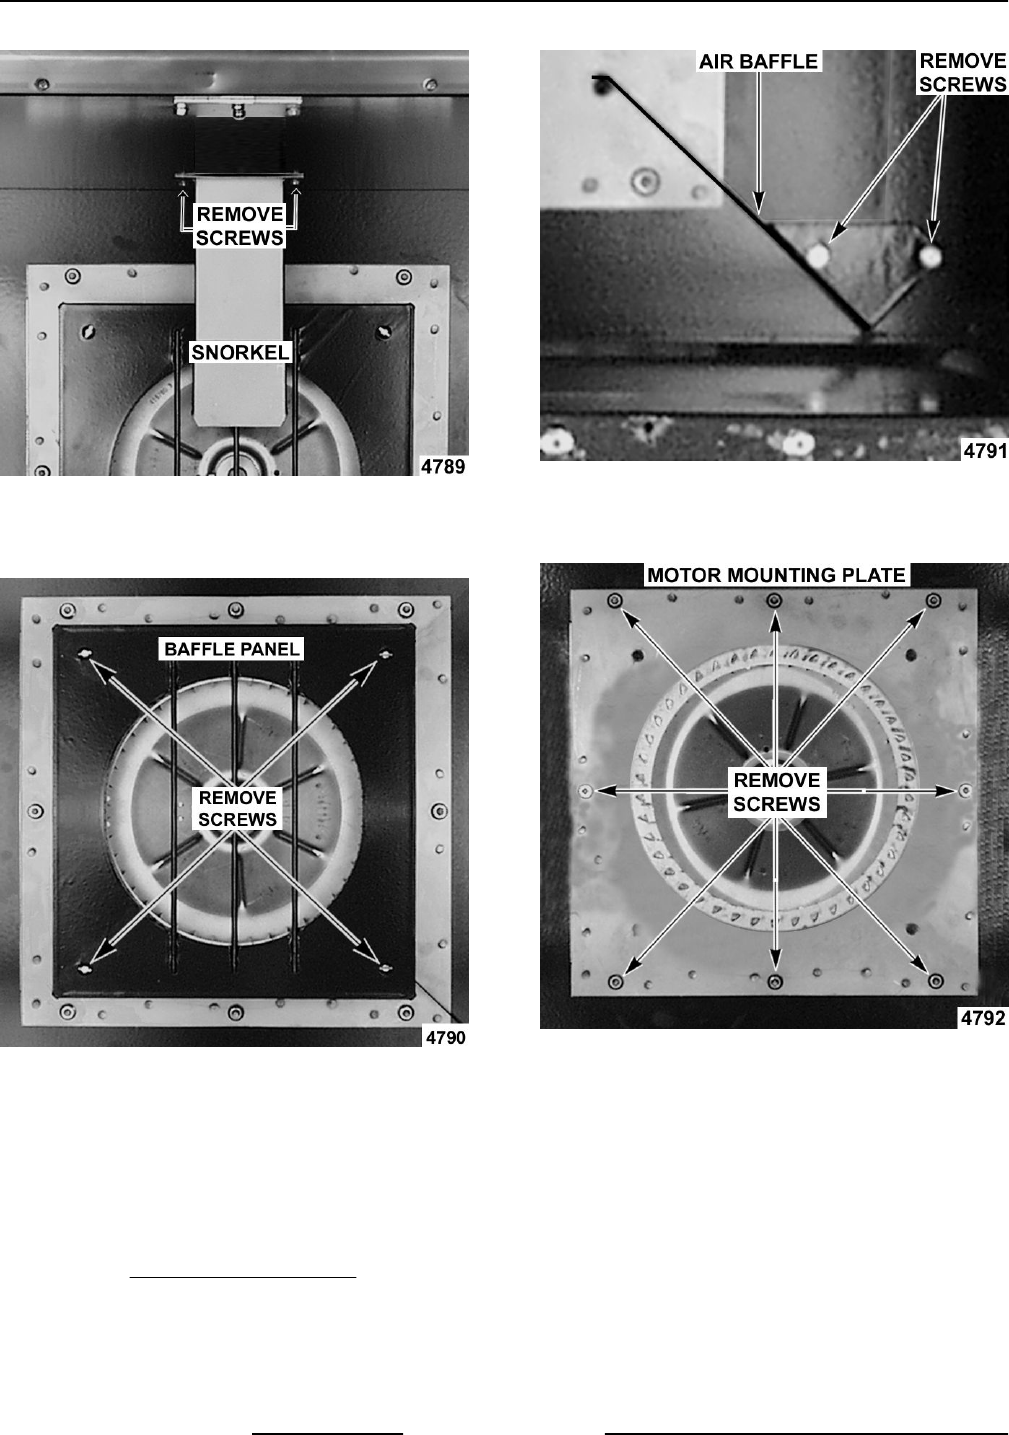
Fig. 31
3. Remove screws securing baffle panel and
remove the panel.
Fig. 32
4. If replacing:
A. Blower Only - Loosen set screws on blower
hub and using a bearing puller, remove
blower from motor shaft.
1) Reverse procedure to install and adjust
blower position as outlined under
BLOWER ADJUSTMENT.
B. Motor - perform step 4A and continue
procedure.
5. Remove the screws securing the air baffle to the
rear wall at the lower right hand corner.
Fig. 33
6. Remove the nuts that secure the motor mounting
plate to the rear wall.
Fig. 34
7. Place a piece of cardboard on the bottom of the
oven cavity to protect its surface from any
damage during motor assembly removal.
8. Pull the motor assembly into the oven cavity and
place it on the cardboard.
9. Remove the junction box cover from the motor,
disconnect lead wires and remove the conduit.
10. Remove motor mounting bolts and flat washers
then lift the motor from the mounting plate.
11. Position the replacement motor on the motor
mounting plate and install mounting bolts and
washers. Hand tighten mounting bolts only.
VC4G & VC6G SERIES FULL SIZE CONVECTION OVENS - REMOVAL AND REPLACEMENT OF PARTS
F24682 Rev. C (0315) Page 16 of 74


