


Using your PowerCase
1. Remove the top cover, slide your iPhone into the PowerCase, then replace the top
cover.
2. Your PowerCase will automatically turn on after you connect your iPhone. Your iPhone
will use the PowerCase’s battery to power its operation and charge its internal battery.
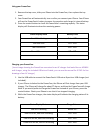
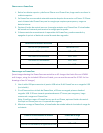
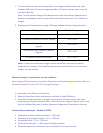
3. Press the control button to check the PowerCase’s remaining capacity. The status
display will illuminate to show the remaining power:
Status Display State
Battery Level
One LED is blinking
Below 20%
One LED is on
25% - 40%
Two LEDs are on
40% - 60%
Three LEDs are on
60% - 80%
All four LEDs are on
80-100%
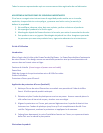
Charging your PowerCase
[Insert image showing the PowerCase connected to an AC charger that looks like our ACMINI
wall charger, using the included USB micro-B cable, you can use the manual for IP-PK1 for line
drawings of our AC charger]
1. Use the USB cable to connect the PowerCase’s USB micro-B port to a USB charger (not
included).
2. If your iPhone is docked to the PowerCase, the iPhone will first charge from your USB
charger. The iPhone will charge for about 2½ hours, and then the PowerCase will charge.
Note: If you would prefer to charge the PowerCase instead of your iPhone, press the
control button. Check your iPhone to see that it has stopped charging.
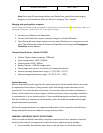
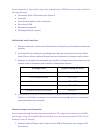
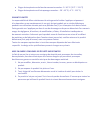
3. While the PowerCase charges, the status display will indicate the charging status of its
battery:
Status Display State
Charge Status
One LED is blinking
Below 20%
One LED is on, next LED is blinking
20% - 40%
Two LEDs are on, next LED is blinking
40% - 60%
Three LEDs are on, last LED is blinking
60% - 80%