


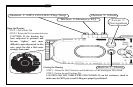


O-RING PREPARATION:
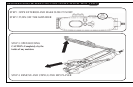
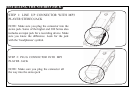
1. Gently Remove the O-ring with the Remover. Be careful not to stretch the O-ring
CAUTION: Never use a sharp or metal object to remove O-rings as they damage the O-ring or the O-ring
groove contact surface. Use only the O-ring Remover Tool included in the packaging.
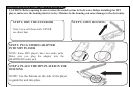
2. Check the O-ring for hair, sand, lint, or other debris and wipe clean as necessary. Be
careful not to stretch the O-ring. If the O-ring is cut or cracked it must be removed and
replaced with a new O-ring.
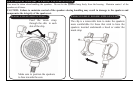
3. Wash your hands prior to greasing the O-ring. Grease the O-ring using your fingertips.
Uniformly spread a bead of grease on the O-ring until there is a thin film covering the
complete surface. Do not stretch the O-ring.
CAUTION: Only use the O-ring grease provided with
your housing.
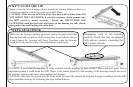
4. Before replacing the O-ring, visually inspect the groove in the lid and the contact surface
for hair, sand, lint, or other debris and wipe clean as necessary. Also, check the contact
surfaces scratches, blemishes, or other imperfections. If an O-ring contact surface is
damaged, do not use the housing. It is very possible the housing will flood and damage the
electronics. Contact your dealer for advice.
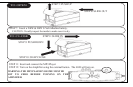
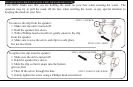
5. Install the O-ring with the flat side down; making sure that it is seated uniformly, with no
twists or loose areas. Be careful not to stretch the O-ring unnecessarily.