


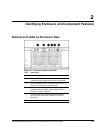

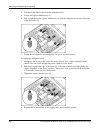

Removing and Replacing Components
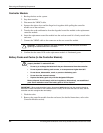
2. Pull the drive out of the enclosure by about 3 cm (1 inch) so that it is disconnected from
the backplane connector.
CAUTION: A drive with a rapidly spinning disk can be difficult to hold securely. To decrease
the chance of dropping the drive, do not remove it completely from the enclosure until the disk
has stopped rotating. This usually takes a few seconds.
3. When the disk is no longer spinning, remove the drive from the enclosure.
Installing a Drive Blank
Insert the drive blank into the enclosure, and push it in until it is firmly seated in the
enclosure.
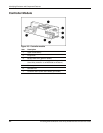
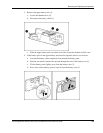
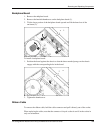
Installing a Replacement Drive
CAUTION: Take care when installing a drive. The drives in the enclosure are fragile.
1. Pull out the release lever on the drive as far as it can go.
2. Insert the replacement drive into the bay until it can go no further. About 1 cm (0.5 inch)
of the drive protrudes from the bay.
3. Push the release lever all the way in. This action installs the drive completely in the bay
and seats it firmly against the connector in the enclosure.
4. Observe the drive status LEDs to confirm that the replacement drive is functioning
correctly.
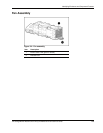
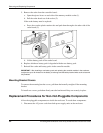
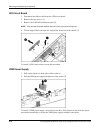
Fan Assembly
1. Lift the release lever and pull the fan assembly out of the enclosure.
2. Slide the replacement fan assembly into the enclosure until it is firmly seated in the
enclosure.
3. Confirm that the fan starts operating immediately and that the status LED is illuminated
green.
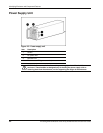
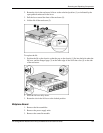
Power Supply Unit
1. Disconnect the AC power cord from the defective power supply unit.
2. Squeeze the handle and the release lever together while pulling the defective power
supply unit out of the enclosure.
3. Insert the replacement power supply unit into the empty bay until it is firmly seated in the
enclosure.
4. Connect the AC power cord.
5. Confirm that the status LED on the replacement unit is illuminated green.
HP StorageWorks Modular Smart Array 20 Maintenance and Service Guide 3-3