


Utilisez un tournevis petit et fin, ou un instrument
similaire.
Remarque:
• Si vous utilisez un tournevis petit et fin, ou un
instrument similaire, n’appuyez pas fortement sur
les commutateurs et témoins car cela pourrait les
endommager et se traduire par des anomalies de
fonctionnement.
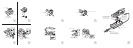
Réglage du commutateur (Fig. 11)
1. Sélecteur de sensibilité
Ce sélecteur vous permet de choisir la sensibilité
de l’appareil vis-à-vis des signaux de téléphones-
cellulaires.
Niveau de sensibilité faible Ô Niveau de sensi-
bilité élevée
Le niveau de sensibilité peut premdre trois
valeurs. Si l’appareil fonctionne en raison de la
réception de signaux provenant d’un autre télé-
phone cellulaire placé hors du véhicule, ou de
tout autre signal, placez le commutateure de
niveau de sensibilité sur la position correspon-
dent á la valeure la plus basse. Si l’appareil ne
fonctionne pas au moment où vous émettez ou
recevez un appel, placez le commutateur de
niveau de sensibilité sur la position correspon-
dant à la valeure la plus élevée.
2. Témoin de température
Ce témoin s’éclaire lorsque la température
interne de l’appareil est élevée. En ce cas, l’ali-
mentation est automatiquement coupée. Elle est
automatiquement rétabile lorsque la température
interne est à nouveau inférieure à la valeur maxi-
male.
3. Interrupteur d’alimentation
Losque vous utilisez cet appareil, conservez l’in-
terrupteur sur la position ON. L’interrupteur d’al-
imentation est dépendant de celui de l’élément
central et se trouve donc automatiquent sur la
position de marche ou d’arrêt en fonction de ce
qui se produit sur l’élément central.
Opération <FRANÇAIS>
Operate with a small standard tip screwdriver or
something similar.
Note:
• When operating with a small standard tip screw-
driver or something similar, strongly pressing or
pulling switches or indicators may damage parts
resulting in faulty operation.
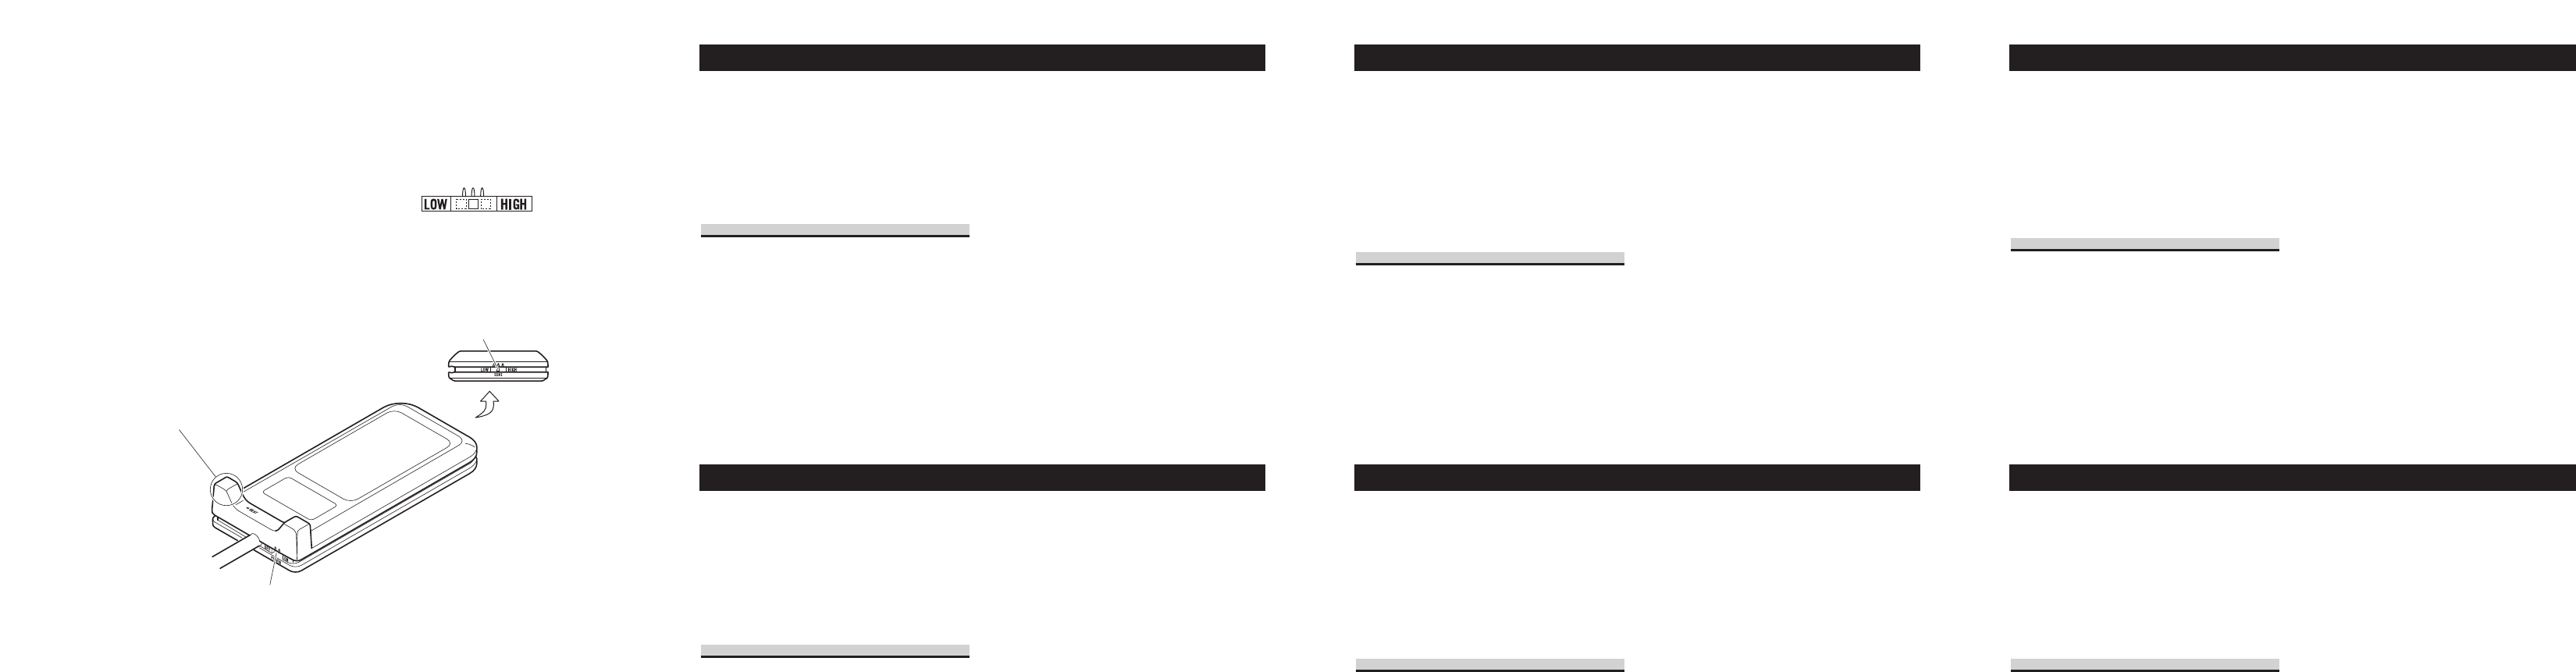
Setting the Switch (Fig. 11)
1. Sensitivity level switch
This allows you to adjust the sensitivity over
which cellular signals can be received.
Low sensitivity level Ô High sensitivity level
The sensitivity level can be changed in three
steps. If this product operates by receiving sig-
nals from another cellular phone outside your car
or other signals, set the sensitivity level switch to
the lower level. If this product does not operate
when making or receiving a call, set the sensitivi-
ty level switch to the higher level.
2. Heat indicator
This lights when the unit’s internal temperature
becomes high. Power automatically switches
OFF. Power automatically switches ON when the
internal temperature decreases.
3. Power switch
Keep the switch in the ON position when using
this product. The power switch is interlocked
with that of the head unit, and is automatically
switched on and off as the head unit is operated.
Operation <ENGLISH>
Opere con un destornillador normal pequeño o algo
similar.
Nota:
• Cuando utilice un destornillador normal pequeño
o algo similar, la presión o extracción fuerte de
los interruptores o indicadores puede dañar las
piezas y causar un funcionamiento defectuoso.
Ajuste del interruptor (Fig. 11)
1. Interruptor de nivel de sensibilidad
Eso le permite ajustar la sensibilidad sorbre la
cual las señales celulares se pueden recibir.
Nivel de sensibilidad baja Ô Nivel de sensibili-
dad alta
El nivel de sensibilidad se puede cambiar en tres
pasos. Si la unidad funciona mediante la recep-
ción de señales de un otro teléfono celular fuera
de su automóvil u otros señales, ajuste el inter-
ruptor de nivel de sensibilidad para un nivel más
bajo. Si la unidad no funciona al hacer o recibir
una llamada, ajuste el interruptor de nivel de sen-
sibilidad para un nivel más alto.
2. Indicator de calor
Se ilumina cuando la temperatura interna de la
unidad se pone alta. La alimentación se
desconecta automáticamente. La alimentación se
conecta automáticamente cuando la temperatura
interna diminuye.
3. Interruptor de alimentactión
Mantenga el interruptor en la posición ON cuan-
do utilice esta unidad. El interruptor de ali-
mentación está sincronizado con el interruptor de
la unidad principal, y se activa o desactiva
automáticamente cuando se opera la unidad prin-
cipal.
Operación <ESPAÑOL>
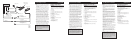
Fig. 11
Abb. 11
Afb. 11
Verwenden Sie einen kleinen
Normalschraubendreher oder etwas Ähnliches zur
Betätigung.
Hinweis:
• Starkes Drücken oder Ziehen von Schaltern oder
Anzeigen bei Betätigung mit einem kleinen
Normalschraubendreher oder einem ähnlichen
Werkzeug kann zu Beschädigung von Teilen und
fehlerhaftem Betrieb führen.
Einstellen des Schalters (Abb. 11)
1. Empfindlichkeitspegelschalter
Dieser Schalter gestattet die Einstellung der
Empfindlichkeit zum Empfang der
Mobiltelefonsignale.
Niedriger Empfindlichkeitspegel Ô Hoher
Empfindlichkeitspegel
Der Empfindlichkeitspegel kann in drei Stufen
eingestellt werden. Falls dieses Gerät auf die
Signale anderer Mobiltelefone außerhalb des
Fahrzeugs oder anderer Geräte anspricht, stellen
Sie den Schalter auf einen niedrigeren
Empfindlichkeitspegel ein. Falls dieses Gerät
beim Tätigen oder Annehmen eines Anrufs nicht
anspricht, stellen Sie den Schalter auf einen
höheren Empfindlichkeitspegel ein.
2. Wärmeanzeige
Diese Anzeige leuchtet auf, wenn die
Innentemperatur des Gerätes zu hoch wird. Die
Stromversorgung wird automatisch ausgeschaltet.
Sobald die Innentemperatur sinkt, schaltet sich
die Stromversorgung wieder ein.
3. Hauptschalter
Zur Benutzung dieses Gerätes muss sich dieser
Schalter in der Stellung ON befinden. Der
Hauptschalter ist mit der Kopfgarnitur gekoppelt
und wird beim Betrieb der Kopfgarnitur automa-
tisch ein- und ausgeschaltet.
Bedienung <DEUTSCH>
Gebruik een kleine normale schroevendraaier of iets
dergelijks.
Opmerking:
• Wanneer u een kleine normale schroevendraaier of
iets dergelijks gebruikt kunt u onderdelen
beschadigen als u er te krachtig op drukt of als u
te hard trekt aan schakelaars of indicators, hetgeen
kan resulteren in storingen.
Instellen van de schakelaar (Afb. 11)
1. Schakelaar voor het gevoeligheidsniveau
Deze stelt u in staat om de gevoeligheid voor de
signalen van de draagbare telefoons te regelen.
Lage gevoeligheid Ô Hoge gevoeligheid
Het gevoeligheidsniveau kan in drie stappen wor-
den geregeld. Als dit product begint te werken als
er signalen worden ontvangen van andere draag-
bare telefoons buiten uw auto of door andere sig-
nalen, dient u de gevoeligheid te verlagen. Als
het product niet begint te werken wanneer u een
telefoongesprek wilt maken of ontvangen, dient u
de gevoeligheid te verhogen.
2. Oververhittingsindicator
Deze indicator zal oplichten wanneer de temper-
atuur binnenin het toestel te hoog oploopt. De
stroom zal in dat geval automatisch worden uit-
geschakeld. Wanneer de temperatuur in het toes-
tel voldoende gedaald is, zal de stroom weer
worden ingeschakeld.
3. Aan/uit schakelaar
Houd deze schakelaar in de ON (aan) stand wan-
neer u dit product gebruikt. Deze schakelaar is
gekoppeld aan die van het hoofdtoestel en zal
automatisch aan en uitschakelen met het hoofd-
toestel.
Bediening <NEDERLANDS>
Lavorare con un cacciavite piccolo a punta normale
o qualcosa di simile.
Nota:
• Quando si lavora con un cacciavite piccolo a
punta normale o qualcosa di simile, se si preme
forte o se si tirano gli interruttori o le spie è possi-
bile danneggiare le parti con conseguenti problemi
di funzionamento.
Impostazione dell’interruttore (Fig. 11)
1. Interruttore del livello di sensibilità
Esso consente di regolare la sensibilità con la
quale viene ricevuto il segnale del telefono cellu-
lare.
Basso livello di sensibilità Ô Alto livello di sen-
sibilità
È possibile cambiare il livello di sensibilità in tre
passaggi. Se questo prodotto funziona ricevendo
segnali da un altro telefono cellulare al di fuori
dell’automobile o altri segnali, impostare l’inter-
ruttore del livello di sensibilità sul livello più
basso. Se questo prodotto non funziona quando si
effettua o si riceve una chiamata, impostare l’in-
terruttore del livello di sensibilità sul livello più
alto.
2. Indicatore di riscaldamento
S’illumina quando la temperatura interna di ques-
ta unità diventa troppo alta. L’unità viene spenta,
automaticamente. Quando la temperatura interna
diminuisce, l’unità si accende, automaticamente.
3. Interruttore di alimentazione
Lasciare l’interruttore in posizione ON (atti-
vazione) quando si utilizza questo prodotto.
L’interruttore di alimentazione è collegato al fun-
zionamento di quello dell’apparecchio principale
e viene acceso e spento automaticamente insieme
all’apparecchio principale.
Esecuzione <ITALIANO>
2. Heat indicator
This lights when the unit’s internal temperature
becomes high. Power automatically switches
OFF. Power automatically switches ON when the
internal temperature decreases.
1. Sensitivity level switch
This allows you to adjust the sensitivity over
which cellular signals can be received.
Low sensitivity level Ô High sensitivity level
The sensitivity level can be changed in three
steps. If this product operates by receiving sig-
nals from another cellular phone outside your car
or other signals, set the sensitivity level switch to
the lower level. If this product does not operate
when making or receiving a call, set the sensitivi-
ty level switch to the higher level.
3. Power switch
Keep the switch in the ON position when using
this product. The power switch is interlocked
with that of the head unit, and is automatically
switched on and off as the head unit is operated.