


To delete a photo or recorded video
1
Browse to the photo or video that you want to delete.
2
Tap the screen to make appear.
3
Tap .
4
Tap Delete to confirm.
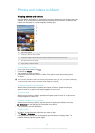
Using Smile Shutter™ to capture smiling faces
Use Smile Shutter™ technology to photograph a face just as it smiles. The camera
detects up to five faces and selects one face for smile detection and auto focus.
When the selected face smiles, the camera automatically takes a photo.
To turn on Smile Shutter™
1
Activate the camera.
2
Tap
, then tap
3
Tap Smile Shutter and select a smile level.
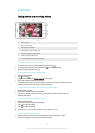
To take a photo using Smile Shutter™
1
When the camera is open and Smile Shutter™ is turned on, point the camera
at your subject. The camera selects which face to focus on.
2
The face selected appears inside a coloured frame and the photo is taken
automatically.
3
If no smile is detected, tap the screen to take the photo manually.
Adding the geographical position to your photos
Turn on geotagging to add the approximate geographical location (a geotag) to
photos when you take them. The geographical location is determined either by
wireless networks (mobile or Wi-Fi® networks) or GPS technology.
When
appears on the camera screen, geotagging is turned on but the
geographical position has not been found. When
appears, geotagging is turned on
and the geographical location is available, so your photo can get geotagged. When
neither of these two symbols appears, geotagging is turned off.
To turn on geotagging
1
From your Home screen, tap .
2
Tap Settings > Location.
3
Drag the slider beside Location to the right.
4
Activate the camera.
5
Tap
, then tap .
6
Drag the slider beside Geotagging to the right.
7
Tap OK.
General camera settings
Capturing mode settings overview
Auto Scene Recognition
Optimise your settings to suit any scene.
Manual
Adjust camera settings manually.
Creative effect
Apply effects to photos or videos.
Auto scene recognition
Auto scene recognition mode detects the conditions in which you are shooting and
automatically adjusts the settings to ensure that you take the best photo possible.
71
This is an Internet version of this publication. © Print only for private use.