Sony Ericsson T290– 2/21
Sending/Receiving MMS Messages
There are 3 ways to send an MMS message: between phones, PC to phone, and phone to PC.
Note! To send MMS message between phones, both the sender and the receiver must have a Next
Generation phone. If the sender has a Next Generation phone and the receiver does not, the receiver will
receive a text (SMS) message with a unique URL (web address) that can be accessed via PC to view the
content.
Sending an MMS from your phone
•
•
•
•
•
•
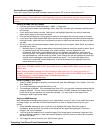
From the main menu, select Messages→ MMS → Create new
If you would like to enter a text message, select ‘Add Text’ and input your message. Inputting text is
not required.
If you would like to enter a picture, ‘Add picture’ and highlight the picture you wish to insert and
press directly down on the scroll key center.
If the picture that appears is the picture you wish you insert press the scroll key center to ‘Accept’
If you would like to add another MMS item such as sound, highlight the add item icon and press the
scroll key center, select the form of multimedia you wish to insert and then select the item you wish
you add.
Once you have your desired message created, press the scroll key down, select ‘Send’ and choose
the recipient by either:
Manually input a 10-digit wireless phone number and press the scroll key center to select ‘Send’
or press the scroll key left to access your saved contacts. You can choose from your
phonebook, SIM entries, email address listings, etc. Highlight your selection, and press the
scroll key center. Your selection will prompt you to enter the first letter(s) of your contact, press
the appropriate key, and the scroll key center. Scroll through the list and highlight the name you
want to send a message to and press the scroll key center. You’ll notice the name of the
contact you’ve selected in the dialogue box. If this is the correct entry, highlight ’Send’ and
press the scroll key center.
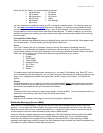
Note! Your Sony Ericsson T290 can receive image files that are 45KB or smaller and in the format of a
JPEG, PNG, OTA-BMP, WBMP or GIF. Sound files must be in Mobile MIDI (GMX) format and under
45KB in size.
When sending an MMS message to a Next Generation phone from your PC (using your email or a
website), you’ll need to know the phone’s address. The Next Generation phone’s MMS “email” address
is made up of their 11-digit wireless phone number@mms.gocbw.com.
(Ex.15135550001@mms.gocbw.com)
Receiving MMS to your phone
•
•
•
•
•
•
When an MMS message is received, your screen will read “New Message, From *sender*, Size *file
size* Read now?”
To view the message, press the left soft key ‘Yes’
The message will appear. If the message came from a PC, you may see a message stating that the
image is attached. You can view picture attachments sent via MMS, however, the image may not
be the first thing you see when you open the message. You may need to scroll down in the
message in order to get to the image.
Saving an MMS Message
MMS messages will be temporarily saved in your inbox/outbox for up to 7 days. If you would like to save
an image longer, you will need to follow these directions to save an image or sound clip into your
gallery.
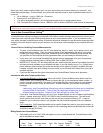
While the MMS message is open, scroll key up to highlight the image. When the image is
highlighted, press the scroll key center and a dialog box will appear prompting you to save the
image or set it as a wallpaper.
You’ll be given the opportunity to name the image (If the image had a name when it was sent, this
name will default; however, a new name can be entered). Input the name you would like and press
the scroll key center.
The image will now be saved to your “My Pictures” gallery.
Protecting Your Phone From Unauthorized Use


