2727
2727
27
ASRock K10N78hSLI-WiFi / K10N78hSLI-1394 Motherboard
EnglishEnglish
EnglishEnglish
English
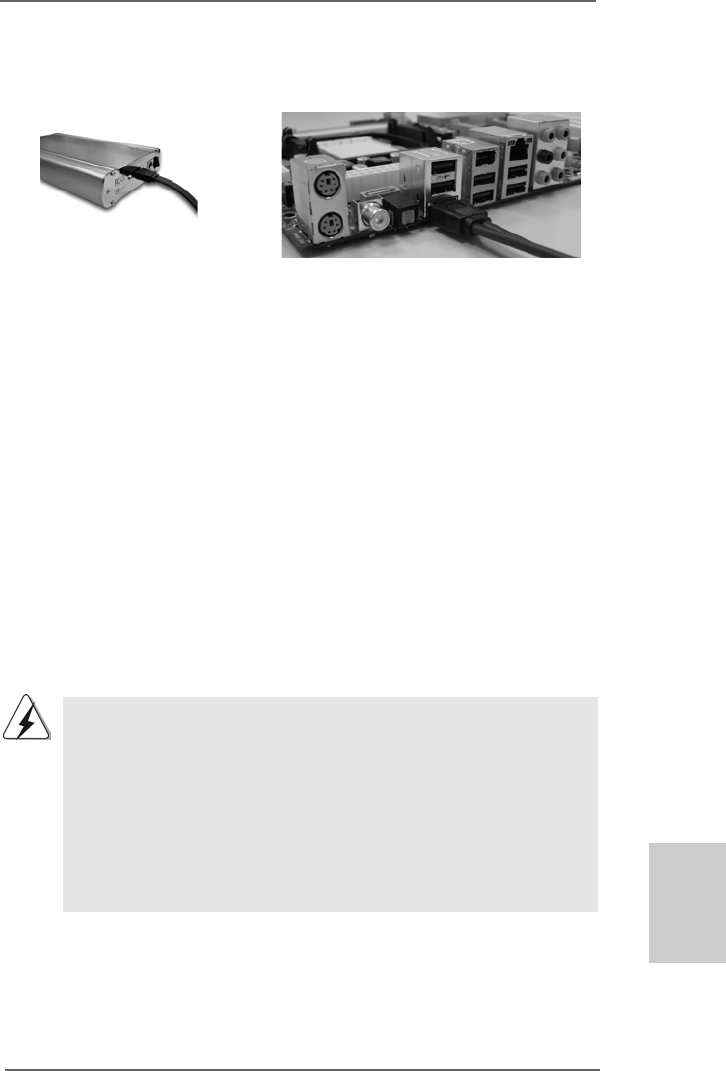
AII_TOP
Connect one end of the eSATAII
device cable to eSATAII device
Connect the other end of the eSATAII
device cable to eSATAII port of the I/O
shield
2. Use the eSATAII device cable to connect eSATAII device and the eSATAII port of
the I/O shield according to the eSATAII connector that you connect the SATA
data cable.
2.102.10
2.102.10
2.10
Serial ASerial A
Serial ASerial A
Serial A
TT
TT
T
A (SAA (SA
A (SAA (SA
A (SA
TT
TT
T
A) / Serial AA) / Serial A
A) / Serial AA) / Serial A
A) / Serial A
TT
TT
T
AII (SAAII (SA
AII (SAAII (SA
AII (SA
TT
TT
T
AII) Hard DisksAII) Hard Disks
AII) Hard DisksAII) Hard Disks
AII) Hard Disks
InstallationInstallation
InstallationInstallation
Installation
This motherboard adopts NVIDIA
®
GeForce 8200 chipset that supports Serial ATA
(SATA) / Serial ATAII (SATAII) hard disks and RAID functions. You may install SATA /
SATAII hard disks on this motherboard for internal storage devices. This section will
guide you to install the SATA / SATAII hard disks.
STEP 1: Install the SATA / SATAII hard disks into the drive bays of your chassis.
STEP 2: Connect the SATA power cable to the SATA / SATAII hard disk.
STEP 3: Connect one end of the SATA data cable to the motherboard’s SATAII
connector.
STEP 4: Connect the other end of the SATA data cable to the SATA / SATAII hard
disk.
1. If you plan to use RAID 0, RAID 1 or JBOD function, you need to install at
least 2 SATA / SATAII hard disks. If you plan to use RAID 5 function, you
need to install 3 SATA / SATAII hard disks. If you plan to use RAID 0+1
function, you need to install 4 SATA / SATAII hard disks.
2. It is recommended to build RAID on internal SATAII ports. In other
words, if SATAII_6 (PORT5) is used for eSATAII port, please build
RAID on other SATAII ports.
3. Under non-RAID mode, SATAII_5 (PORT4) and SATAII_6 (PORT5)
cannot function.


