If connecting the projector to a computer
with a built-in monitor, or to a laptop
computer, you may need to change the
output destination for image signals using
one of the buttons on the computer (such
as a button with a or icon on
it) or setting menus.
The output destination can normally be
changed by holding down the computer's
key and pressing one of the
Function keys.
Once the source has been changed, after
a short wait the projector will start
projecting.
For details, refer to the documentation
provided with your computer.
Examples of changing output
NEC
Panasonic
TOSHIBA
IBM
SONY
FUJITSU
Macintosh
After startup, change the
Control Panel adjustments so
that Mirroring is active
Tip
If images do not appear ...
Change the input signal.
Remote Control
If you have other problems ...
Refer to the online
Help information.
* Refer to "Troubleshooting".
Projector
Press on the projector's control
panel and follow the prompts which
appear in order to solve the problem.
Projecting
Each time is pressed, the
image source cycles between
Computer/Component Video,
S-Video, and Video.
Projector
Press
or .
Left Right
Down
Up
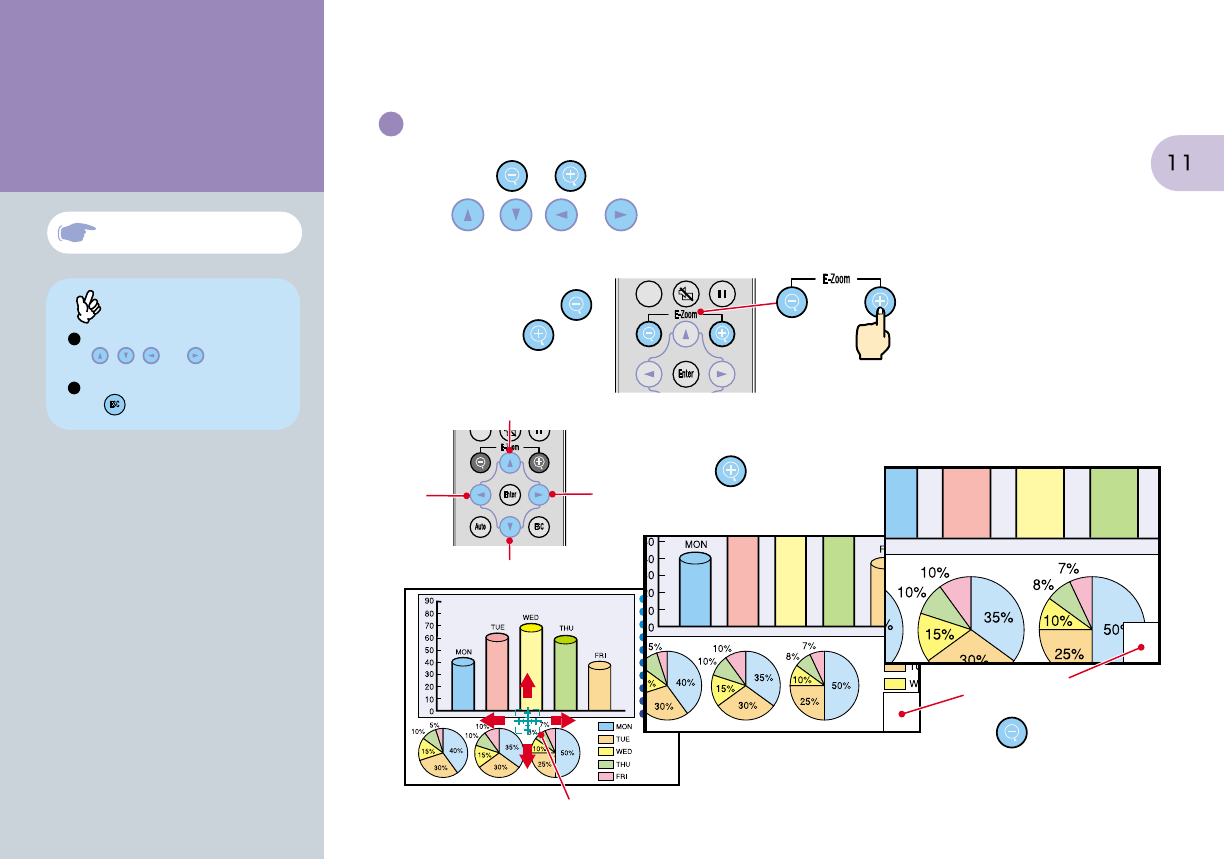
After enlarging the image, you can
use , , and to scroll
around the image.
To cancel the enlargement effect,
press .
"E-Zoom" in User's Guide
Enlarging part of projected images
If you press or , the cross will appear at the middle of the image being projected.
Press , , or on the remote control to move the cross to the area of the image
that is to be enlarged.
Enlargement ratio
When is pressed, the
enlarged image is reduced
in size again.
Tip
Functions for
Enhancing Projection
When is pressed, the
image is enlarged with the
cross as its center.
Cross
Remote control


