HotBrick Network Solutions
2. Installing the HotBrick Load Balancer LB-2 in your LAN
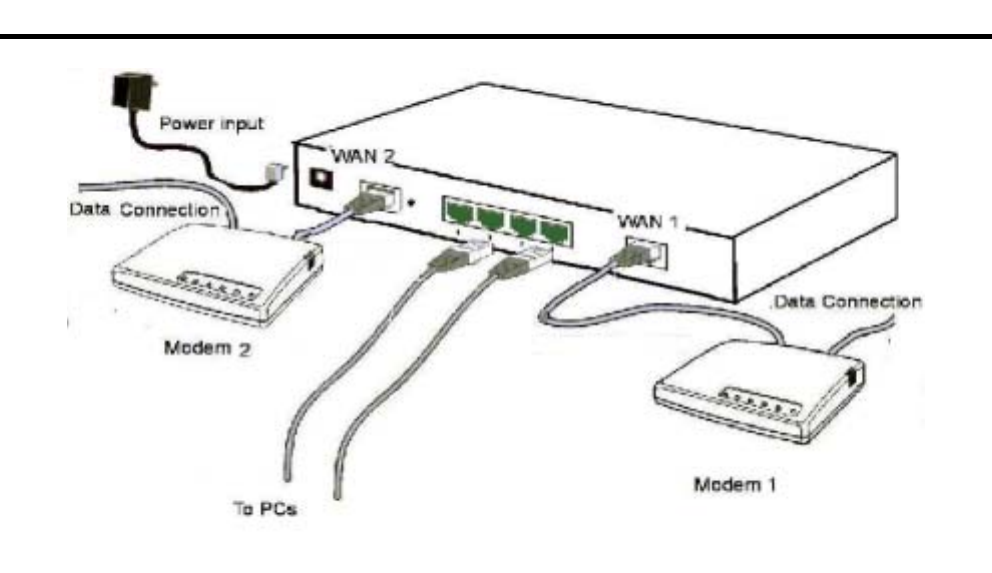
Figure 7: Installation Diagram LB-2
1. Ensure the HotBrick Load Balancer LB-2 and the DSL/Cable modem are powered OFF.
Leave the modem or modems connected to their data line.
2. Connect the Broadband modem or modems to the Load Balancer LB-2.
• If using only one (1) Broadband modem, connect it to the "WAN 1" port.
• Use the cable supplied with your DSL/Cable modem. If no cable was supplied, use a
standard cable.
3. Use standard LAN cables to connect PCs to the Switching Hub ports on the Load Balancer.
• Both 10BaseT and 100BaseT connections can be used simultaneously.
• If you need to connect the Load Balancer LB-2 to another Hub, just use a standard LAN cable
to connect any port on the Load Balancer LB-2 to a standard port on another hub. Any LAN
port on the Load Balancer LB-2 will automatically act as an "Uplink" port when required.
4. Power Up
• Power on the Cable or DSL modem or modems.
• Connect the supplied power adapter to the Load Balancer LB-2 and power up.
5. Check the LEDs
• The Power LED should be ON.
• The WAN – Link LED should be ON, if the corresponding WAN port is connected to a
broadband modem.
• The Error LED will flash during start up, but will then turn off. If it stays on, there is an error
condition.
12


