81
4. Press
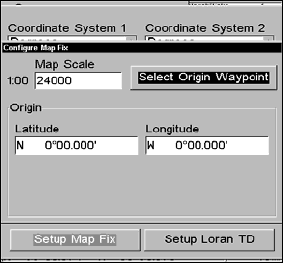
ENT and enter the map's scale. This is generally at the bottom
of the paper map. It is shown as a ratio, like 1:24000. Press
EXIT and
the unit to return to the Configure Map Fix screen.
Configure a map fix so the unit can find your position on a printed
chart or topographical map.
5. Press → to SELECT ORIGIN|ENT|ENT|ENT to bring up the waypoint list.
Select the waypoint that you saved the reference point under and press
ENT. The unit displays a waypoint information screen with the com-
mand
SET AS ORIGIN selected.
6. Press
ENT and the unit returns to the Configure Map Fix menu. Fi-
nally, press
EXIT to close this menu.
7. Press ↑ to
COORD SYSTEM|ENT, select MAP FIX from the list and press
ENT|EXIT. All position information now shows as a distance from the
reference point you chose.
Customize Page Displays
Every Page display option except Full Map (on the Map Page) has cus-
tomizable data boxes to provide constant on-screen information.
The data available from your unit is divided into categories in the Data
Viewer menu. These categories include: GPS Data, Navigation, Trip
Calculator, Time and Sensor Data. You can select items from any of
these categories for display in any data box — the category divisions
are only there to help you sort through the information.
To change the information displayed in a data box:
1. On the Page display you wish to change, press
MENU|↓ to CUSTOM-
IZE
|ENT. A data box name flashes, indicating it is selected.
2. Press
ENT to change the box or hit ↑, ↓, ← → to select another box, then
press
ENT.


