6
2. Setting up the monito
HVR
XW
RQ
RW
FDW
RQ
ROR
DQJXDJ
6HWXS
6'6HWWLQ
HVHW
Q
RUPDW
RQ
II
2II
'LVSOD\3RUW'DLV\FKDLQ
If your graphics card or video output is not
certified for DisplayPort V1.2, then you may
experience blank or black screen. In this
specific scenario, please go back to OSD
menu again and re-set the “DisplayPort
Daisychain” to “Off” mode.
Warning
To avoid unknown damage, make sure to
connect your DisplayPort input source to the
port [DP IN].
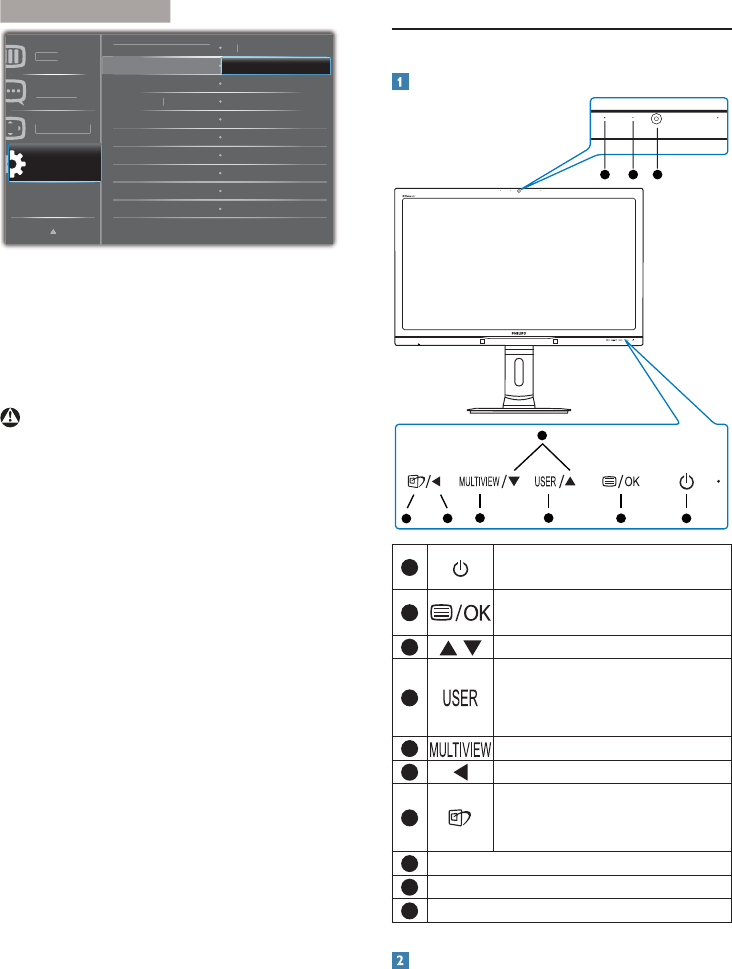
2.2 Operating the monitor
Description of the control buttons
5 4
3
2
1
7
6
10 9 8
1
Switch monitor’s power ON and
OFF.
2
Access the OSD menu
.
&RQÀUPWKH26'DGMXVWPHQW
3
Adjust the OSD menu.
4
User preference key. Customize
your own preference function
from OSD to become the “user
key”.
5
PiP/PbP/Off/Swap
6
Return to previous OSD layer.
7
SmartImage
hot key
. There are 6
PRGHVWRVHOHFW2IÀFH3KRWR
Movie, Game, Economy, Off.
8
2.0 Megapixel Webcam
9
Webcam activity light
10
Microphone
Customize your own “USER” key
This hot key allows you to setup your favorite
function key.


