Paper and Other Media
94
8
E
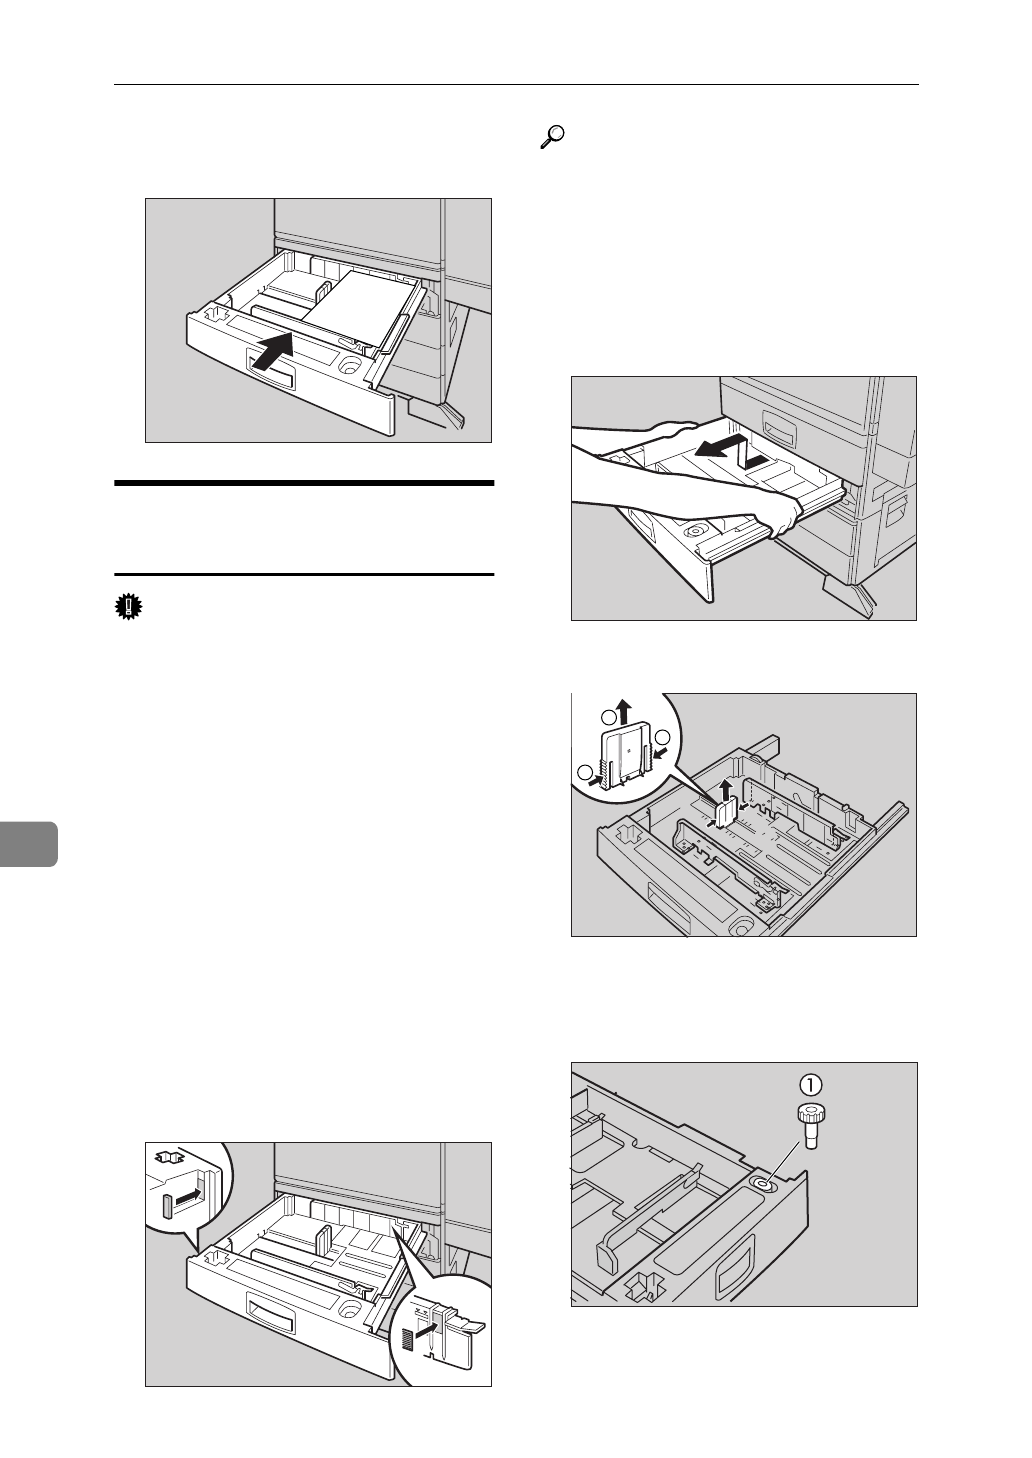
Slide the tray into the printer un-
til it stops.
Changing Paper Size of the
Paper Tray
Important
❒
Confirm that the setting of the pa-
per size dial matches the paper size
and feed direction of the paper in
the tray. Otherwise, the printer
might be damaged, or printing
problem might occur.
❒
If you load A3
L
, B4 JIS
L
,
11"x17"
L
and 8 1/2"x14"
L
size
paper into Tray 1, attach the cush-
ion (
A
) and pad (
B
) as shown in
the illustration. Attach the cushion
(
A
) on the left back side of the
front cover of Tray 1. The cushion
should touch the bottom and the
wall. Attach the pad (
B
) on the
side guide on the printer side. The
pad should be between the ribs
and 1 - 2 mm (0.04" - 0.08") from the
top.
Reference
For more information on the size
and feed direction of paper that
can be set in the tray, see P.85 “Pa-
per Types and Sizes”.
A
Slide the paper tray out until it
stops. After that, lift it up slightly,
then pull it out.
B
Remove the rear guide.
C
Pull the standard paper tray (Tray
1), and take the screwdriver (
A
)
from the tray.
TAPY581E
TAPY800E
TAPH210E
TAPY063E
1
2
1
TAPP720E


