


138
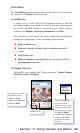
Section 11: Using Camera and Album
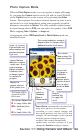
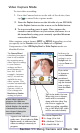
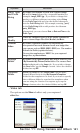
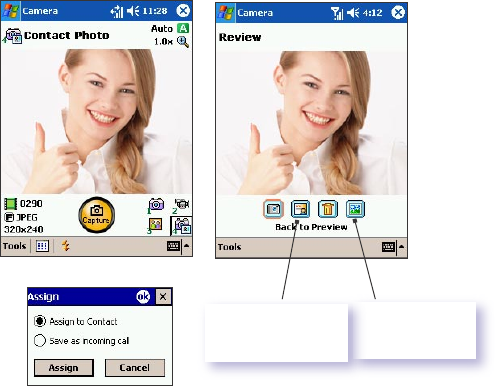
Contact Photo Capture Mode
When in Contact Photo Capture mode, you can capture a single
still image by pressing the Capture button on the left side of your
PPC6600, or the Capture button on the screen, or by pressing the
Action button. This captures the current content shown on the
screen, and allows you to assign still or animated photo to entries
in your Contacts. Hence, when a person calls you (for whom you
have previously assigned a photo ID in Contacts), that photo ID
will appear on your PPC6600's incoming call screen.
The components of the LCD Display Panel in Contact Photo Capture
mode are the same as in Photo Capture mode. The only difference is
that after the photo is captured, you can assign it to a Contact using
Caller ID immediately after capture.
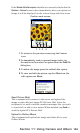
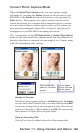
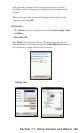
Assign to Contact
This allows you to assign a photo to a Contact person. Tap Assign
to enter the Caller ID screen. Select a contact and then tap Next
to enter its settings, where you can preview, select the size and
position of the photo. When nished, tap OK. The screen will
then return to Contact Photo capture mode.
Save as Incoming Call
This will set it as the default photo for all incoming calls.
Tap to assign the
photo to a Contact
person.
Tap the Album
icon to view and
edit the photo.