SKU 94121 For technical questions, please call 1-800-444-3353. Page 10
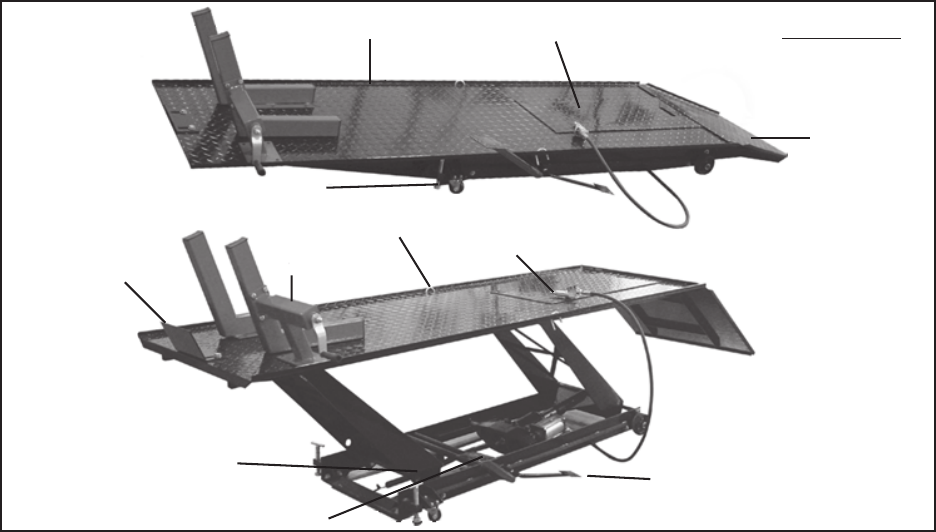
RAMP
(37)
ADJUSTING SCREW
(18)
SLIDING PLATE
(36)
U-CLAMP
(8)
STOP PLATE
(32)
VISE ASSY.
(34)
LIFT FOOT PEDAL (11)
RELEASE FOOT PEDAL (10)
LOCKING BAR (22)
PLATFORM
(35)
FIGURE E
AIR VALVE
(37P)
3. Make sure the Sliding Plate (36) is properly positioned over the inspection hole of
the Platform (35). (See Figure E.)
4. Raise the Casters (14) off the floor to prevent the Motorcycle Lift from moving
during use. Raise the Casters by turning the Adjustment Screws (18) clockwise.
(See Figure E.)
5. With assistance, roll the motorcycle up the Ramp (37) and onto the Platform (35)
until its front wheel contacts the Stop Plate (32). Then, kick the center stand of
the motorcycle down to stabilize it on the Lift. (See Figure E.)
6. Clamp the front wheel of the motorcycle into the Vise assembly (34). For
maximum safety, you should also stabilize the motorcycle using tie-down straps
(not included) with one end of the straps tied to the motorcycle and the other end
of the straps tied to the U-Clamps (8). (See Figure E.)
7. Pump the Lift Foot Pedal (11) repeatedly to raise the Motorcycle Lift.
(See Figure E.)
8. When the Platform (35) has been raised to the working height, insert the
Locking Bar (22) completely through the Front Lifting Arm (38) to prevent the
Motorcycle Lift from accidentally lowering. (See Figure C.)
9. When work on the motorcycle is completed, check under the Motorcycle Lift to
make sure there are no tools, motorcycle parts, etc. and that it is safe to lower
the Lift.
REV 03/06


