38 Using the Printer Software
Changing the Printer Driver Settings
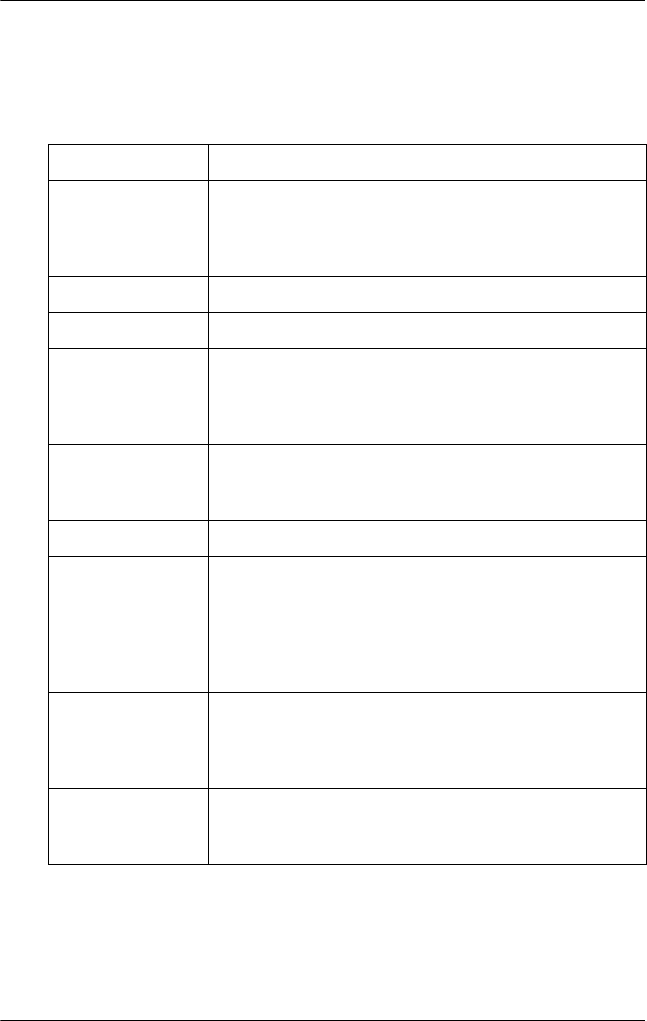
The following table shows the printer driver settings. Note that
not every setting is available in all versions of Windows.
Setting Explanation
Paper Size Select the paper size you want to use. If you don’t see
your paper size, use the scroll bar to scroll through the
list. If your paper size is not included in the list, see
“Defining a custom paper size” on page 40.
Orientation Select Portrait or Landscape.
Paper Source Select the paper source you want to use.
Resolution/
Graphics
Resolution
Select the printing resolution you want. The higher the
resolution you select, the more detailed your printout
will be. However, increasing the resolution slows
printing.
Dithering You can leave this option set to Fine, which is the
default setting, or select another dithering pattern for
the kind of printout you want.
Intensity Move the slider to make your printout lighter or darker.
Print Quality Select a print quality option from the Print quality list.
Set Hi-speed to On to use bidirectional printing, which
increases the print speed. Setting Hi-speed to Off
selects unidirectional printing mode, which is slower
but more precise. Printing with the default settings
uses the settings stored in the printer.
Halftone Setup.../
Halftone Color
Adjustment...
Click this button to set the brightness and contrast,
input the RGB gamma, or make other settings. The
Halftone Color Adjustment window appears. For
details, click the Help button in this window.
Halftoning Select the type of halftoning to use when printing
graphics. To let the printer determine the best
halftone quality, use Auto Select.


