If the appliance is installed in a very damp environment,
condensate may form on the outside of the appliance.
u
Always see to good ventilation at the installation site.
2.2 Changing over door hinges
NOTICE
Risk of damage by condensate to appliances installed side-by-
side!
If refrigerator and freezer are installed side-by-side, the freezer
always has to be to the right of the refrigerator, as seen from
the front.
u
Do not change over the door hinges.
Ensure that the following tools are to hand:
q
Cordless screwdriver Torx® 15, 25
q
Screwdriver Torx® 15, 25
Slide the appliance 2/3 of the way into the recess.
Pull out the power plug.
Open the door.
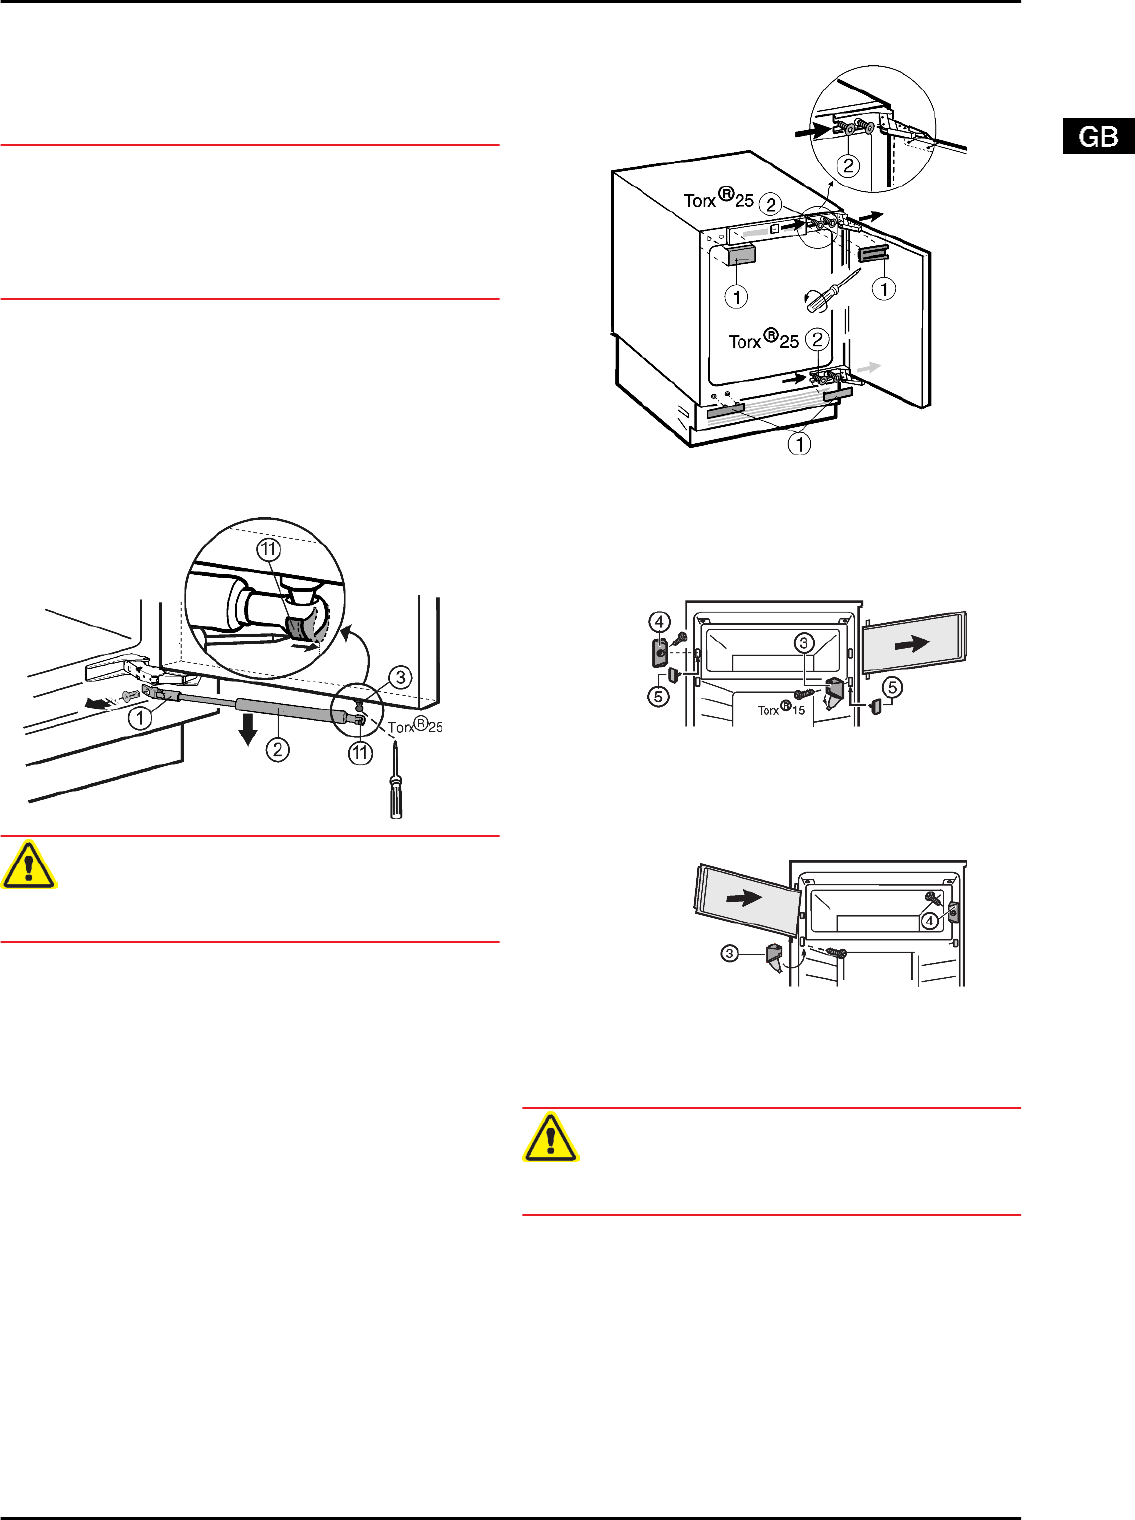
2.2.1 Detach the soft stop mechanism*
Fig. 1
CAUTION
Risk of injury if soft stop contracts!
u
Detach with care.
u
Pushtension spring
Fig. 1 (11)
outwards, using a screw-
driver.
u
Lowersoft stop mechanism
Fig. 1 (2)
for removal.
u
Unscrewholder
Fig. 1 (1)
.
u
Unscrew the ball stud
Fig. 1 (3)
(Torx® 25).
2.2.2 Demount door
Fig. 2
u
Lift off covers
Fig. 2 (1)
.
u
Only slacken fastening screws
Fig. 2 (2)
.
u
Remove door: push outwards, unhinge and set aside.
2.2.3 Change freezer compartment door*
Fig. 3
u
Fold away the cover of the turn hinge
Fig. 3 (3)
.
u
Unscrew turn hinge
Fig. 3 (3)
together with compartment
door.
u
Unscrew closing element
Fig. 3 (4)
.
u
Close the vacated holes with the accompanying stoppers
Fig. 3 (5)
.
Fig. 4
u
Fit the closing element
Fig. 4 (4)
.
u
Fit the compartment door at the top.
u
Fit the turn hinge
Fig. 4 (3)
and fold the cover.
2.2.4 Changing bearing parts
CAUTION
Risk of injury if hinges fold!
u
Leave hinges open.
Putting into operation
3


