TimesTen Installation 83
% /opt/tt60/32/bin/ttBulkCp -o
DSN=source600 able able.save
% /opt/tt60/32/bin/ttBulkCp -o
DSN=source600 baker baker.save
Next create a new data source name, source_tt70 for the TimesTen 7.0
data store, and execute the commands:
% /opt/TimesTen/tt70/bin/ttIsql -connStr
DSN=source_tt70 -f create.sql
% /opt/TimesTen/tt70/bin/ttBulkCp -i
DSN=source_tt70 able able.save
% /opt/TimesTen/tt70/bin/ttBulkCp -i
DSN=source_tt70 baker baker.save
Building and running the demo applications
Source code for several demo applications is provided in the demo
directory as part of the TimesTen Data Manager distribution on UNIX
and Windows systems. Documentation for these demos is included
online in the file install_dir
/demo/README.TXT on UNIX or
install_dir
\demo\README.TXT on Windows.
The directory install_dir
/demo/tutorial and install_dir/
demo/quickstart
contains files used in demos that provide examples
for the TimesTen documentation. For a description of these demos, see
the README.txt file at the top of these directories.
Note: By default, the TimesTen demo applications save data store files
to
/var/TimesTen/TTinstance/demo/DemoDataStore on UNIX for
root installs, and
install_dir/info/DemoDataStores on non-root
installs. On Windows, you specify the data store directory at installation
time. Before running the demos, make sure your temporary directory
has a minimum of 100 MB of available space.
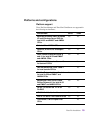
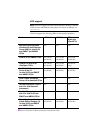
Defining data sources for the demo applications
Before the demo applications can be executed, you must create the data
source names (DSNs) that the demo applications rely on.
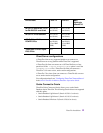
On Windows, the TimesTen installation program automatically creates
the appropriate data source names as System DSNs. Their configuration
can be viewed and modified via the ODBC program on the Control
Panel.