Chapter 10 DHCP Server
EMG1302-R10A User’s Guide
96
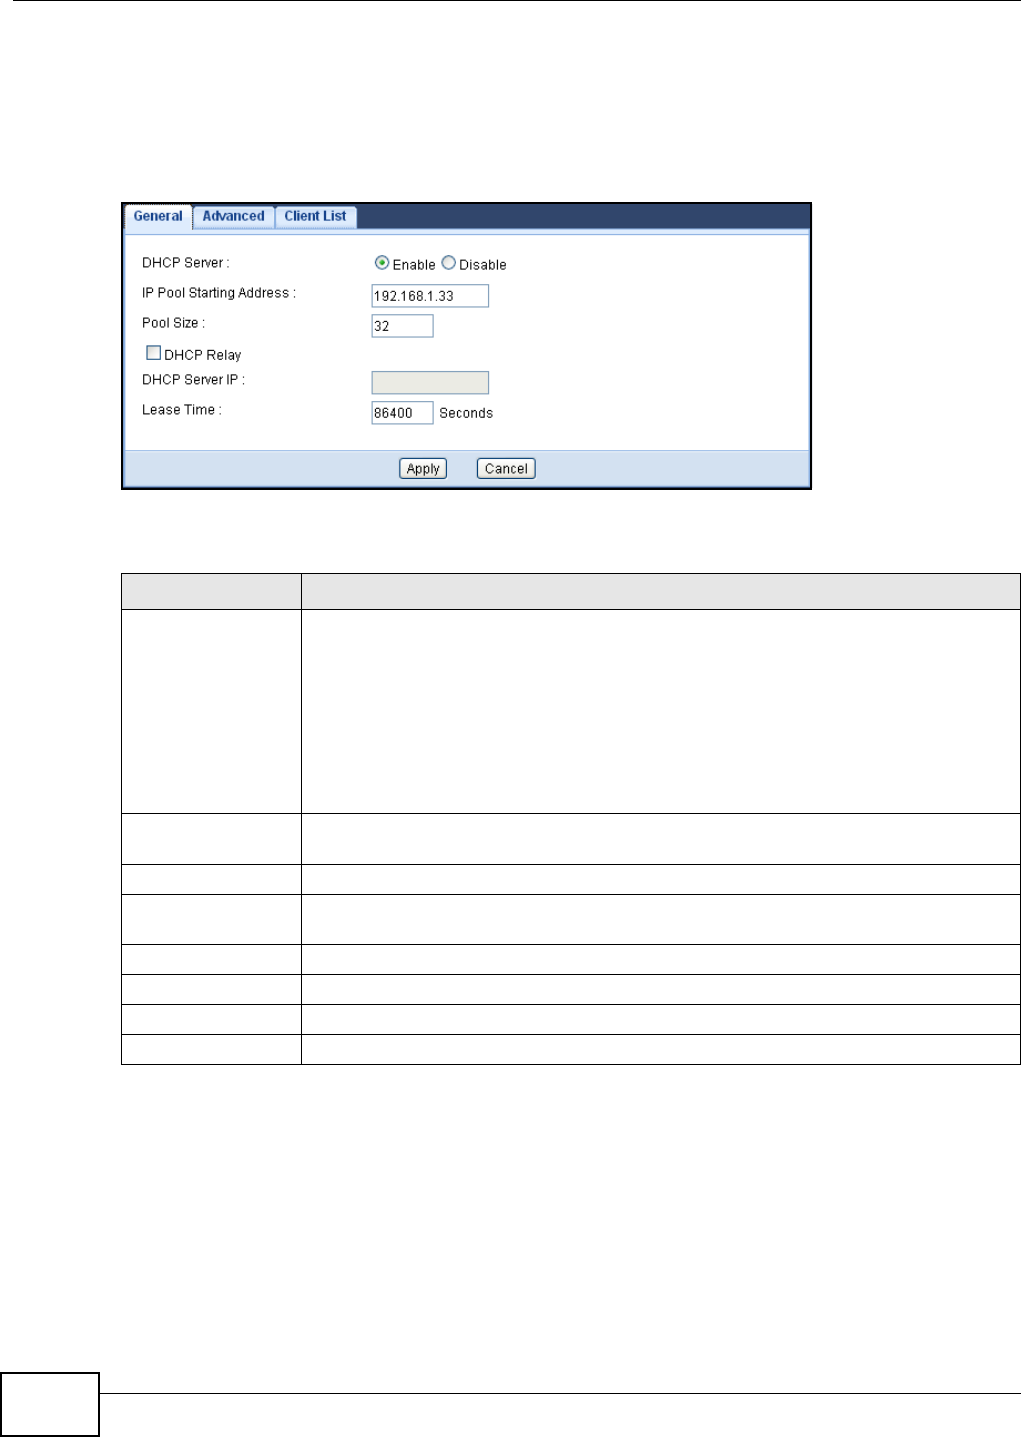
10.4 The DHCP General Screen
Use this screen to enable the DHCP server. Click Configuration > Network > DHCP Server. The
General screen displays.
Figure 51 Configuration > Network > DHCP Server > General
The following table describes the labels in this screen.
Table 33 Configuration > Network > DHCP Server > General
LABEL DESCRIPTION
Enable DHCP Server Select the checkbox to enable DHCP for LAN.
DHCP (Dynamic Host Configuration Protocol, RFC 2131 and RFC 2132) allows individual
clients (computers) to obtain TCP/IP configuration at startup from a server. Leave the
Enable DHCP Server check box selected unless your ISP instructs you to do
otherwise. Clear it to disable the EMG1302-R10A acting as a DHCP server. When
configured as a server, the EMG1302-R10A provides TCP/IP configuration for the
clients. If not, DHCP service is disabled and you must have another DHCP server on
your LAN, or else the computers must be manually configured. When set as a server, fill
in the following four fields.
IP Pool Starting
Address
This field specifies the first of the contiguous addresses in the IP address pool for LAN.
Pool Size This field specifies the size, or count of the IP address pool for LAN.
DHCP Relay Select the checkbox to enable DHCP relay and forward a DHCP request to the DHCP
server.
DHCP Server IP Enter the IP address of the DHCP server.
Lease Time Enter the in seconds the designated lease time for a DHCP assignment.
Apply Click Apply to save your changes back to the EMG1302-R10A.
Cancel Click Cancel to begin configuring this screen afresh.


