


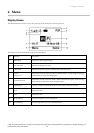


Chapter 4 Menu
16
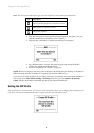
1. Select the duration option: 10s, 15s, 25s, or 45s.
2. Press the Select soft key.
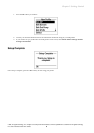
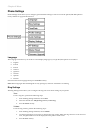
AP Settings
Use the AP Settings menu to set the default access point, or configure IP and security settings for a particular access point.
To configure the AP settings, perform the following steps:
1. Select the available network.
2. Press the Default soft key to set selected AP as default.
3. Press the Options soft key to modify selected AP settings.
• IP Settings: Select DHCP or configure Static settings including IP Address, Subnet Mask, Gateway
Address, and DNS Address.
• Security Settings: Enter the Security protocol. The key options are WPA Passphrase, WPA Key,
WEP64 Key, WEP64 Passphrase, WEPl28 Key, and WEP128 Passphrase
• Delete: Delete the selected AP.
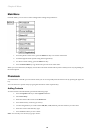
Master Reset
Use the Master Reset menu to restore the phone settings to its factory defaults. WARNING: This function will erase your
phonebook, SIP profiles, stored AP’s, and all other stored user settings.
1. When Master Reset option is selected, a warning message appears to prevent accidental deletion of your
settings.
2. Press the Yes soft key to continue reset, or press the No soft key to cancel.
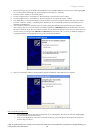
Firmware Upgrade
Your phone supports firmware upgrades as they become available from the vendor. Please follow these instructions
carefully. Skipping steps or performing steps out of order may result in upgrade failure.
To upgrade your firmware, perform the following steps:
(Note: To check what version of firmware is currently installed on your WiFi phone, see Step 4 below.)
Step 1, You Will Need:
1. Your QuickPhones QA-341 or QA-342 WiFi phone.
2. One USB to mini-USB cable.
3. A PC running Windows XP or Windows Vista.
4. The USB drivers that Windows needs to communicate with your WiFi phone (files MIP.INF and MIP.SYS).
5. The MIP Upgrade Tool, which is a small program that will load the firmware file onto your WiFi phone (files
DFUENGINE.DLL and MIPDFUTOOL.EXE).
6. The firmware file for your WiFi phone (file 51200-25-2-00C.DFU)
7. To prepare, unZIP all the required files to a convenient location on your PC.
8. Please close any open applications running on the PC while upgrading your WiFi phone, including any anti-virus
or security programs.
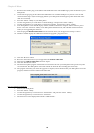
Step 2, Installing the USB Drivers:
(Note: If you have used this PC to upgrade the firmware in your WiFi phone before, and the USB drivers are already
installed on the PC, then you can skip Step 2 and proceed to Step 3.)
1. Ensure that your QA-34x WiFi phone is turned on.
2. Connect the smaller plug on the USB to mini-USB cable to the mini-USB/charger jack at the bottom of your WiFi
phone.