


17
Make sure that you have completed the instructions from Step 1 “Setting Up
the Machine” on pages 4 - 11.
Before installation, if you are using Personal
Firewall software, disable it. Once you are
sure that you can print, re-start your
Personal Firewall software.
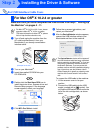
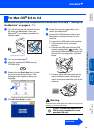
1
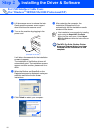
Connect the network cable to the machine,
and then connect it to a free port on your
hub.
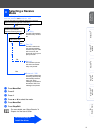
To connect the network interface cable to
the machine:
1. Lift the scanner cover to its open
position.
2. Connect the network cable into the LAN
socket, marked with a symbol. You
will find the LAN socket above and to the
left of the ink cartridge slots, as shown
below.
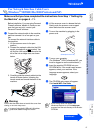
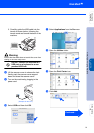
3. Carefully guide the network cable into the
trench as shown below, following the
trench round and toward the back of the
machine.
Warning
Ensure that the cable does not restrict the cover from
closing, or an error may occur.
2
Lift the scanner cover to release the lock.
Gently push the scanner cover support
down and close the scanner cover.
3
Turn on the machine by plugging in the
power cord.
4
Turn on your computer.
(For Windows
®
2000 Professional/XP, you
must be logged on as the administrator.)
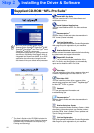
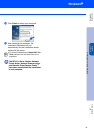
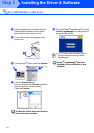
5
Insert the supplied CD-ROM into your
CD-ROM drive. If the model name screen
appears, select your machine. If the
language screen appears, select your
language.
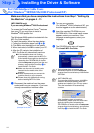
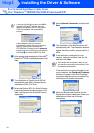
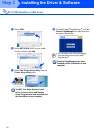
6
The CD-ROM main menu will appear.
Click Install MFL-Pro Suite.
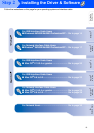
For Network Interface Cable Users
(Windows
®
98/98SE/Me/2000 Professional/XP)
In case of using both USB and LAN cables,
guide both cables through the trench.
If this window does not appear, use
Windows
®
Explorer to run the setup.exe
program from the root directory of the Brother
CD-ROM.
(Example for the U.K.)
Continued...
Installing the Driver & Software
Setting Up
the Machine
Windows
®
For
Network Users
Windows
®
Network