


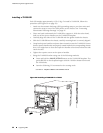
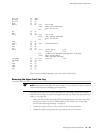
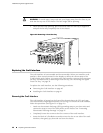

WARNING: To avoid injury, keep tools and your fingers away from the fans as you
slide the fan tray out of the chassis. The fans might still be spinning.
4. When the fans stop spinning, place one hand under the fan tray to support it
and pull the fan tray completely out of the chassis.
Figure 21: Removing a Front Fan Tray
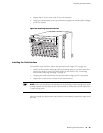
Replacing the Craft Interface
The craft interface is hot-insertable and hot-removable. When you install the craft
interface, allow several minutes for the display to reflect the current state of the
T1600 routing node. Before you remove the craft interface, remove the front upper
fan tray. For instructions on removing a front fan tray, see “Removing the Upper
Front Fan Tray” on page 39
To replace the craft interface, use the following procedures:
■ Removing the Craft Interface on page 40
■ Installing the Craft Interface on page 41
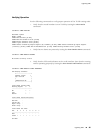
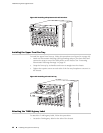
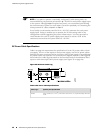
Removing the Craft Interface
The craft interface is located on the front of the chassis above the FPC card cage.
The craft interface weighs approximately 2 lb (0.9 kg). To remove the craft interface,
follow this procedure (see Figure 22 on page 41):
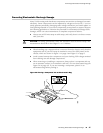
1. Attach an electrostatic discharge (ESD) grounding strap to your bare wrist and
connect the strap to one of the ESD points on the chassis. See “Preventing
Electrostatic Discharge Damage” on page 47.
2. Completely loosen the screws at the four corners of the craft interface.
3. Insert the blade of a flat-blade screwdriver into the slot on one side of the craft
interface, then gently pry that side out from the chassis.
40 ■ Replacing the Craft Interface
T1600 Routing Node Upgrade Guide