E59
Reference Section
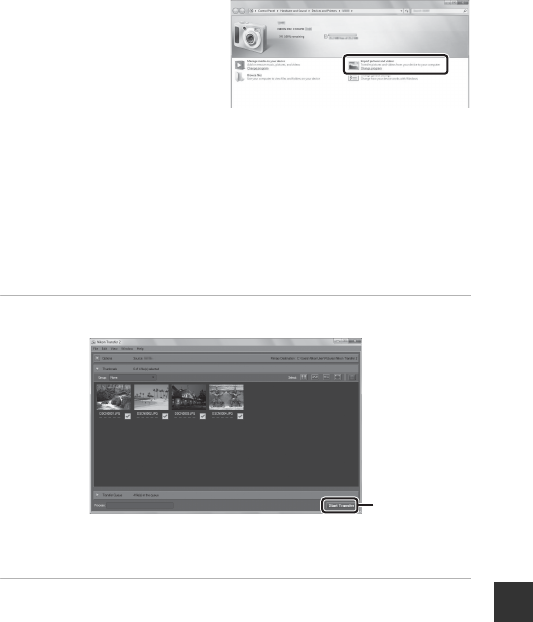
If a message is displayed prompting you to choose a program, select Nikon
Transfer 2.
• When using Windows 7
If the dialog shown at right is
displayed, follow the steps
below to select Nikon Transfer
2.
1Under Import pictures
and videos, click Change
program. A program
selection dialog will be displayed; select Import File using Nikon
Transfer 2 and click OK.
2Double-click Import File.
If the memory card contains a large number of images, it may take a while for
Nikon Transfer 2 to start. Wait until Nikon Transfer 2 starts.
B Notes About Connecting the USB Cable
Operation is not guaranteed if the camera is connected to the computer via a USB
hub.
2 After Nikon Transfer 2 starts, click Start Transfer.
• Image transfer begins. When image transfer is complete, ViewNX 2 starts and
the transferred images are displayed.
• Consult online help for more information on using ViewNX 2.
3 Terminate the connection.
• If you are using a card reader or card slot, choose the appropriate option in
the computer operating system to eject the removable disk corresponding
to the memory card and then remove the memory card from the card reader
or card slot.
• If the camera is connected to the computer, turn the camera off and
disconnect the USB cable.
Start Transfer


