


nokia
CONNECTING PEOPLE
PAGE 16 (27) Approved 1.0
CMO Operations & Logistics
MGR
WW Competence Transfer
Multimedia Creation & Support CONFIDENTIAL 18.11.2005
Bochum / Germany
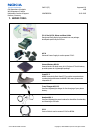
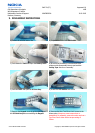
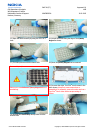
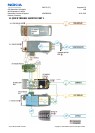
25.) Open the hooks carefully by using the SRT-6 as a
lever.
26.) Unlock the hooks along the edge of the Qwerty
Keypad as shown.
27.) The same procedure on the shown side.
28.) Now, the Qwerty Keypad can be removed.
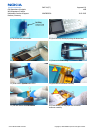
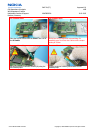
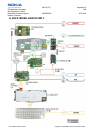
For assembly only!
Always use a new Adhesive Qwerty Keypad when re-
assembling!
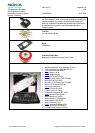
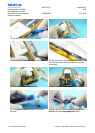
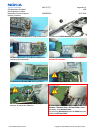
29.) Unscrew the eight, Torx Plus
®
size 6 screws in the
order shown. Always use new screws when re-
assembling! For assembly, reverse the order and use a
Torx Plus
®
size 6 driver with a torque setting of
25Ncm.
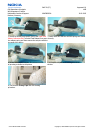
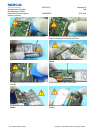
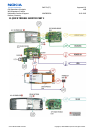
30.) Remove the Chassis Assy. Always start from the
antenna side.
31.) Remove the DC-Jack by using the DC-plug.
Service Manual 9300i Level 1&2 Copyright © 2005 NOKIA Corporation. All rights reserved.