EPSON PowerLite 9300i Projector
12 - EPSON PowerLite 9300i Projector 10/03
Controlling Multiple Projectors
If you’re using more than one projector, you can control all
the projectors—or just selected ones—by using the projector
ID system. To operate a projector, you have to set the remote
control’s ID to match that of the projector. Or you can
control all of the projectors simultaneously by setting the
remote control’s ID to zero.
Setting the Projector ID
The projector’s default ID is 1. If you need to change it,
follow these steps:
1. Access the projector’s
Advanced2 menu and highlight
Projector ID.
2. Press the right or left side of the pointer button on the
remote control to increase or decrease the ID value.
3. Press
Enter to set the value.
4. When done, press ESC to exit the menu system.
Setting the Remote Control ID
The remote control’s default ID is zero. To change it:
1. Press the
ID button on the remote control.
You see it light up.
2. Press one of the numbered buttons on the
remote control to select the desired ID (0
through 9). Select zero to control all
projectors, or select a number to match the
ID of the projector(s) you want to operate.
The
ID button’s light shuts off and the new ID is registered.
If you would like to check the remote control’s current ID,
press the
ID button twice in succession. Count the number of
flashes; this number corresponds to the remote control’s ID.
(If it doesn’t flash, it is set to zero.)
Managing Projectors from a Remote
Computer
The EasyManagement software lets you monitor and control
projector(s) from a remote computer. These features are
intended for use by network administrators.
❏ Use EMP Monitor to see your projectors’ status, switch
image sources, and control basic settings.
❏ Use EMP NetworkManager to receive e-mail notifications
alerting you to possible problems.
❏ Use EMP Multi Screen Adjustment to make your image
appear consistent when you are combining multiple
projectors to display a single, large image.
Make sure you install the software (included on the projector’s
CD-ROMs) on the computer you want to use to monitor
your projectors.
Setting Up the Network
Connect each projector you want to monitor to your network
and configure it with an appropriate IP address.
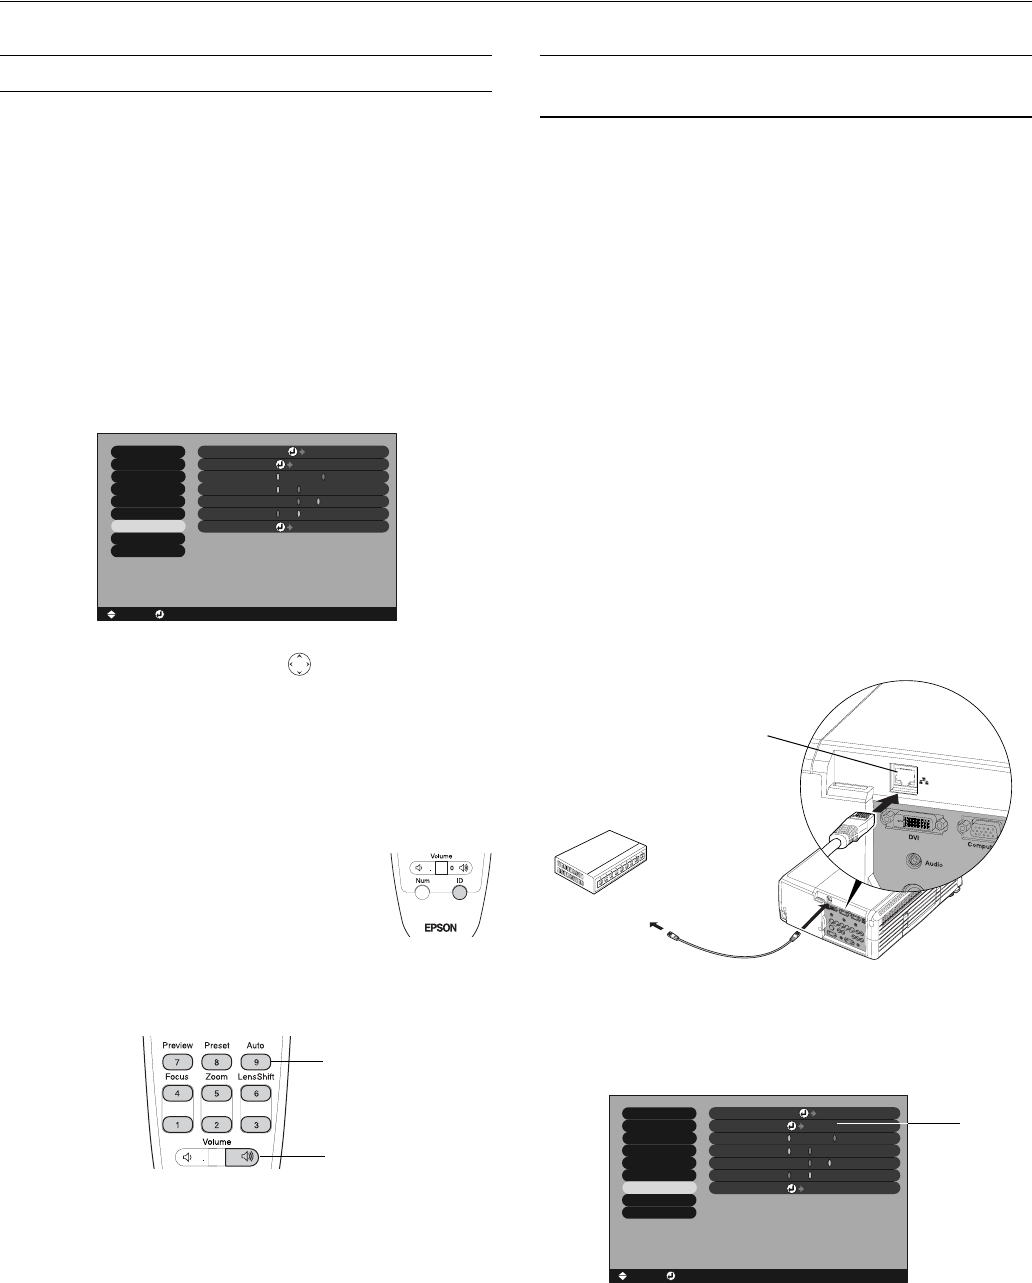
1. Connect the projector to your network using a
commercially available 100baseTX or 10baseT network
cable.
2. Turn on the projector.
3. Press the
Menu button on the remote control and select
Network from the Advanced2 menu.
:
Video
Audio
Setting
User’s Logo
Advanced1
About
Reset All
Reset
Execute
[Menu]: Exit[ ]: Enter[ ]: Select
Effect
Advanced2
BNC Sync Termination
ON OFF
:
Projector ID
Network
: 1
COM Port
:
Set
Set
RS-232C USB
Auto Setup
ON OFF
:
Direct Power ON
ON OFF
:
0
Zero
Nine
To network port
Ethernet port
:
Video
Audio
Setting
User’s Logo
Advanced1
About
Reset All
Reset
Execute
[Menu]: Exit[ ]: Enter[ ]: Select
Effect
Advanced2
BNC Sync Termination
ON OFF
:
Projector ID
Network
: 1
COM Port
:
Set
Set
RS-232C USB
Auto Setup
ON OFF
:
Direct Power ON
ON OFF
:
Select
Network


