2-4
2-4 | Monitoring and Configuring the Printer
3. Press the
Item
button. You see
NOZZLE CHECK=PRINT
on the
display.
4. Press the
Enter
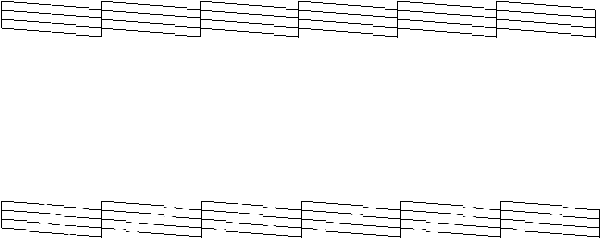
button. The nozzle check prints as shown below:
Each line should be complete, with no gaps in the dot pattern. If any
dots are missing, as shown below, you need to run a cleaning cycle. Press
the
Cleaning
button on the control panel and hold it for at least
3seconds.
For more information, see page 3-2. If you’re using the EPSON printer
driver, you can run the Head Cleaning utility. See page B-24
(Macintosh) or C-26 (Windows) for instructions.
Checking Ink Levels and Component Life
You can view printer status information on the control panel display without
printing a status check. Follow these steps:
1. Press the
SelecType
button on the control panel. Press it several times
until you see
PRINTER STATUS MENU
on the display.
2. Press the
Item
button. You see
VERSION <number>
on the
display. This indicates the firmware version installed in your printer.
3. Continue pressing the
Item
button to display the amount remaining for
each of the 6 inks or service life remaining for a number of printer parts.
The indicators read as follows:
E*****F
= full (or full life remaining
)
E**** F
= 3/4 full (or 3/4 life remaining)
E*** F
= 1/2 full (or 1/2 life remaining)
E** F
= 1/4 full (or 1/4 life remaining)
E* F
= nearly empty (or service life near end)
<nn>% F
= less than 10% of ink (or service life) remaining


