Chapter 2
Kodak ESP 9 Printer User Guide 17
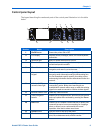
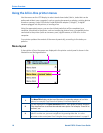
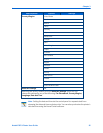
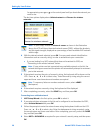
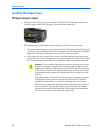
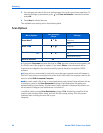
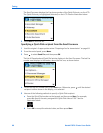
Menu structure
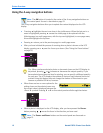
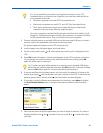
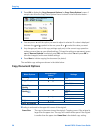
The top-level menu on your All-in-One printer is called the Main menu. When you press
OK on most Main menu items, another menu displays. You can press Start as specified in
the Quick instruction section beneath the menu title (see item 2 in the “Menu layout”
illustration and accompanying table, above) to initiate a task.
You can review details about each menu available in your All-in-One printer using the
information below:
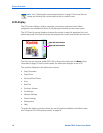
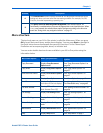
4
The Current Value content displays between
andsymbols indicates the active
setting only when you have more than one setting available. For example, On/Off;
Yes/No; a number representing a quantity; etc..
5
The option in the row with the golden background is the selected option. Its
functionality is enabled when you press the appropriate control panel button. When
or
are pressed, the selected menu option changes according to the direction
used. See “Using the 4-way navigation buttons” on page 12.
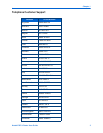
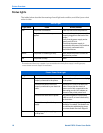
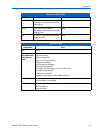
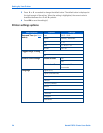
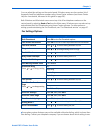
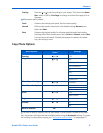
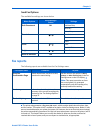
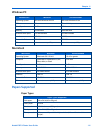
Number Description
Main menu option When you press OK:
To review details about the
option:
Copy Document Displays Copy Document
Options menu
See “Copy Document Options” on
page 56
Copy Photo Displays Copy Photo Options
menu
See “Copy Photo Options” on
page 57
View and Print Photos Displays Print Photos Options
menu
See “Print Photos Options” on
page 47
Scan Displays Scan Options menu See “Scan Options” on page 62
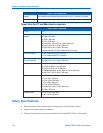
Send Fax Displays Fax Options menu
(must press OK twice to display)
See “Using Quick Dial to select a
Fax Phonebook entry” on page 65
Fax Auto–Answer
Pressing OK sets Fax
Auto-Answer On or Off.
See “Setting Fax Auto–Answer” on
page 36
Fax Settings Displays Fax Settings menu See “Fax Settings Options ” on
page 37
Network Settings Displays Network Settings
menu
See “Network Settings options” on
page 27
Printer Settings Displays Printer Settings
menu
See “Printer settings options” on
page 24
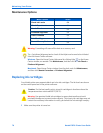
Maintenance Displays Maintenance menu See “Maintenance Options” on
page 76
Help Displays Help menu See “Help Menu” on page 1