Chapter 8
Kodak ESP 9 Printer User Guide 69
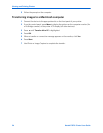
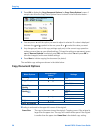
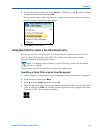
5 Press to select Edit Entry and press OK.
6 Press
to select the desired Phonebook entry and press OK.
7 Select the field you want to edit, and press
OK.
8 Using the LCD display keyboard or the control panel keypad, edit the entry as needed.
Select
Done on the LCD display keyboard to indicate that you are finished using it.
9 Select
Done when the entry is complete, and press OK.
10 Select another item to edit; or, press
Cancel to display the Edit Phonebook menu.
Deleting an existing Fax Phonebook entry
1 From the control panel, press Menu.
2 Press
to select Send Fax and press OK.
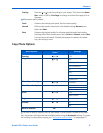
3 Select
Fax Options and press OK.
4 Select
Edit Phonebook and press OK.
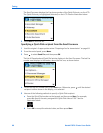
5 Press
to select Delete Entry and then press OK.
6 Press
to select the desired Phonebook entry and press OK.
7 Follow the prompts displayed on the LCD, and press
OK to delete the entry displayed or
cancel to go back to select an entry to delete.
8 Select
Done when the entry is complete, and press OK.
9 Select another item to delete; or, press
Cancel to display the Edit Phonebook menu.
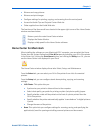
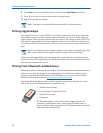
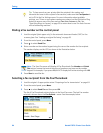
Preparing a fax for transmission
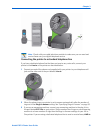
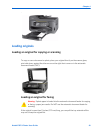
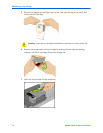
Before sending a fax, load the original (plain paper only) print side up in the automatic
document feeder (ADF). See “Loading an original for faxing” on page 43.
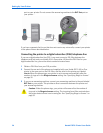
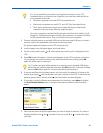
Printing a fax cover page
If you do not create a fax cover sheet using a third-party application (for example, word-
processing software), you can print one with the ESP 9 All-in-One printer.
1 Before sending your Fax, press
Menu from the control panel.
2 Press
to select Fax. Settings and press OK.
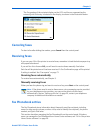
3 Press
to select Print Fax Cover Page and press OK.
Note: This option is also accessible by selecting Edit Phonebook from the Fax
Settings menu.
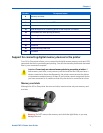
Caution: Never load photo paper into the automatic document feeder (ADF) on
the ESP 9; the ADF only accepts plain paper. If you load photo paper in the ADF,
the printer displays a warning on the LCD, and will not send the Fax.