4 240PW9 LCD
Installation
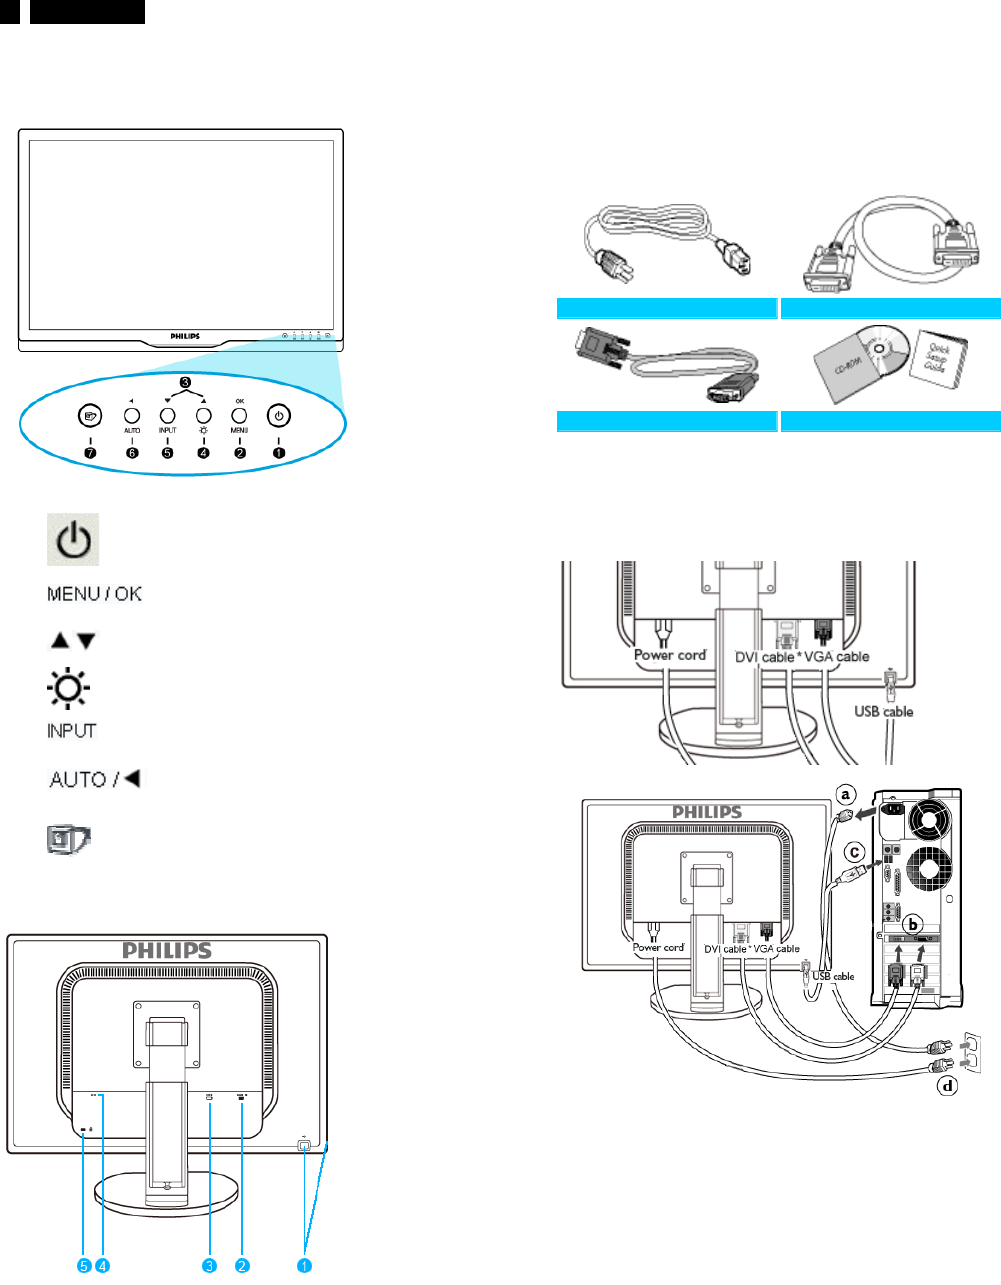
Front View Product Description
1 To switch monitor's power On and Off
2
To access OSD menu
3
To adjust the OSD menu
4
To adjust brightness of the display
5
Tochange the signal input source
6
Automatically adjust the horizontal position,
vertical position, phase and clock settings /
Return to previous OSD level
7
SmartImage.There are five modes to be
selected: Office Work, Image Viewing,
Entertainment, Economy, and Off
Rear View
1 USB upstream port and downstream port
2VGAinput
3 DVI-D input (availablefor selective models)
4 AC power input
5 Kensington anti-thief lock
Accessory Pack
ʳ
ʳʳ
ʳ
Unpack all the parts.
ʳ
Power cord DVI cable (Optional)
VGA cable EDFUpack
Connecting to Your PC
ʳ
ʳʳ
ʳ
1) Connect the power cord to the back of the monitor firmly. (Philips has
pre-connected VGA cable for the first installation.)
2) Connect to PC
ʳ
(a) Turn off your computer and unplug its power cable.
(b) Connect the monitor signal cable to the video
connector on the back of your computer.
(c)
Connect the USB upstream port on the monitor and the
USB port on PC with a USB cable. The USB downstream
port is now ready for any USB device to plug in.
(d) Plug the power cord of your computer and your monitor
into a nearby outlet.
(e) Turn on your computer and monitor. If the monitor displays
an image, installation is complete.


