English
16
Naming Cameras
For accessing the MAIN MENU, see page 13 – 14.
You can give a name (title) to each camera. The specified names are displayed on the monitor
so that you can easily distinguish the monitoring images when you use multiple cameras.
1
11
1
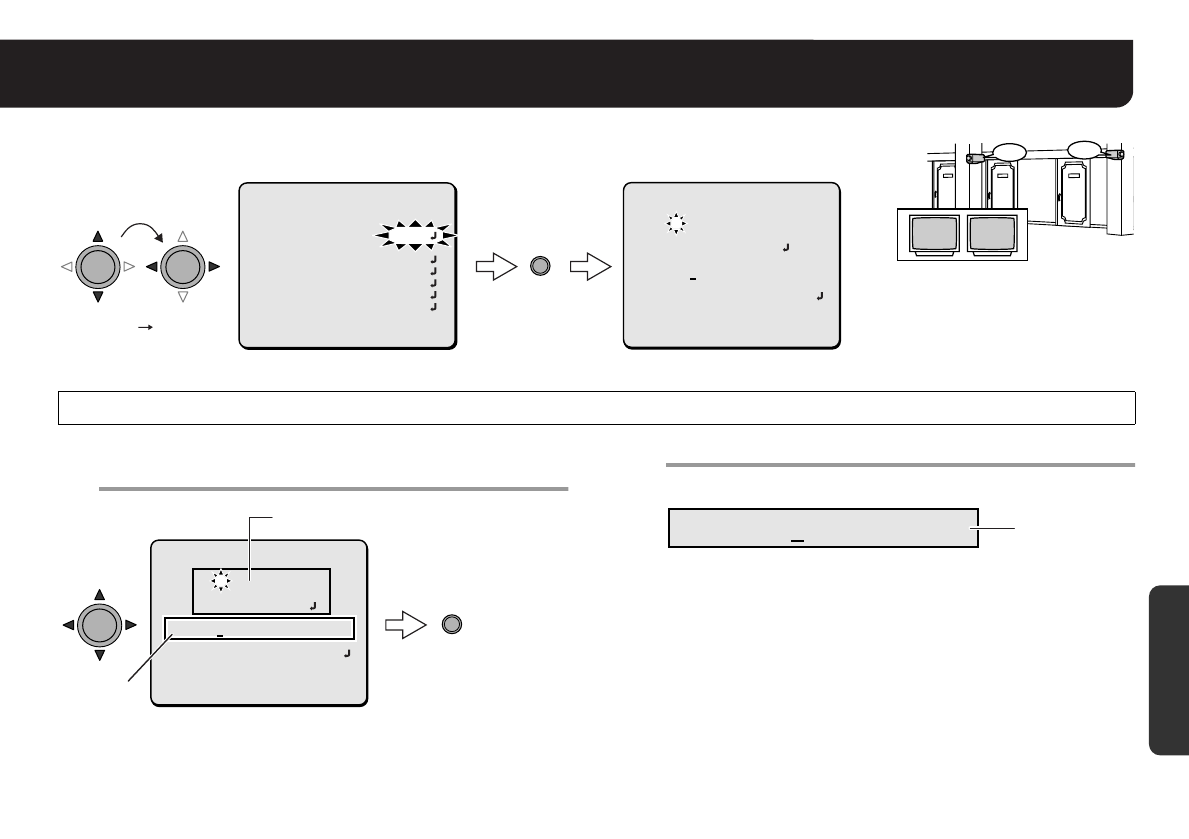
Choose a character(s) from the “Character
Selecting Field”.
RThe characters are displayed starting from the left in the ID
string.
2
22
2
Repeat step 1 to complete the title.
• You can enter up to 16 characters.
• The letters “???....” do not appear on the monitoring screen, but
if you select “ON” for the “TITLE” and then enter no letter at all,
the monitor will show you “???....”.
TITLE (Title Setting)
SET
TITLE
ON
MAIN MENU
LANGUAGE SET
SYNC INT
EXPOSURE SET
DAY/NIGHT AUTO
WHITE BALANCE ATW
ALARM SET
OPTION SET
PRESET OFF
MENU END
TITLE ON
TITLE SETTING
ABCDEFGHIJKLM
NOPQRSTUVWXYZ
0123456789 :-
ID ????????????????
POSITION SET
PRESET OFF
MENU BACK
SET
ID string
Character Selecting Field
TITLE SETTING
ABCDEFGHIJKLM
NOPQRSTUVWXYZ
0123456789 :-
ID ????????????????
POSITION SET
PRESET OFF
MENU BACK
MEMO:
• If you want to overwrite the character, move the cursor onto it
in the ID string and choose any new letter.
• If you want the name to be displayed on the monitor in two
lines, insert the line feed mark (y) in the ID string wherever you
want to start a new line. On the monitor screen, the name will
be displayed in two lines. You can enter up to 16 characters
including the line feed mark.
ID CAM1????????????
ID String
Example: CAM1
ROOM1
ROOM2
ROOM1 ROOM2
Settings/
Adjustments


