


C
H
5
89
GET IT NOW
C
H
5
88
GET IT NOW
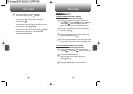
PIX PLACE
2
Connect “Mobile Web” launches and connects
you to “PIX Place”.
1
Press [MENU], then select “Get It Now” menu,
then press “Get PIX” or press or press
and hold side camera key, then select “PIX
Place”.
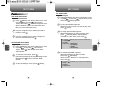
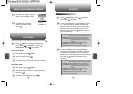
TAKE PIX
1
Press [MENU], then select “Get It Now” menu,
then press “Get PIX” or press or press
and hold side camera key, then select “Take
PIX”. Or press or .
3
Press side camera key or press to take the
picture.
2
Point the camera lens at your subject. You can
check the picture framing through the main
display screen.
Press [My PIX], you can view the captured pictures.
By pressing [OPTIONS], you can choose from the following:
1. Resolution: To select a resolution for a picture.
(480x640/240x320/120x160)
2. Self Timer: To activate the camera’s timer function.
(Off/3 Seconds/5 Seconds/10 Seconds)
3. Flash: To activate the flash function. (Off/On/Auto Flash/
Only This Shot)
4. White Balance: To select white balance. (Auto/Sunny/
Cloudy/Tungsten/Fluorescent/Darkness)
5. File Quality: To select a file quality.(High/Normal/Economy)
6. Shutter Sound: To select a shutter sound. (Shutter/Silent/
Say “Cheez”/Ready! 123)
7. Color Effects: To select a color effects. (Normal/Antique/
Black & White/Negative)
8. Display Icon: To select an icon “On” or “Off”.
9. Fun Frame: Select your favorite fun picture frame to
decorate your picture.
10. Sub LCD: To take a picture using the Sub LCD.
By pressing [OPTIONS], you can choose
Sub LCD options: 1. Main LCD / 2. Self Timer /
3. Flash / 4. Shutter Sound
User can control brightness, zoom and flash directly by pressing
up and down navigation key.
Navigation Up / Down: Zoom up & down.
Navigation Left / Right: Brightness up & down
( -2, -1, 0, +1, +2).
In detail view, user can view previous or next picture by
pressing left or right navigation key.
By pressing [OPTIONS], you can choose from the following:
DOWNLOADED or TAKEN PIX :
1. Send: To send a picture message.
2. To PIX Place: To upload the selected picture to a PIX server.
3. Get New: To download a “New PIX” through “Get It Now”.
4. Set As: Assigns the selected PIX to display for specific tasks.
(Wallpaper/Screensaver/Picture ID).
5. Rename: To edit the picture’s title.
6. Lock/Unlock: To select “Lock” or “Unlock”.
7. Erase: Erase the current picture from your phone.
8. Erase All: To erase all the pictures in your phone.
9. PIX Info: Displays information on the selected picture,
such as File Name, Date, Time, Res and Size.
PRELOADED PIX :
1. Get New: To download a “New PIX” through the “Get It Now”.
2. Set As: Assigns the selected PIX to display for specific tasks.
(Wallpaper/Screensaver/Picture ID).
3. Erase All: To erase all the pictures in your phone.
4. PIX Info: Displays information on the selected picture,
such as File Name, Date, Time, Res and Size.
Press [CAMERA] to return to Camera mode to take
another picture.