


9
Getting Started
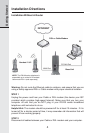
Installation Directions
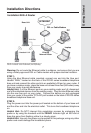
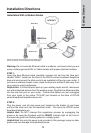
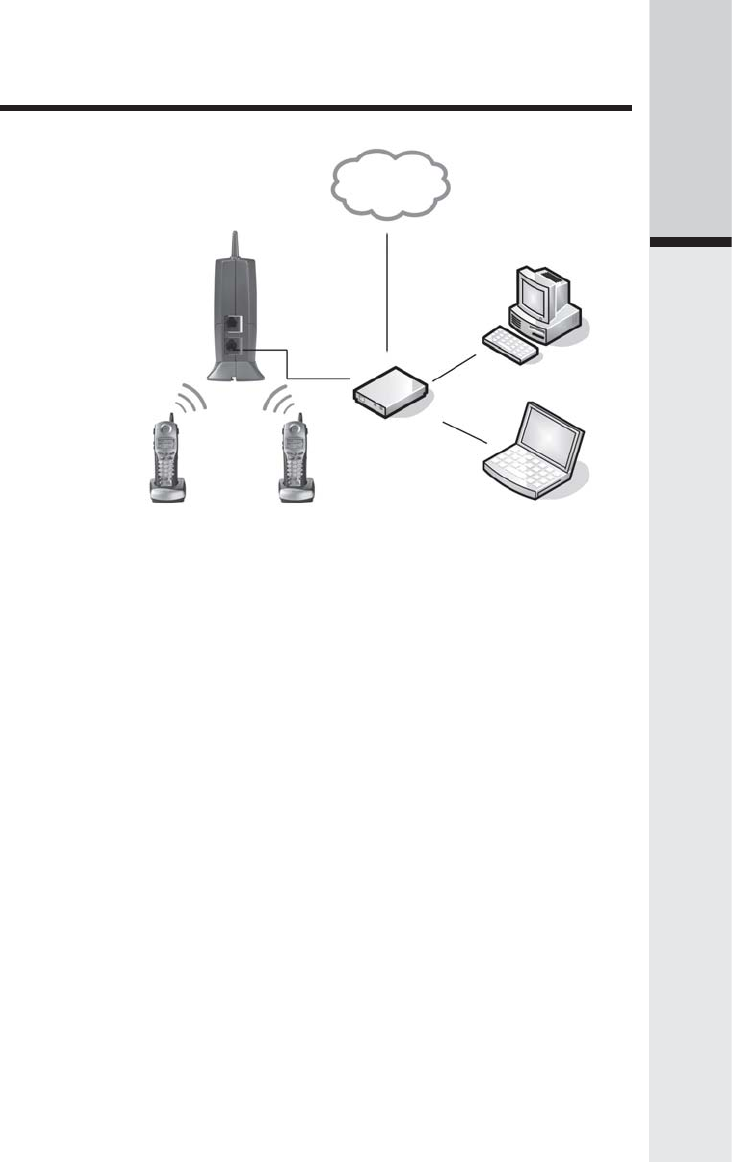
DSL or Cable Modem
INTERNET
Laptop
PC
Base Unit
Handset 1 & 2
WAN Port
Warning: Do not route the Ethernet cable to outdoors, and ensure that you are
using a safety approved DSL or Cable modem with proper electrical isolation.
STEP 1:
Using the blue Ethernet cable provided, connect one end into the blue port,
labeled “WAN,” located on the back of the IP8100 series broadband telephone
base unit and connect the other end into an available LAN port on your router. If
you have a wireless modem router, place the base unit at least 3 feet away from
your router to avoid interference.
Helpful Hint: If all the Ethernet ports on your existing router are full, disconnect
one of the attached devices from the existing router. Plug the blue Ethernet cable
into the now free port on your router. Connect the device you just unplugged
from your router to the yellow “PC/LAN” port located on the back of IP8100
series broadband telephone base unit.
STEP 2:
Plug the power cord into the power port located on the bottom of your base
unit and the other end into the electrical outlet. This turns the IP8100 series
broadband telephone on.
Helpful Hint: Do NOT interrupt this registration process by unplugging the
power or by using the handsets until the READY indicator light on the front of
the base has gone from flashing yellow to a steady green.
Helpful Hint: Use only the power cord provided in this package; using an older
power cord can damage the broadband phone.
Installation With A Modem Router
NOTE: The IP8100 series telephone is expandable up to a
total of 4 handsets. Uses model IP811 (sold separately)